👔 How To Make A Tie
& CRAFT IDEAS
Beginner-friendly tutorials, creative projects,
and weekly inspiration in your inbox.
🛠️ The Ultimate Maker's Toolkit
I've tested thousands of craft tools over the years. Whether you are quilting, crafting, or building mixed-media art, these are the top 5 absolute non-negotiable tools I personally recommend to guarantee professional results.
🪡 SINGER Heavy Duty 4452 Sewing Machine
The sewing community highly recommends this as the ultimate "bulletproof" entry-level machine. Its heavy metal frame powerfully pushes through thick denim and heavy quilt layers that would instantly jam a standard plastic machine.
✂️ Fiskars 8" Orange-Handled Scissors
Never settle for dull dollar-store blades. Wirecutter repeatedly names Fiskars the absolute best all-purpose craft scissor due to its legendary precision-ground blades and an ergonomic grip that prevents hand-cramping.
🔥 Gorilla Dual Temp Hot Glue Gun
Named Wirecutter's top choice because it literally does the work of two tools. It features dual-temperature settings offering low heat for delicate florals and blistering high heat for heavy wood adhesion repairs.
🖌️ Mod Podge Waterbase Gloss Sealer
The absolute undisputed champion of decoupage and paper crafts. Experts rely exclusively on this exact water-based formula because it glues, seals, and finishes beautifully without yellowing or flaking over time.
🎨 Apple Barrel Acrylic Paint (2 oz)
The quintessential, incredibly inexpensive craft paint. Woodworkers and hobby painters swear by its smooth flow and matte finish, providing massive value and remarkably thick color coverage on rough surfaces.
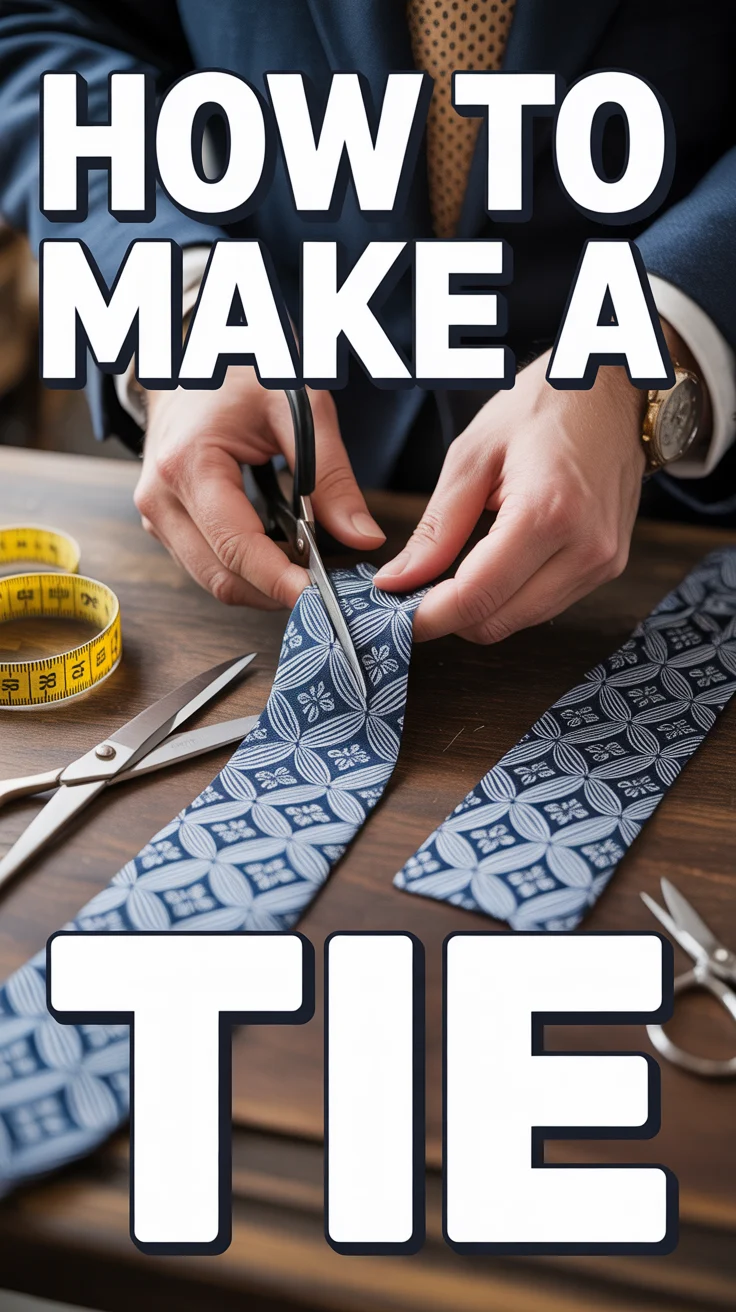
Ready to turn fabric into something dapper and vaguely intimidating? Let’s make a tie from scratch—no fashion degree required. You’ll cut, stitch, press, and boom: instant suave. Keep coffee nearby and scissors sharp. We’re going from flat cloth to boardroom flair.
1. Pick Your Fabric
Start with fabric that behaves—nothing slippery on day one. Silk is classic, wool feels luxe, and cotton or linen plays casual. Aim for medium weight so the knot sits nicely without bulking up.
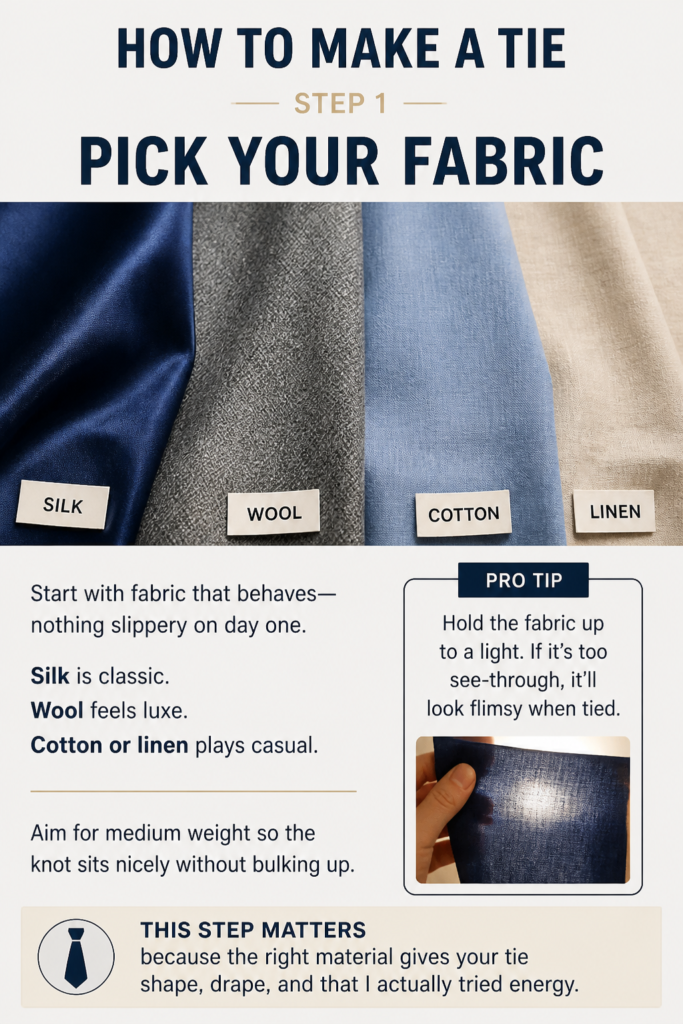
Pro tip: Hold the fabric up to a light. If it’s too see-through, it’ll look flimsy when tied.
This step matters because the right material gives your tie shape, drape, and that “I actually tried” energy.
2. Choose a Pattern Shape
Decide your vibe: standard width (about 8–9 cm), skinny (5–6 cm), or wide (retro drama). Draft a tie template with blade, tail, and neck sections.
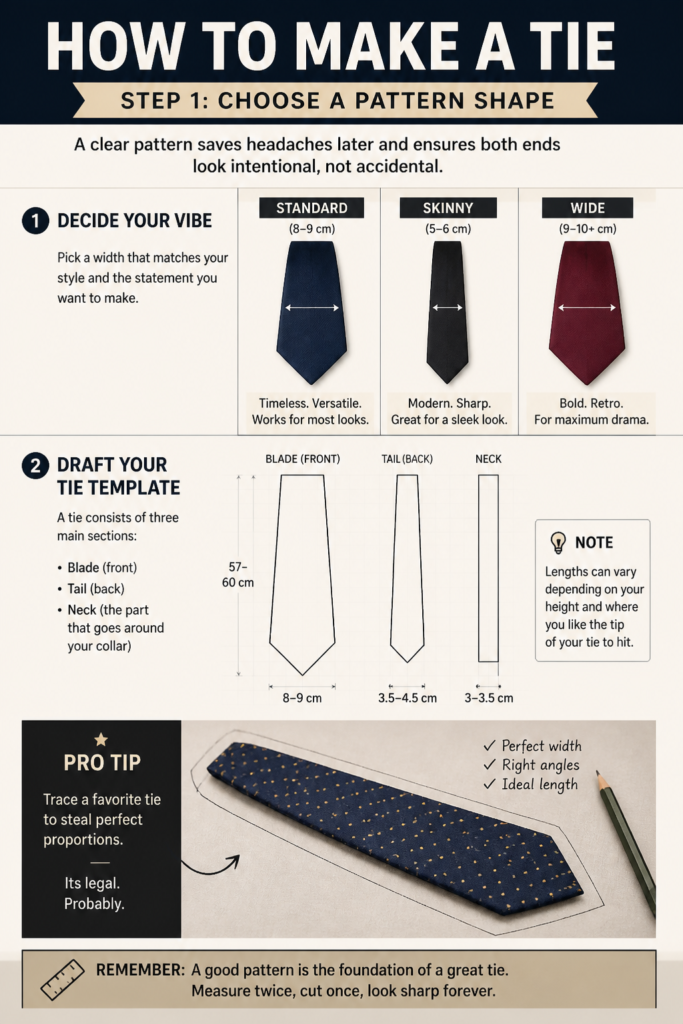
Pro tip: Trace a favorite tie to steal perfect proportions. It’s legal. Probably.
A clear pattern saves headaches later and ensures both ends look intentional, not accidental.
3. Cut on the Bias
Lay your fabric at a 45-degree angle to the grain and cut. Bias gives your tie that smooth, natural drape and helps it bounce back after knots.
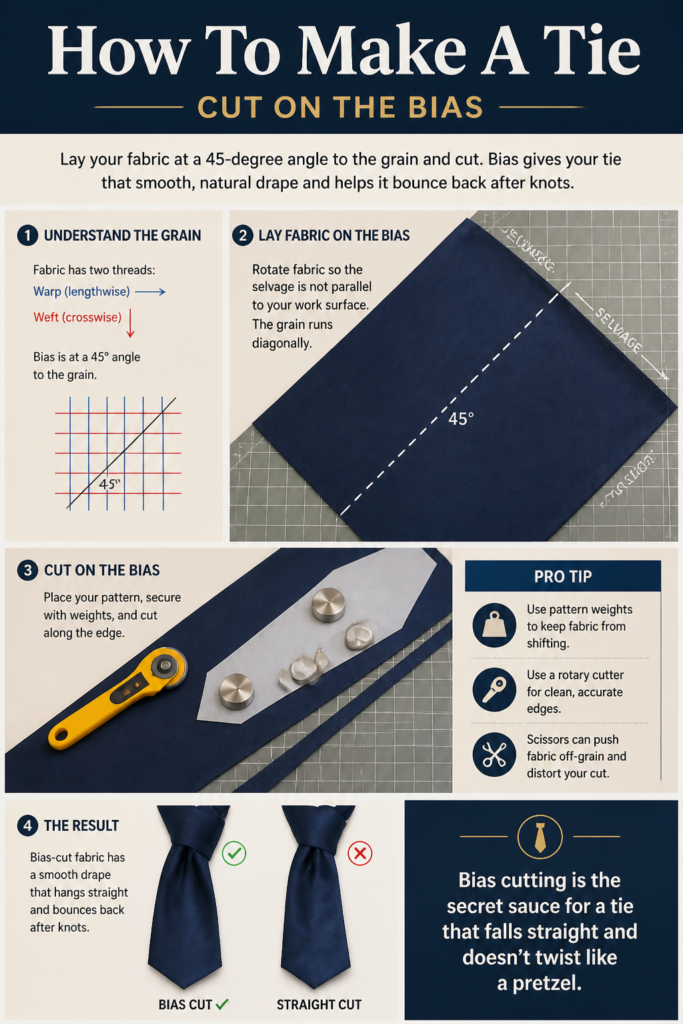
Pro tip: Use pattern weights and a rotary cutter for clean edges—scissors can nudge fabric off-grain.
Bias cutting is the secret sauce for a tie that falls straight and doesn’t twist like a pretzel.
4. Add a Good Interlining
Slide in a wool or wool-blend interlining cut slightly smaller than your outer fabric. This gives thickness, weight, and satisfying knot structure.
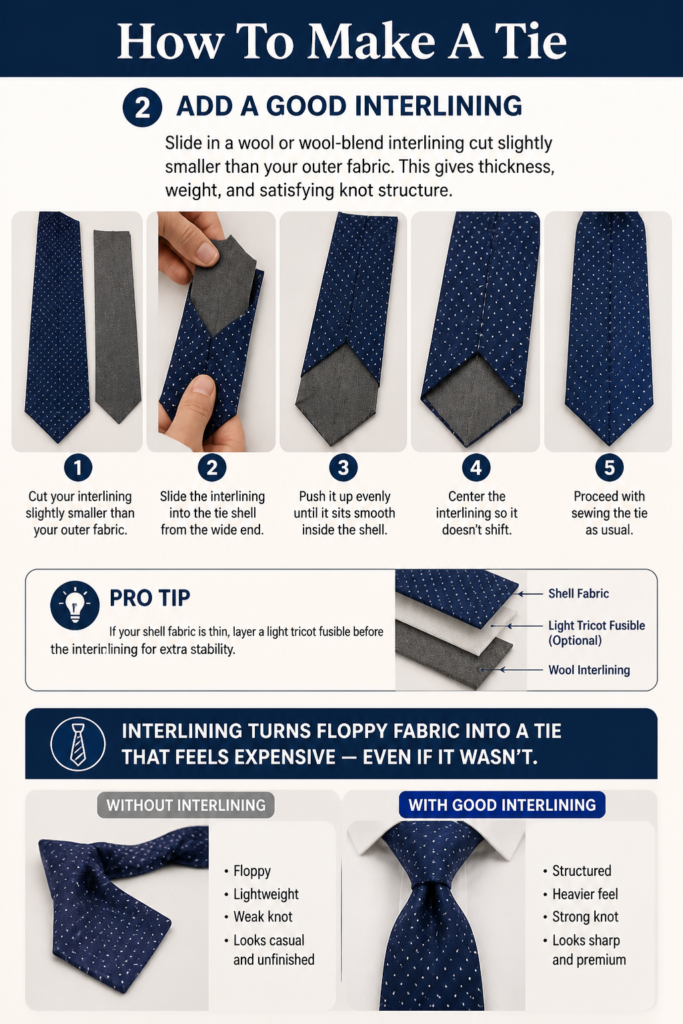
Pro tip: If your shell fabric is thin, layer a light tricot fusible before the interlining for extra stability.
Interlining turns floppy fabric into a tie that feels expensive even if it wasn’t.
5. Cut and Place the Tipping
For a clean finish, add tipping (the inner end pieces) in matching fabric or contrast for flair. Cut on the bias for the bigger end and tiny end.
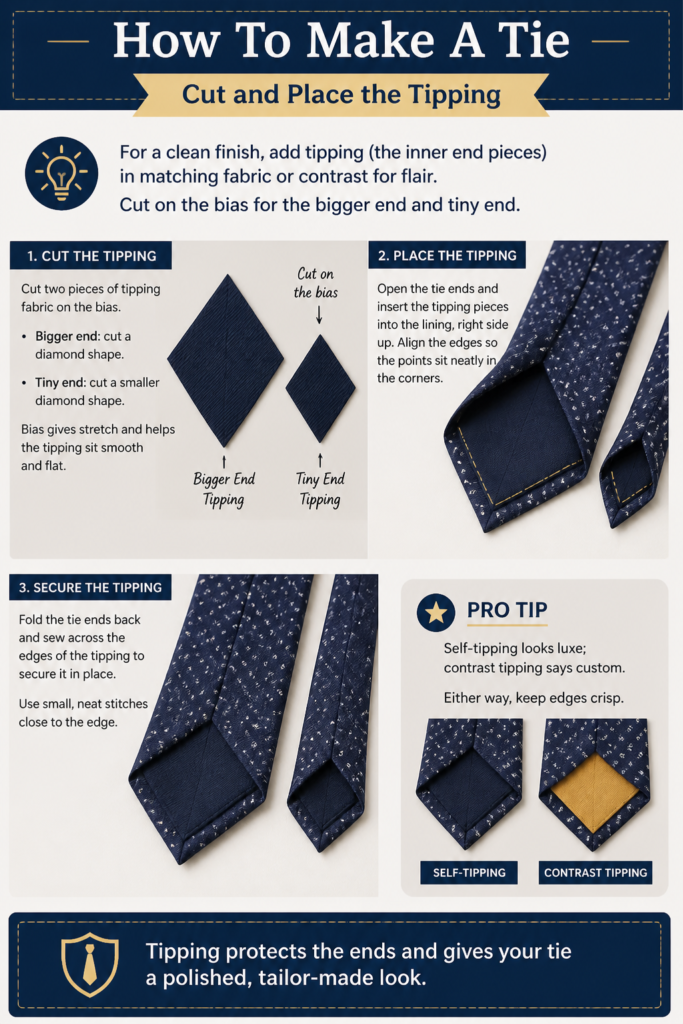
Pro tip: Self-tipping looks luxe; contrast tipping says “custom.” Either way, keep edges crisp.
Tipping protects the ends and gives your tie a polished, tailor-made look.
6. Sew the Blade and Tail
With right sides facing, stitch the pointed ends to their tipping pieces. Trim corners and turn them out for razor points. Press gently—no shine marks.
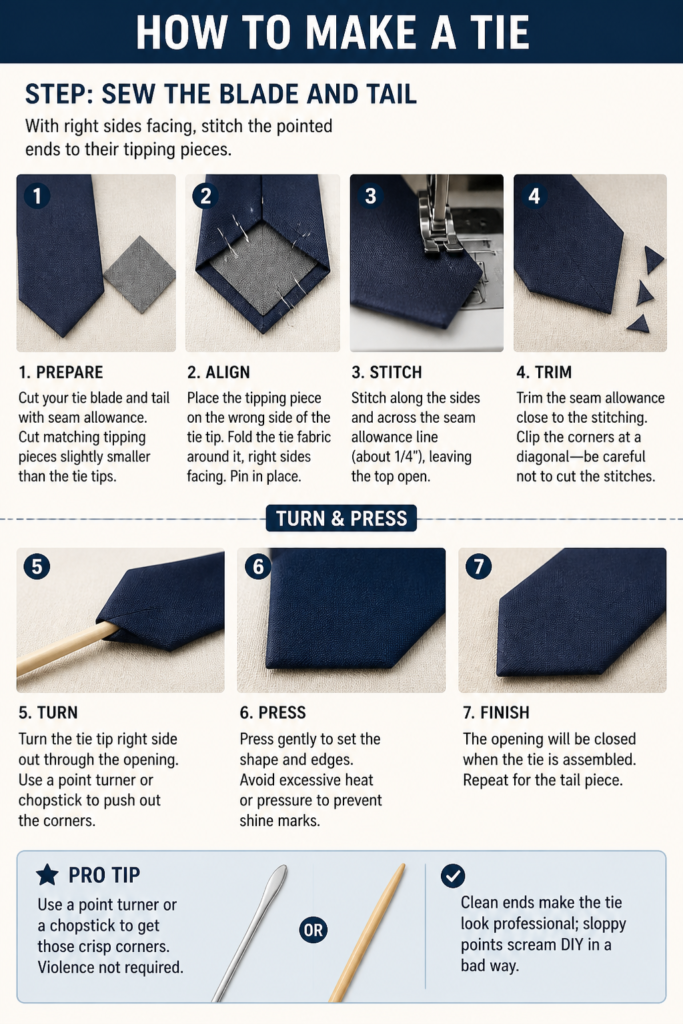
Pro tip: Use a point turner or a chopstick to get those crisp corners. Violence not required.
Clean ends make the tie look professional; sloppy points scream DIY in a bad way.
7. Fold and Press the Long Edges
Wrap the outer fabric over the interlining and press the long edges toward the center. The edges should overlap slightly down the back.
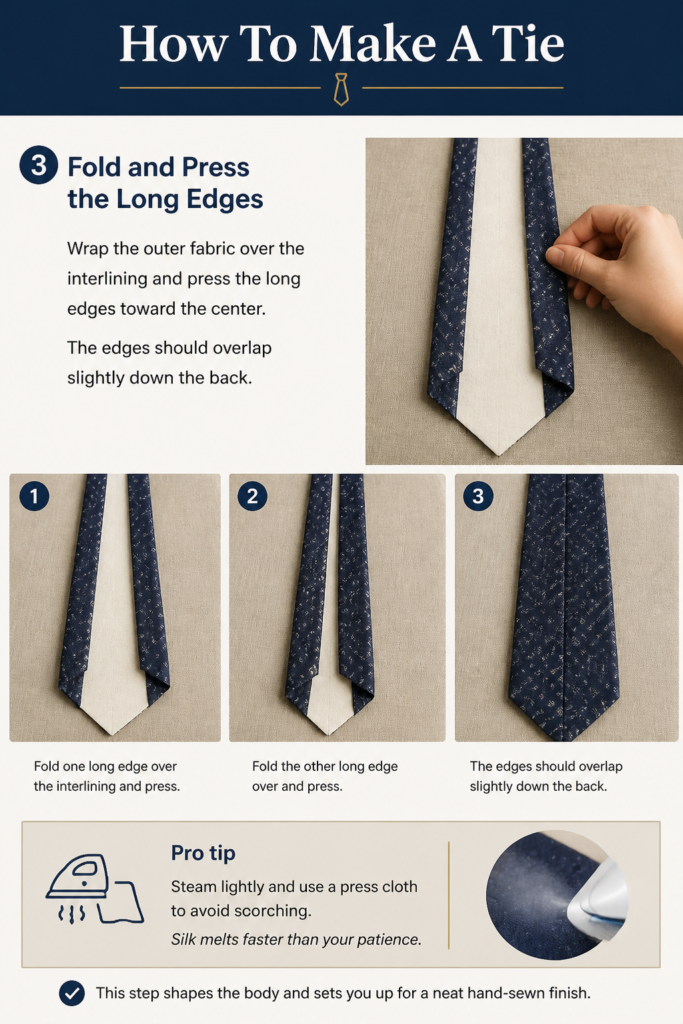
Pro tip: Steam lightly and use a press cloth to avoid scorching. Silk melts faster than your patience.
This step shapes the body and sets you up for a neat hand-sewn finish.
8. Hand Stitch the Back Seam
Use a slip stitch or ladder stitch to close the back seam invisibly. Small, even stitches keep the tie flexible.
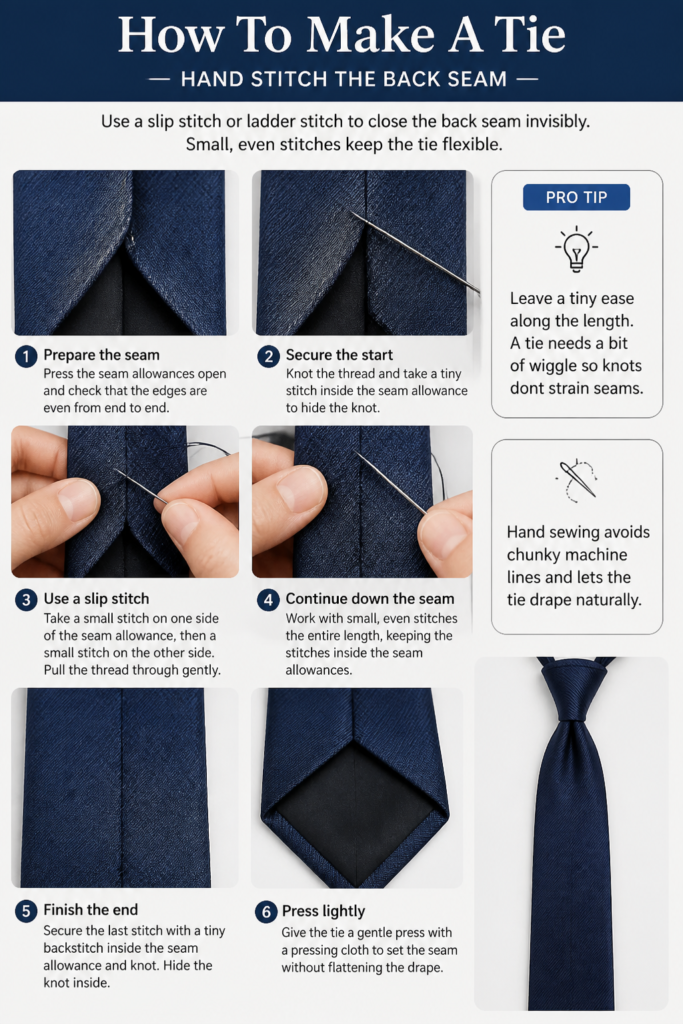
Pro tip: Leave a tiny ease along the length. A tie needs a bit of wiggle so knots don’t strain seams.
Hand sewing avoids chunky machine lines and lets the tie drape naturally.
9. Add the Keeper Loop
Create a small fabric loop and attach it to the back roughly 8–10 cm below the neck. That’s where the tail will tuck in.
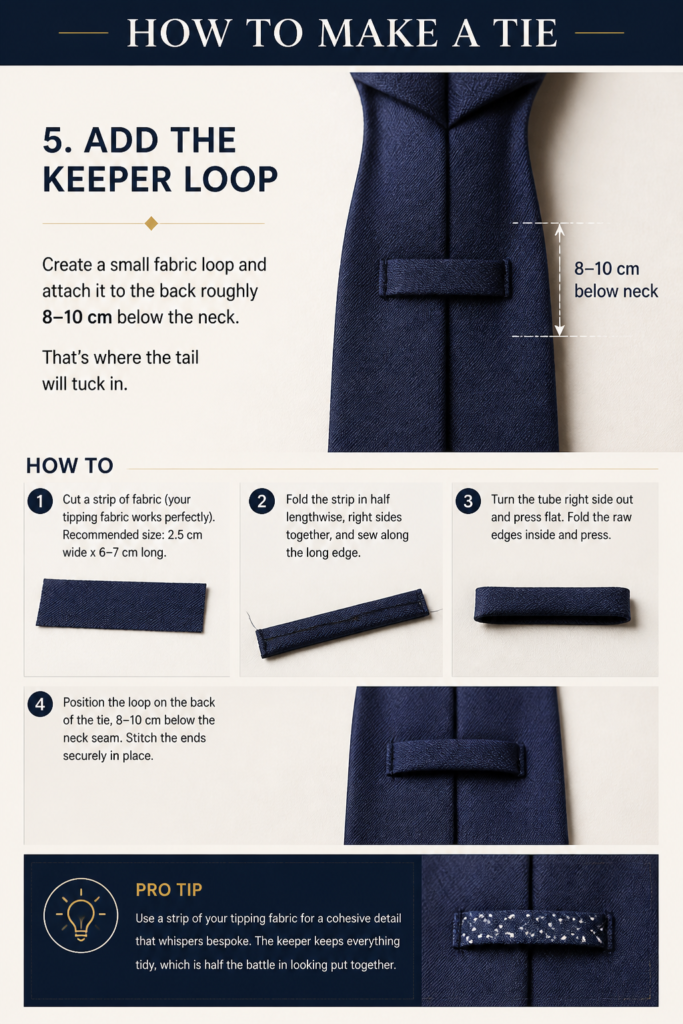
Pro tip: Use a strip of your tipping fabric for a cohesive detail that whispers bespoke.
The keeper keeps everything tidy, which is half the battle in looking put together.
10. Shape and Press the Knot Area
Lightly steam the knot zone so it softens and curves. You want a graceful roll, not a cardboard plank.
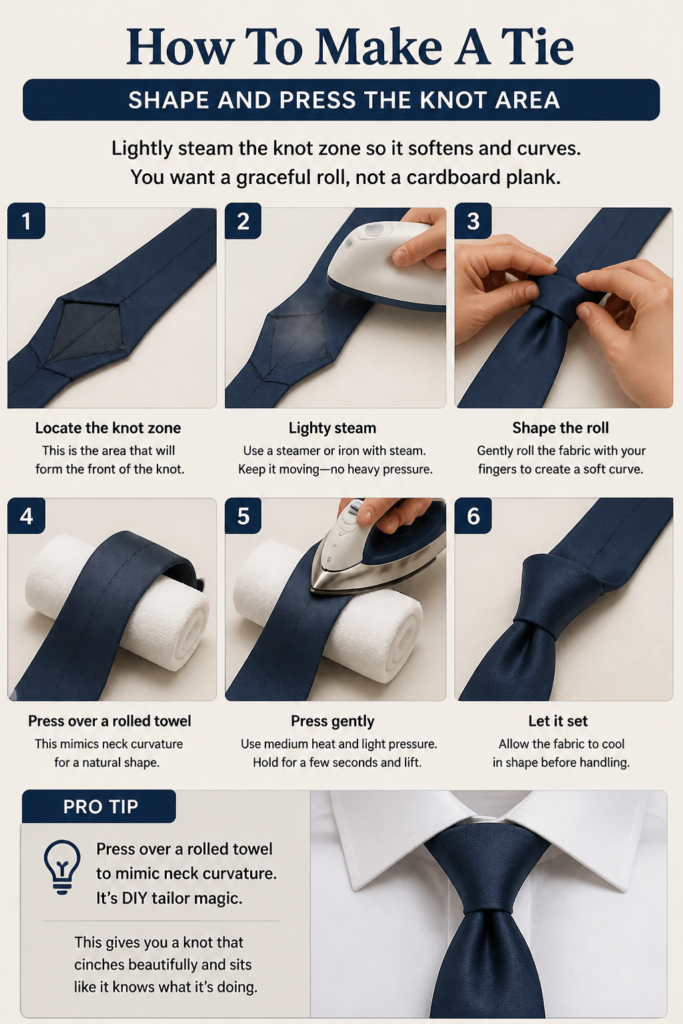
Pro tip: Press over a rolled towel to mimic neck curvature. It’s DIY tailor magic.
This gives you a knot that cinches beautifully and sits like it knows what it’s doing.
11. Final Check and Tie Test
Try a Four-in-Hand or Half Windsor to test drape and balance. Check length: tip should kiss your belt buckle, not ghost it.
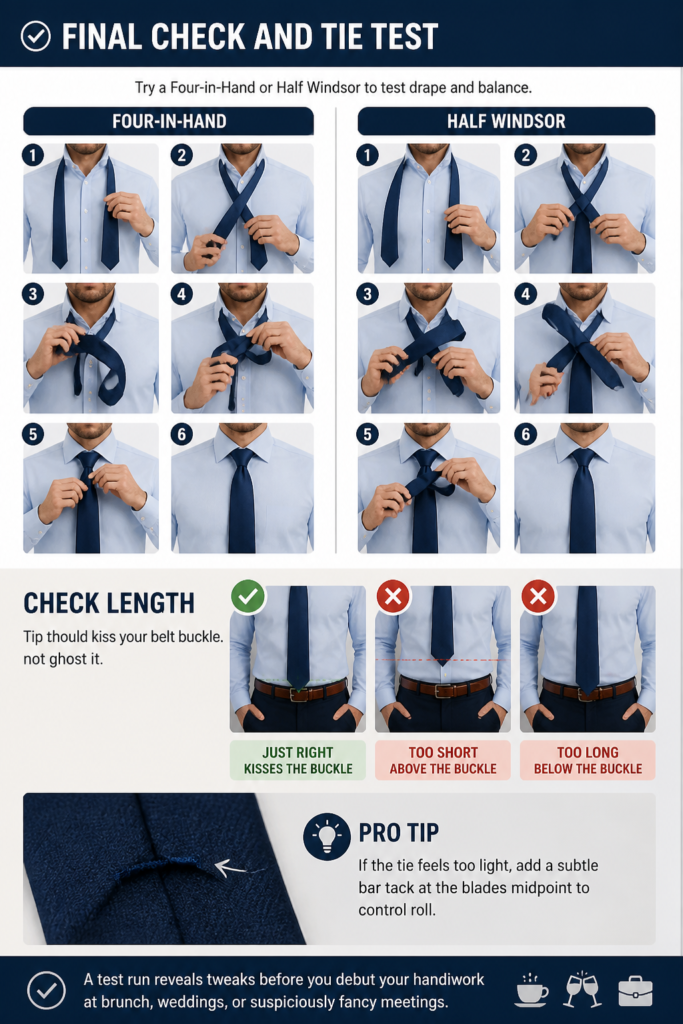
Pro tip: If the tie feels too light, add a subtle bar tack at the blade’s midpoint to control roll.
A test run reveals tweaks before you debut your handiwork at brunch, weddings, or suspiciously fancy meetings.
Conclusion
You just engineered a confidence device out of fabric. Nice. Now you’ve got the pattern, the process, and the swagger to make more—thin, wide, loud, quiet. The value is simple: custom fit, custom flair, zero generic energy.
& CRAFT IDEAS
Beginner-friendly tutorials, creative projects,
and weekly inspiration in your inbox.