🧷 12 Strapless Bra Hacks DIY Ideas
& CRAFT IDEAS
Beginner-friendly tutorials, creative projects,
and weekly inspiration in your inbox.
🛠️ The Ultimate Maker's Toolkit
I've tested thousands of craft tools over the years. Whether you are quilting, crafting, or building mixed-media art, these are the top 5 absolute non-negotiable tools I personally recommend to guarantee professional results.
🪡 SINGER Heavy Duty 4452 Sewing Machine
The sewing community highly recommends this as the ultimate "bulletproof" entry-level machine. Its heavy metal frame powerfully pushes through thick denim and heavy quilt layers that would instantly jam a standard plastic machine.
✂️ Fiskars 8" Orange-Handled Scissors
Never settle for dull dollar-store blades. Wirecutter repeatedly names Fiskars the absolute best all-purpose craft scissor due to its legendary precision-ground blades and an ergonomic grip that prevents hand-cramping.
🔥 Gorilla Dual Temp Hot Glue Gun
Named Wirecutter's top choice because it literally does the work of two tools. It features dual-temperature settings offering low heat for delicate florals and blistering high heat for heavy wood adhesion repairs.
🖌️ Mod Podge Waterbase Gloss Sealer
The absolute undisputed champion of decoupage and paper crafts. Experts rely exclusively on this exact water-based formula because it glues, seals, and finishes beautifully without yellowing or flaking over time.
🎨 Apple Barrel Acrylic Paint (2 oz)
The quintessential, incredibly inexpensive craft paint. Woodworkers and hobby painters swear by its smooth flow and matte finish, providing massive value and remarkably thick color coverage on rough surfaces.
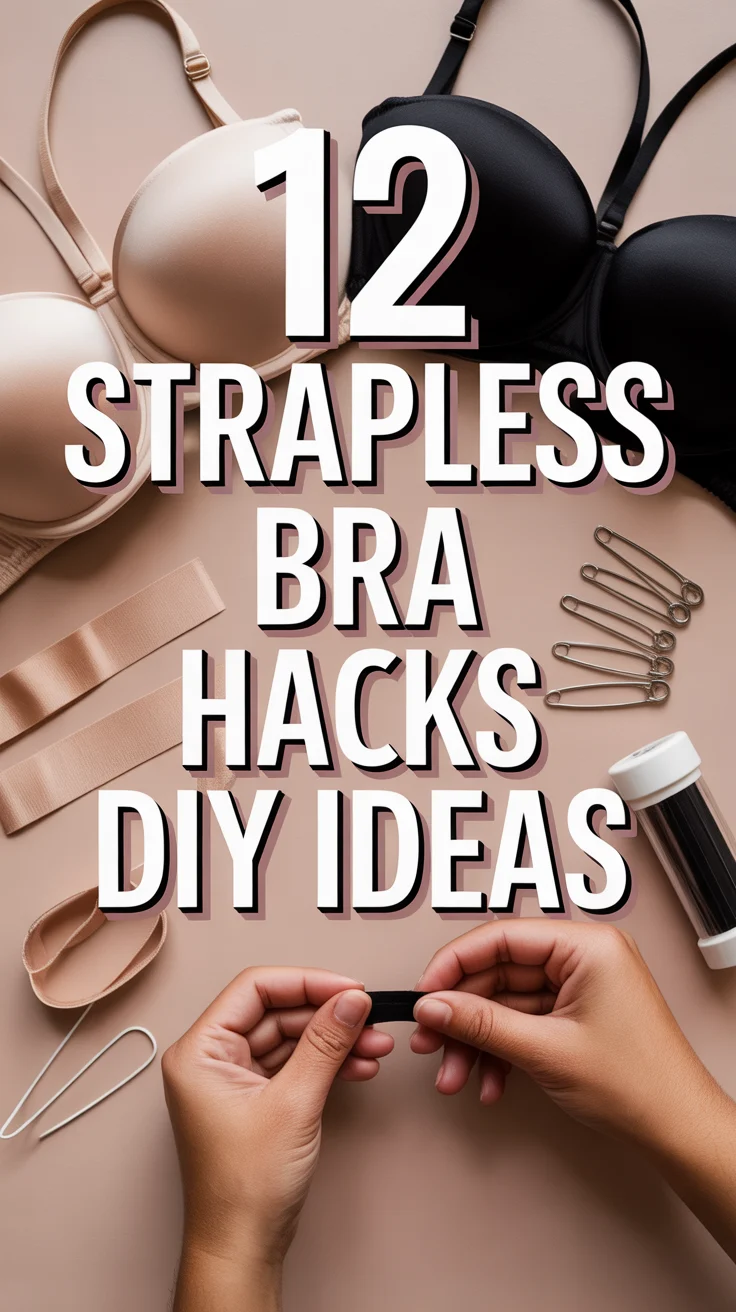
Going strapless shouldn’t mean going stress-full. If your bra keeps sliding, gaping, or poking, I’ve got clever fixes using stuff you already own. Zero drama, maximum hold, and no awkward tugging every five minutes.
1. Tape and Tuck Lift
Give your strapless a gravity-defying assist with fashion tape. Stick tape along the top edge of the cups and press into skin for a smooth, gap-free seal.
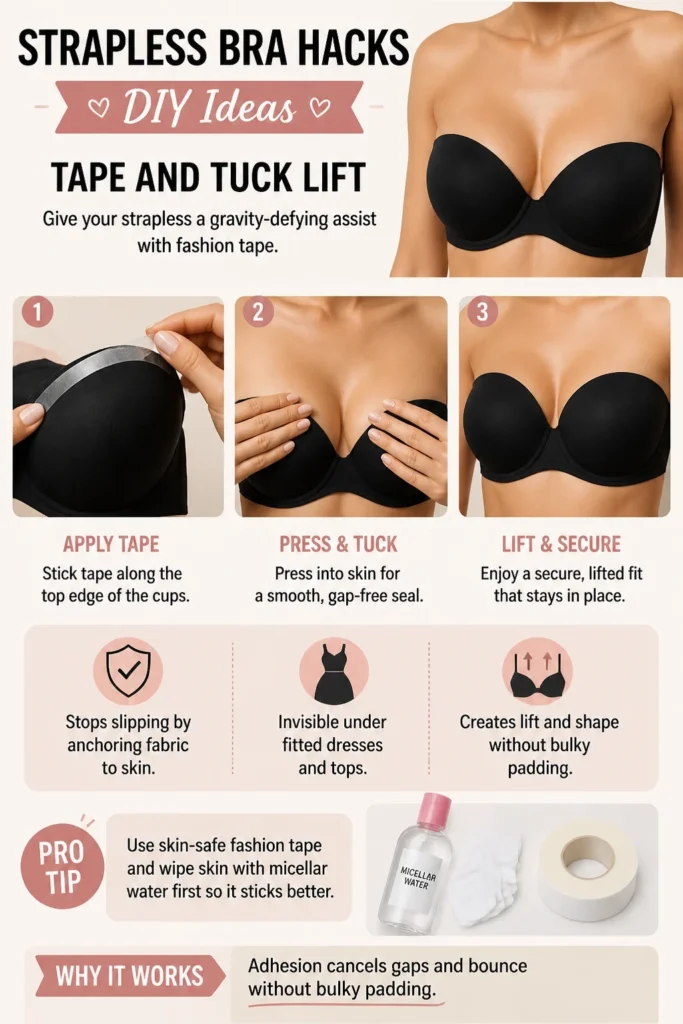
- Stops slipping by anchoring fabric to skin.
- Invisible under fitted dresses and tops.
Pro tip Use skin-safe fashion tape and wipe skin with micellar water first so it sticks better.
This works because adhesion cancels gaps and bounce without bulky padding.
2. Racerback Strap Reroute
Convert a regular bra into a “hidden” strapless helper. Hook each strap to the opposite back wing and tighten to create a low profile under wide necklines.
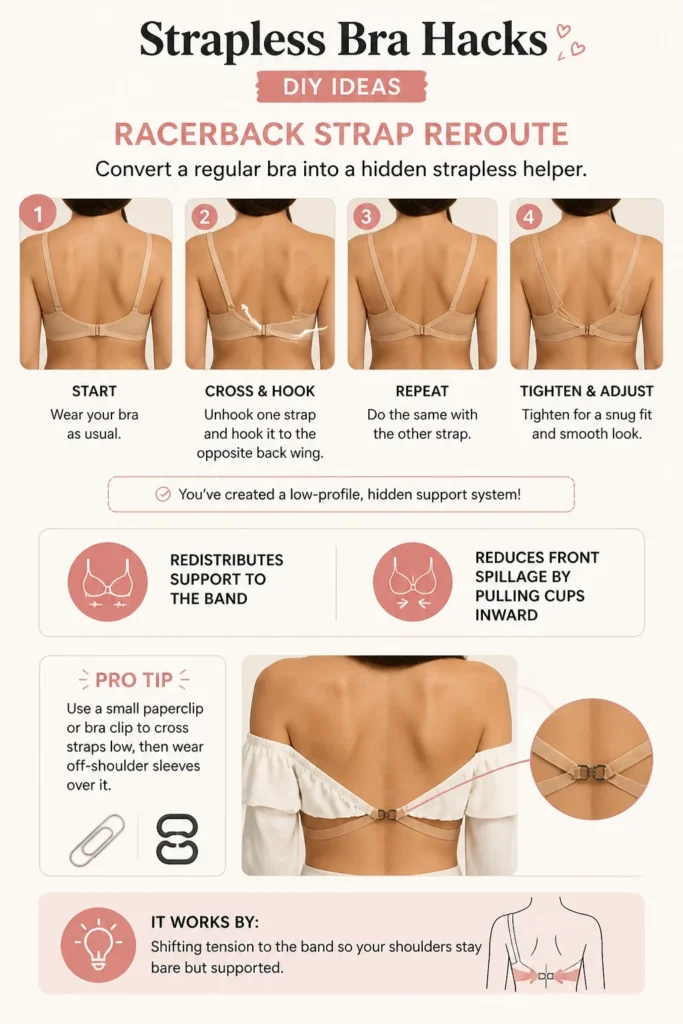
- Redistributes support to the band.
- Reduces front spillage by pulling cups inward.
Pro tip Use a small paperclip or bra clip to cross straps low, then wear off-shoulder sleeves over it.
It works by shifting tension to the band so your shoulders stay bare but supported.
3. Silicone Nipple Covers Plus Bandeau
When a bra feels like overkill, go minimal. Pair silicone covers with a snug bandeau for smooth shape and modesty.
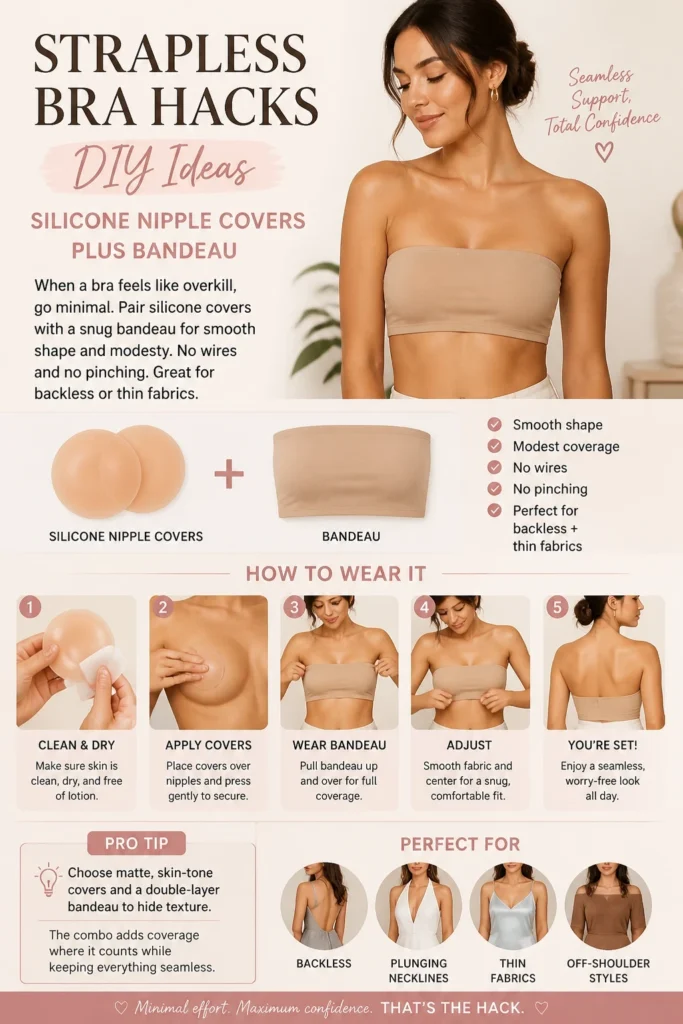
- No wires and no pinching.
- Great for backless or thin fabrics.
Pro tip Choose matte, skin-tone covers and a double-layer bandeau to hide texture.
The combo adds coverage where it counts while keeping everything seamless.
4. Non-Slip Shelf Liner Hack
Line the inside band with a thin strip of clean, soft shelf liner. Instant grip without stickiness.
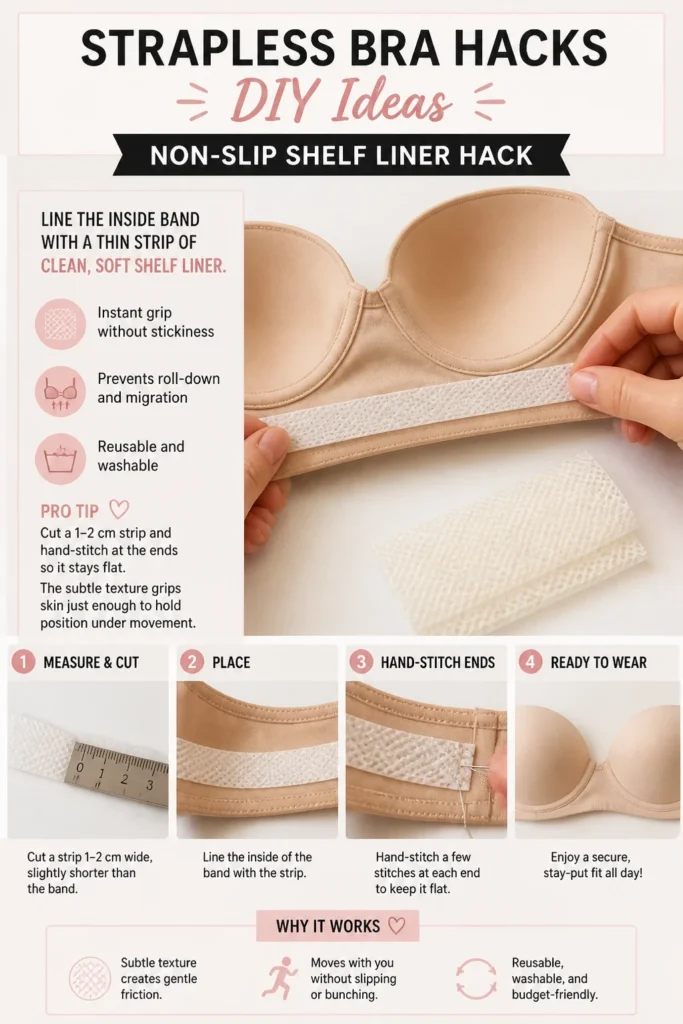
- Prevents roll-down and migration.
- Reusable and washable.
Pro tip Cut a 1–2 cm strip and hand-stitch at the ends so it stays flat.
The subtle texture grips skin just enough to hold position under movement.
5. Extended Hook-and-Eye for Better Fit
Too tight band? Add a hook extender so you can breathe and still keep lift. A comfortable band grips better than a suffocating one.
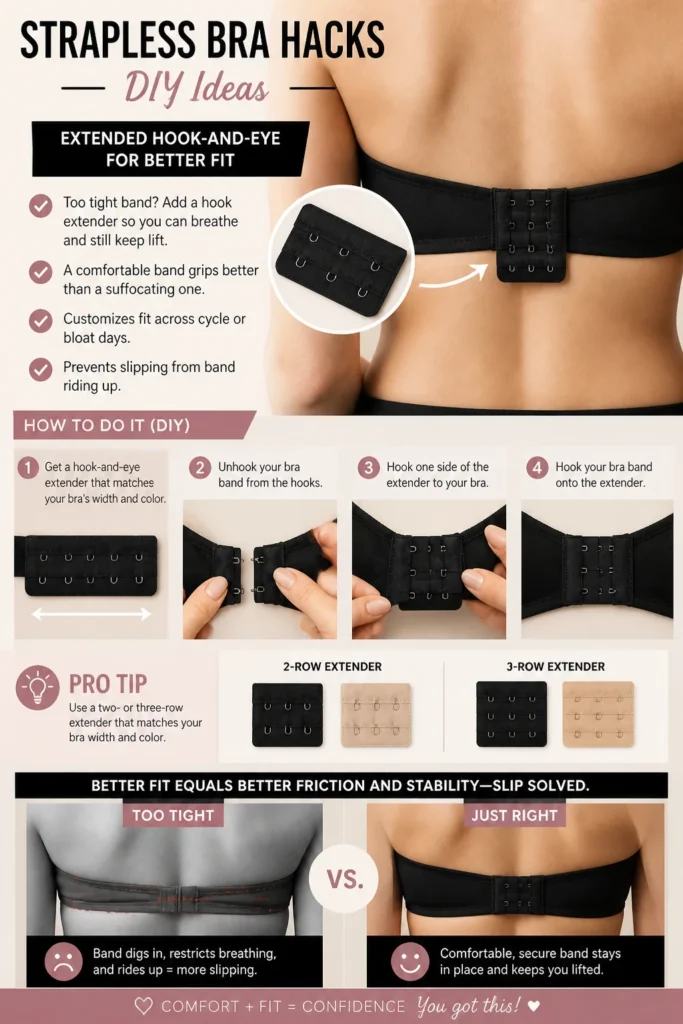
- Customizes fit across cycle or bloat days.
- Prevents slipping from band riding up.
Pro tip Use a two- or three-row extender that matches your bra width and color.
Better fit equals better friction and stability—slip solved.
6. Foam Insert Swap
Replace bulky pads with thin foam cookies to smooth and secure. Lighter inserts keep the bra from drifting down.
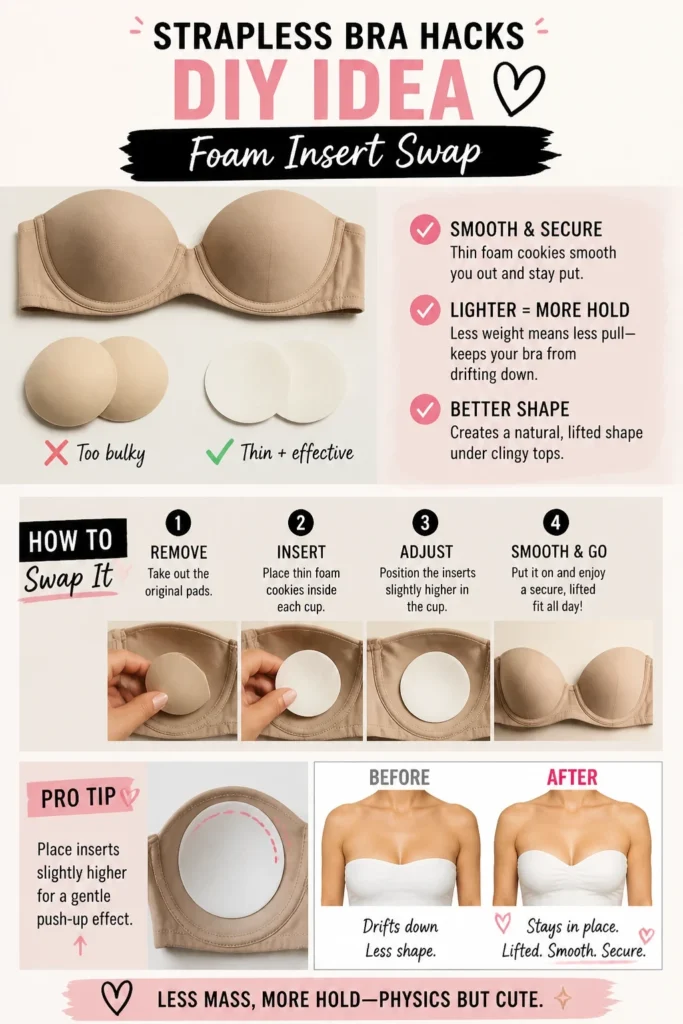
- Reduces weight pulling the bra south.
- Improves shape under clingy tops.
Pro tip Place inserts slightly higher for a gentle push-up effect.
Less mass, more hold—physics but cute.
7. Elastic Waistband Reinforcement
Sew a soft elastic band along the inside bottom edge. Think mini corset vibes without the drama.
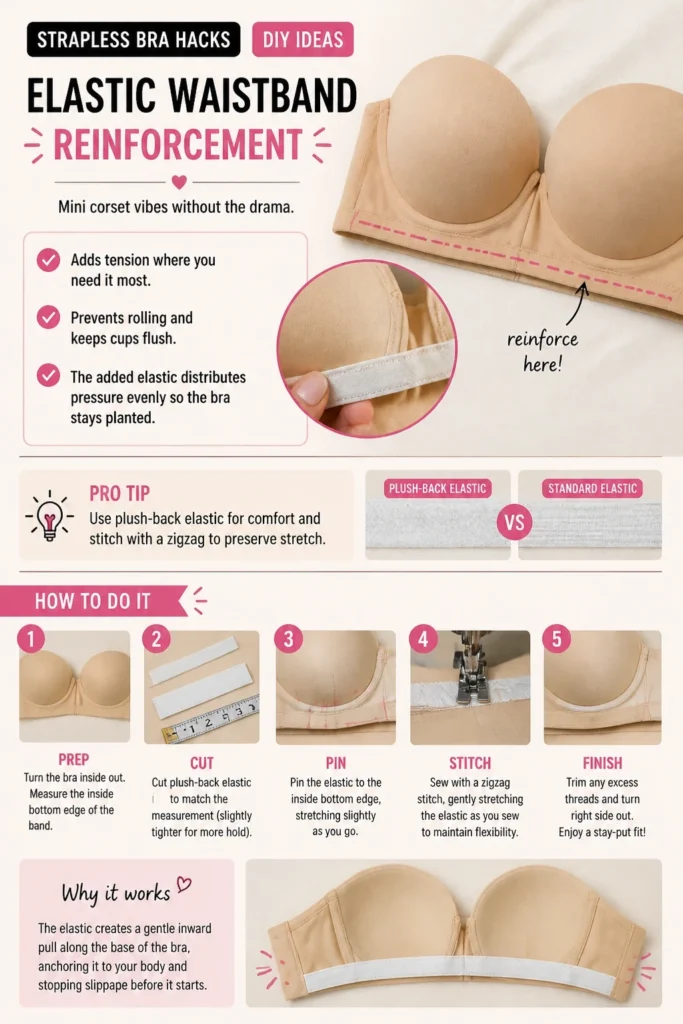
- Adds tension where you need it most.
- Prevents rolling and keeps cups flush.
Pro tip Use plush-back elastic for comfort and stitch with a zigzag to preserve stretch.
The added elastic distributes pressure evenly so the bra stays planted.
8. Double-Band Trick
Wear a strapless bra, then layer a snug bralette or bandeau over it. The outer layer locks the inner one in place.
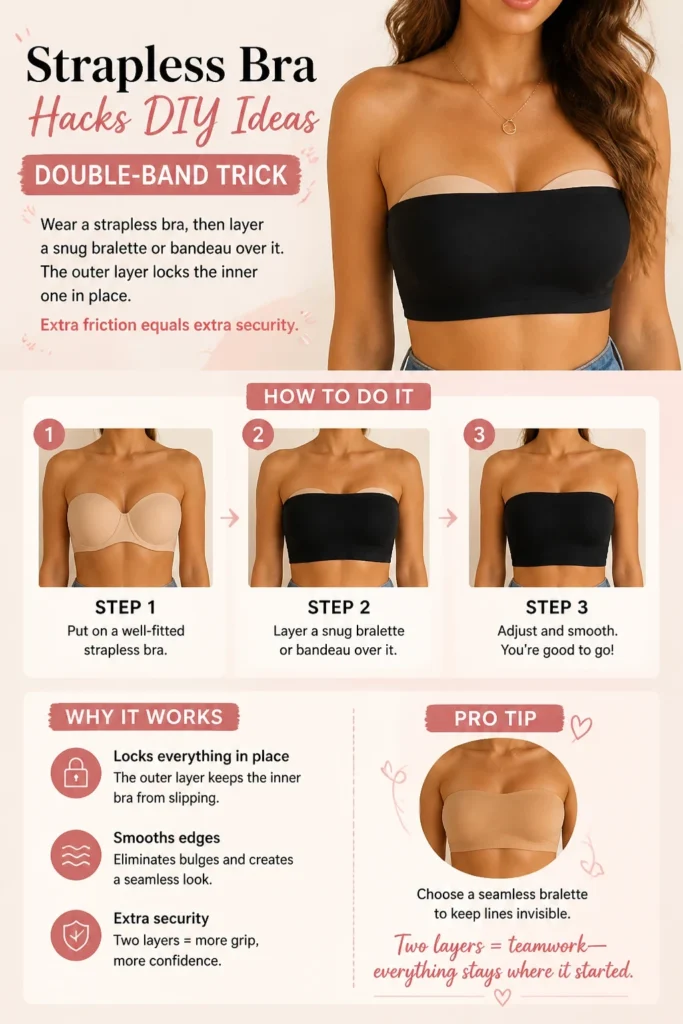
- Extra friction equals extra security.
- Smooths edges and eliminates bulges.
Pro tip Choose a seamless bralette to keep lines invisible.
Two layers = teamwork—everything stays where it started.
9. Body Adhesive Roll-On
Use a dance-grade roll-on adhesive along the band and cup edges. Flexible hold that moves with you.
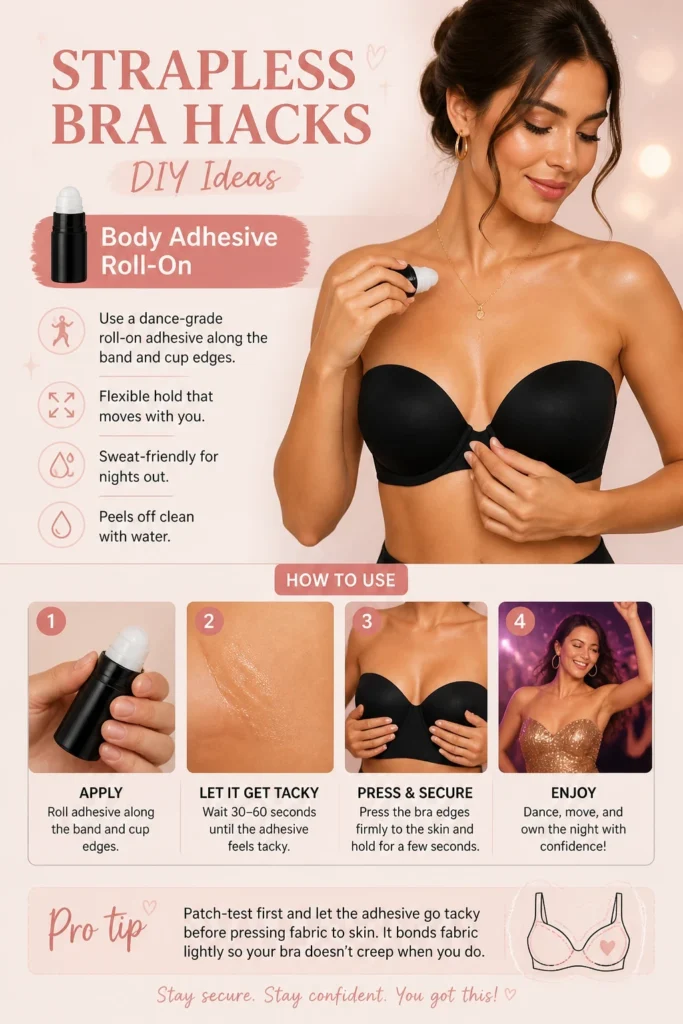
- Sweat-friendly for nights out.
- Peels off clean with water.
Pro tip Patch-test first and let the adhesive go tacky before pressing fabric to skin.
It bonds fabric lightly so your bra doesn’t creep when you do.
10. Low-Back Converter Strap
Need a low back without ditching support? Clip a converter strap to the hooks and wrap around your waist.
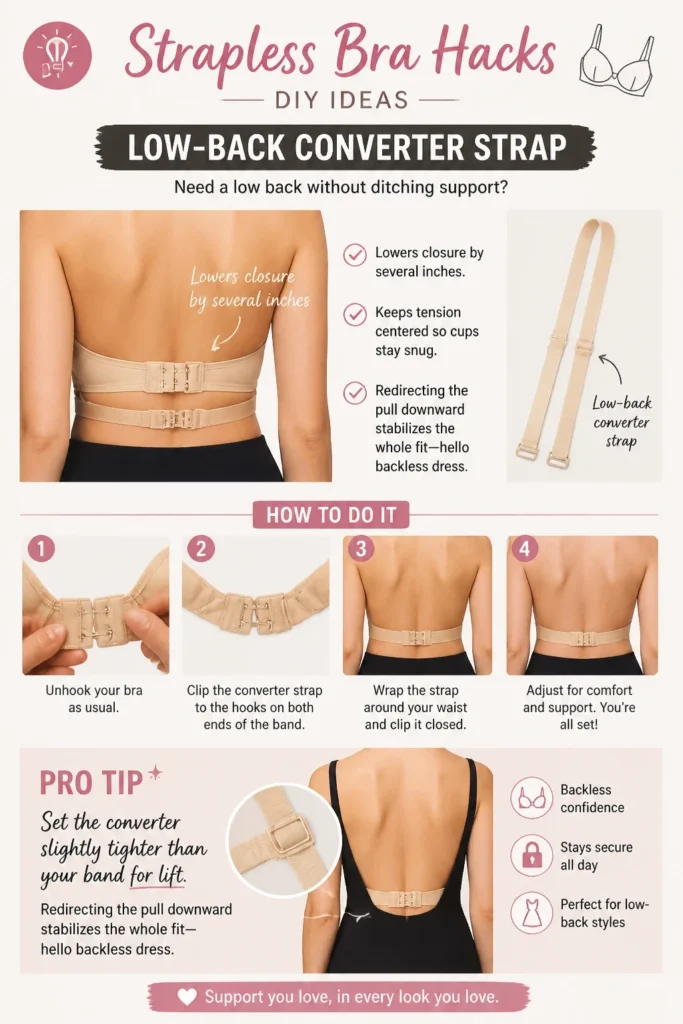
- Lowers closure by several inches.
- Keeps tension centered so cups stay snug.
Pro tip Set the converter slightly tighter than your band for lift.
Redirecting the pull downward stabilizes the whole fit—hello backless dress.
11. Seamless Stick-On Cups with Center Clip
For true strapless freedom, use adhesive cups with a front clasp. They bring everything together and stay hidden.
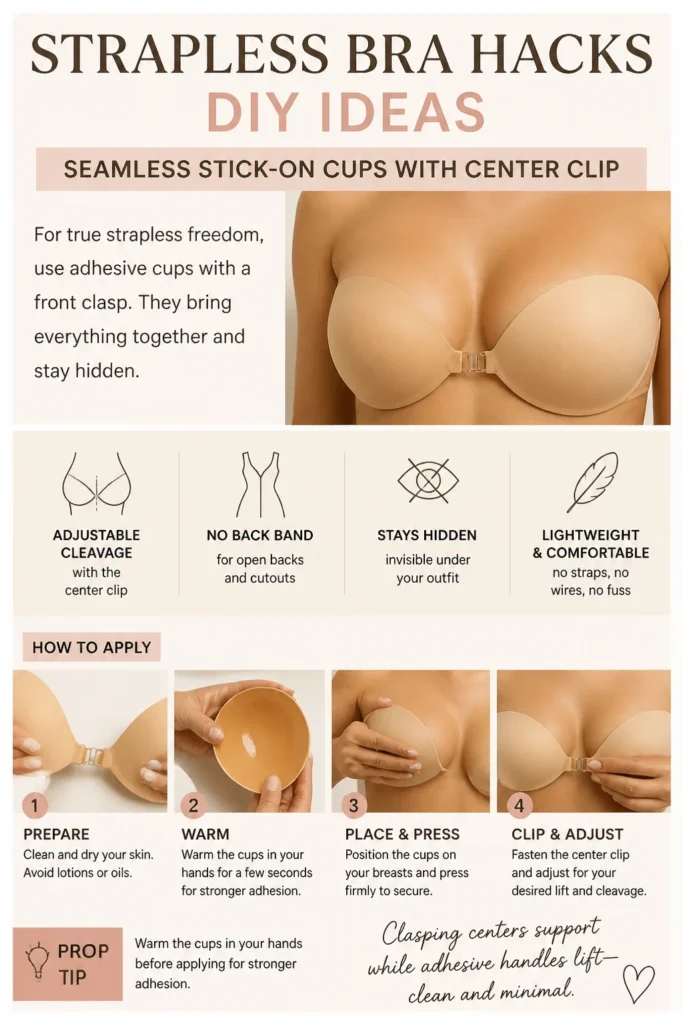
- Adjustable cleavage with the center clip.
- No back band for open backs and cutouts.
Pro tip Warm the cups in your hands before applying for stronger adhesion.
Clasping centers support while adhesive handles lift—clean and minimal.
12. Bra Sizing Refit at Home
Measure your underbust and bust to check your true size. A correct band size is the ultimate hack.
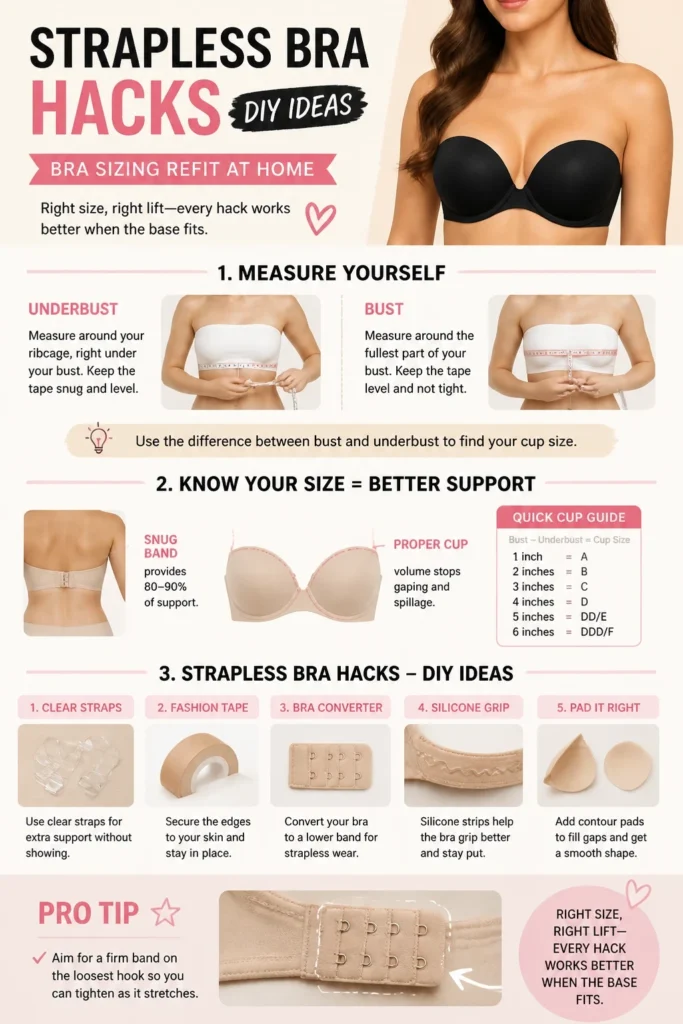
- Snug band provides 80–90 percent of support.
- Proper cup volume stops gaping and spillage.
Pro tip Aim for a firm band on the loosest hook so you can tighten as it stretches.
Right size, right lift—every hack works better when the base fits.
Conclusion
Going strapless doesn’t have to be a trust fall. With a few smart tweaks, your bra stays put, your outfit shines, and your hands stop doing emergency rescue. Mix and match these DIY moves and enjoy fuss-free, shoulder-baring magic.
& CRAFT IDEAS
Beginner-friendly tutorials, creative projects,
and weekly inspiration in your inbox.