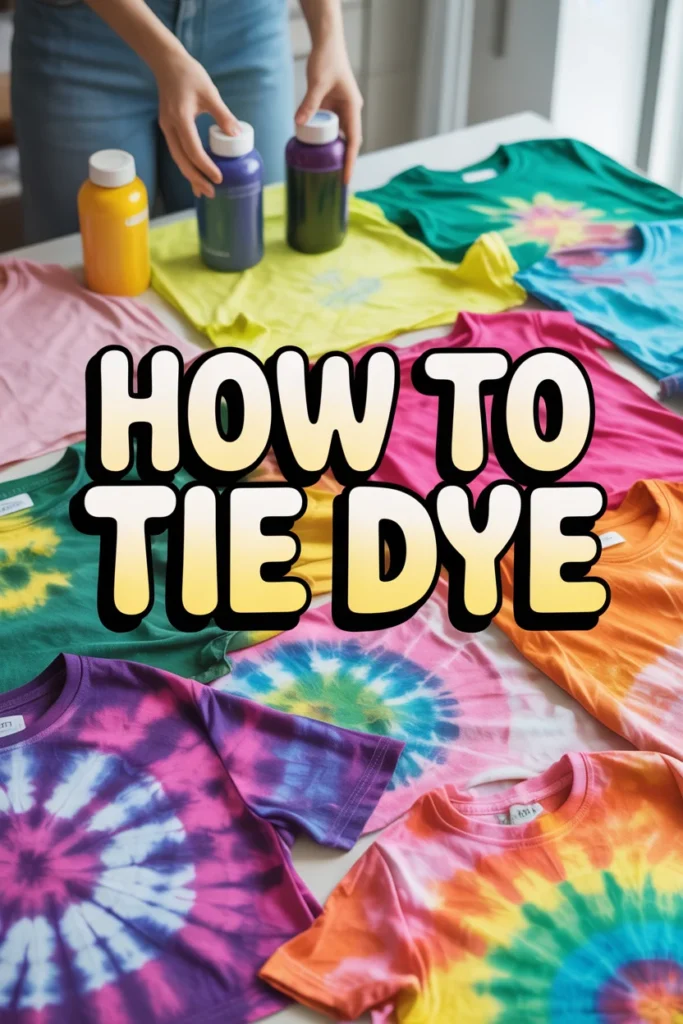
🌈 How To Tie Dye
🛠️ The Ultimate Maker's Toolkit
I've tested thousands of craft tools over the years. Whether you are quilting, crafting, or building mixed-media art, these are the top 5 absolute non-negotiable tools I personally recommend to guarantee professional results.
🪡 SINGER Heavy Duty 4452 Sewing Machine
The sewing community highly recommends this as the ultimate "bulletproof" entry-level machine. Its heavy metal frame powerfully pushes through thick denim and heavy quilt layers that would instantly jam a standard plastic machine.
✂️ Fiskars 8" Orange-Handled Scissors
Never settle for dull dollar-store blades. Wirecutter repeatedly names Fiskars the absolute best all-purpose craft scissor due to its legendary precision-ground blades and an ergonomic grip that prevents hand-cramping.
🔥 Gorilla Dual Temp Hot Glue Gun
Named Wirecutter's top choice because it literally does the work of two tools. It features dual-temperature settings offering low heat for delicate florals and blistering high heat for heavy wood adhesion repairs.
🖌️ Mod Podge Waterbase Gloss Sealer
The absolute undisputed champion of decoupage and paper crafts. Experts rely exclusively on this exact water-based formula because it glues, seals, and finishes beautifully without yellowing or flaking over time.
🎨 Apple Barrel Acrylic Paint (2 oz)
The quintessential, incredibly inexpensive craft paint. Woodworkers and hobby painters swear by its smooth flow and matte finish, providing massive value and remarkably thick color coverage on rough surfaces.
Do you remember that incredible feeling of creating something vibrant and uniquely yours?
Years ago, I discovered the magic of tie-dye, transforming plain fabric into a swirling masterpiece.
This guide is built on countless hours of twisting, dyeing, and rinsing, ensuring you get fantastic results every time.
Quick Overview
You’re about to embark on a colorful adventure, turning ordinary white fabric into a wearable work of art.
This process is wonderfully creative and surprisingly simple, perfect for crafters of all skill levels.
- Time needed: 2-4 hours active crafting, 6-24 hours for dye setting.
- Difficulty: Beginner
- What you’ll need: White cotton fabric, fiber-reactive dyes, soda ash, rubber bands, gloves, squeeze bottles, plastic sheeting.
Step-by-Step Instructions
Step 1: Prepare Your Workspace
Choose a well-ventilated area, ideally outdoors or in a garage.
Lay down a thick layer of plastic sheeting or an old shower curtain to protect your surfaces.
Dye can stain permanently, so take extra precautions.
Step 2: Select and Pre-Wash Your Fabric
Opt for natural fibers like 100% cotton, rayon, or hemp.
These materials absorb dye much better than synthetics, leading to brighter, longer-lasting colors.
Wash your chosen item (t-shirt, tote bag, socks) with a detergent, but without fabric softener.
This removes any sizing or oils that might repel the dye.
Pro Tip: Using fabric that is still damp from the wash helps the dye spread more evenly. Don’t wring it out completely; just enough so it’s not dripping.
Step 3: Soak in Soda Ash
Mix 1 cup of soda ash (sodium carbonate) with 1 gallon of warm water in a bucket.
Stir until the soda ash is completely dissolved.
Submerge your damp fabric into this solution, ensuring it’s fully saturated.
Let it soak for at least 15-20 minutes.
Soda ash acts as a dye fixative, helping the dye bond permanently with the fabric fibers.
Wring out the fabric thoroughly after soaking, so it’s damp but not dripping wet.
Step 4: Fold or Gather Your Fabric
This is where your design starts to take shape.
Experiment with various folding techniques like spirals, crumbles, stripes, or bullseyes.
For a classic spiral, lay the fabric flat, pinch the center, and twist clockwise until it forms a flat disc.
Secure your folds tightly with rubber bands.
The tighter the bands, the more defined your white lines will be.
Step 5: Mix Your Dyes
Prepare your fiber-reactive dyes according to the manufacturer’s instructions.
Typically, this involves mixing the dye powder with warm water in squeeze bottles.
Wear gloves and a mask during this step to avoid skin contact and inhaling fine dye particles.
Label your bottles clearly to avoid confusion.
Pro Tip: Use squeeze bottles with small nozzles for precise application. Consider a limited color palette for your first project to prevent muddying. Analogous colors (next to each other on the color wheel) blend beautifully.
Step 6: Apply the Dyes
Place your rubber-banded fabric on a wire rack over a plastic tub or bin.
This allows excess dye to drain away, preventing muddy colors.
Apply the dyes to different sections of your folded fabric.
Flip the fabric over and apply dye to the other side, ensuring full saturation.
Don’t be afraid to get creative with your color placement.
Step 7: Wrap and Cure
Carefully transfer your dyed item into a plastic bag or wrap it in plastic cling film.
This keeps the fabric damp and allows the dye to set properly.
Let it cure for at least 6-24 hours, or even longer for more vibrant results (up to 48 hours).
The warmer the temperature, the faster the dye will set.
Step 8: Rinse and Wash
Wear gloves again for this step.
Remove the fabric from the plastic and rinse it under cold running water.
Keep rinsing until the water runs clear.
Remove the rubber bands while continuing to rinse.
This is the exciting reveal moment!
Wash the tie-dyed item in a washing machine on a hot cycle with a special tie-dye detergent or a color-safe detergent.
Wash it alone for the first few washes to prevent any residual dye from bleeding onto other clothes.
Dry as usual, and admire your unique creation!
Common Mistakes to Avoid
Not Pre-Washing Fabric
Failing to pre-wash your fabric leaves sizing and oils on the material.
These substances act as a barrier, preventing the dye from penetrating the fibers effectively.
The result is often dull, patchy colors that wash out quickly.
Skipping the Soda Ash Soak
Soda ash is crucial for fiber-reactive dyes to bond permanently with natural fibers.
Without it, the dye will not properly fix to the fabric.
This leads to colors that fade significantly or wash out almost entirely after the first rinse.
Not Saturating the Fabric Enough
When applying dye, it’s important to ensure every part of the folded fabric receives color.
If areas are missed, you’ll end up with large, unintended white patches or uneven color distribution.
Make sure to flip your item and dye both sides thoroughly.
Rinsing Too Early
The curing time is essential for the dye to chemically bond with the fabric.
Rinsing before the recommended 6-24 hours (or more) means the dye hasn’t had enough time to set.
This often results in significantly lighter colors and reduced vibrancy.
Troubleshooting
Colors Look Muddy or Brown
This often happens when too many different colors are applied too closely without enough white space.
It can also occur if complementary colors (like red and green, or blue and orange) mix directly.
Next time, try using fewer colors, or select analogous colors that blend harmoniously.
Ensure excess dye has a place to drain away from your fabric during the application stage.
Dye Bled Onto White Areas
Dye bleeding can happen if your rubber bands aren’t tight enough, allowing dye to seep into unintended areas.
It might also occur if you don’t rinse thoroughly enough before the initial wash.
For future projects, secure your folds more tightly and extend your cold water rinse until the water is completely clear.
Colors Are Too Faded or Light
This issue typically points to insufficient soda ash, not enough curing time, or using synthetic fabric.
Double-check your soda ash mixture and ensure the fabric soaks adequately.
Extend your curing time to the full 24 hours, especially if it’s cooler.
Always choose 100% natural fibers for best results.
Key Takeaways
- Always pre-wash your fabric and soak it in soda ash for vibrant, lasting colors.
- Protect your workspace thoroughly; dye stains are persistent.
- Experiment with different folding techniques to create unique patterns.
- Apply dyes generously but allow excess to drain to prevent muddying.
- Give your project ample curing time (6-24 hours) for the dye to set properly.
- Rinse with cold water until clear before the final hot water wash.
Frequently Asked Questions
What kind of fabric works best?
Natural fibers are ideal for tie-dye, with 100% cotton being the top choice.
Rayon, hemp, and linen also work wonderfully, absorbing the dye beautifully.
Avoid synthetic fabrics like polyester, as they don’t hold fiber-reactive dyes well and will result in very faded or no color.
Can I tie-dye with kids?
Absolutely! Tie-dye is a fantastic activity for kids, fostering creativity and providing a tangible result.
Just ensure adult supervision, especially when handling dyes and soda ash.
Use plenty of gloves and protect their clothing and work surfaces.
How do I make sure the colors don’t bleed in the wash?
The critical steps are proper soda ash treatment and thorough rinsing.
After curing, rinse under cold water until the water runs completely clear before washing.
For the first few washes, always wash your tie-dyed item separately in hot water with a good detergent.
Can I use food coloring or natural dyes?
While food coloring and some natural dyes can tint fabric, they are not permanent like fiber-reactive dyes.
They will fade significantly or wash out almost entirely after a few washes.
For lasting, vibrant results, always choose fiber-reactive dyes specifically designed for fabric.
Our Top Recommended Finds
- All-Inclusive Tie-Dye Kit: These kits usually contain dyes, soda ash, gloves, and rubber bands, perfect for beginners.
- 100% Cotton Blanks (T-shirts, Hoodies, Socks): Starting with quality, pure cotton items ensures the best dye absorption and brightest colors.
- Plastic Squeeze Bottles with Fine Tips: These allow for precise dye application, helping you create intricate designs and avoid messy overlaps.
Your Colorful Journey Begins Now
You now have all the knowledge and inspiration to create your very own tie-dye masterpieces.
Don’t be afraid to experiment with patterns, colors, and different fabric items.
Every piece you create will be a unique expression of your creativity.
Grab your supplies, clear your workspace, and let the colors flow.
The world is waiting for your vibrant touch!