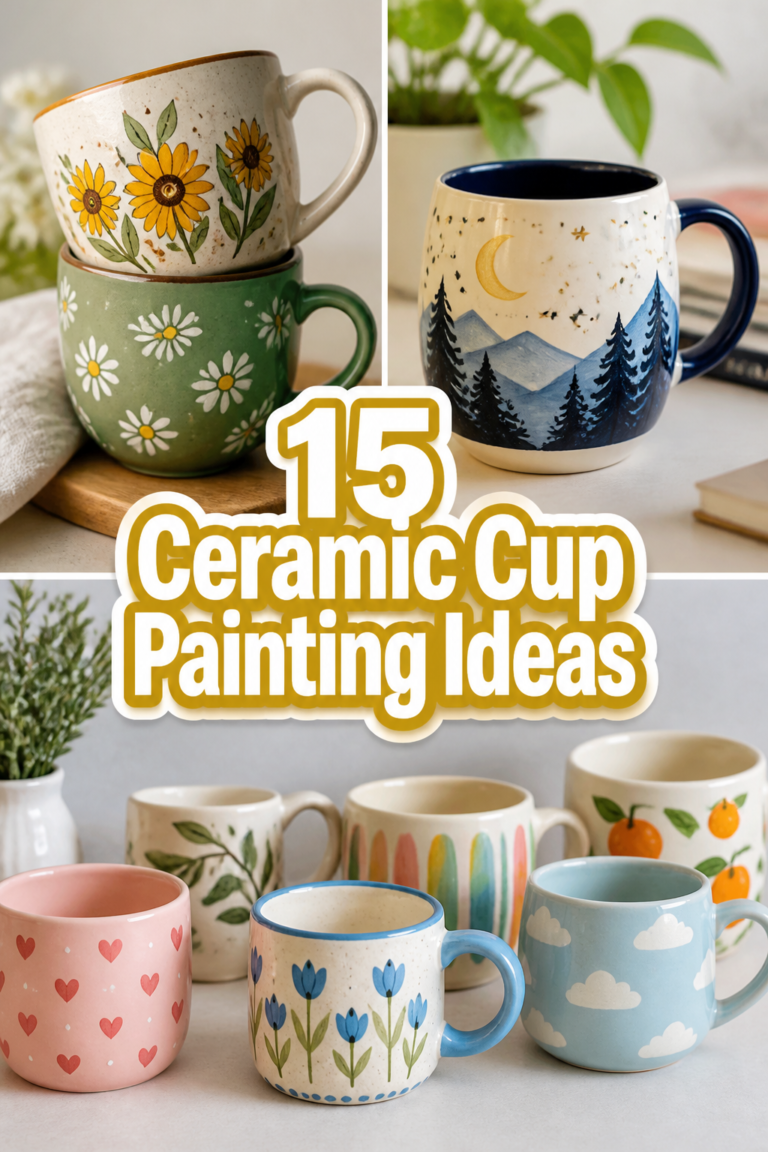
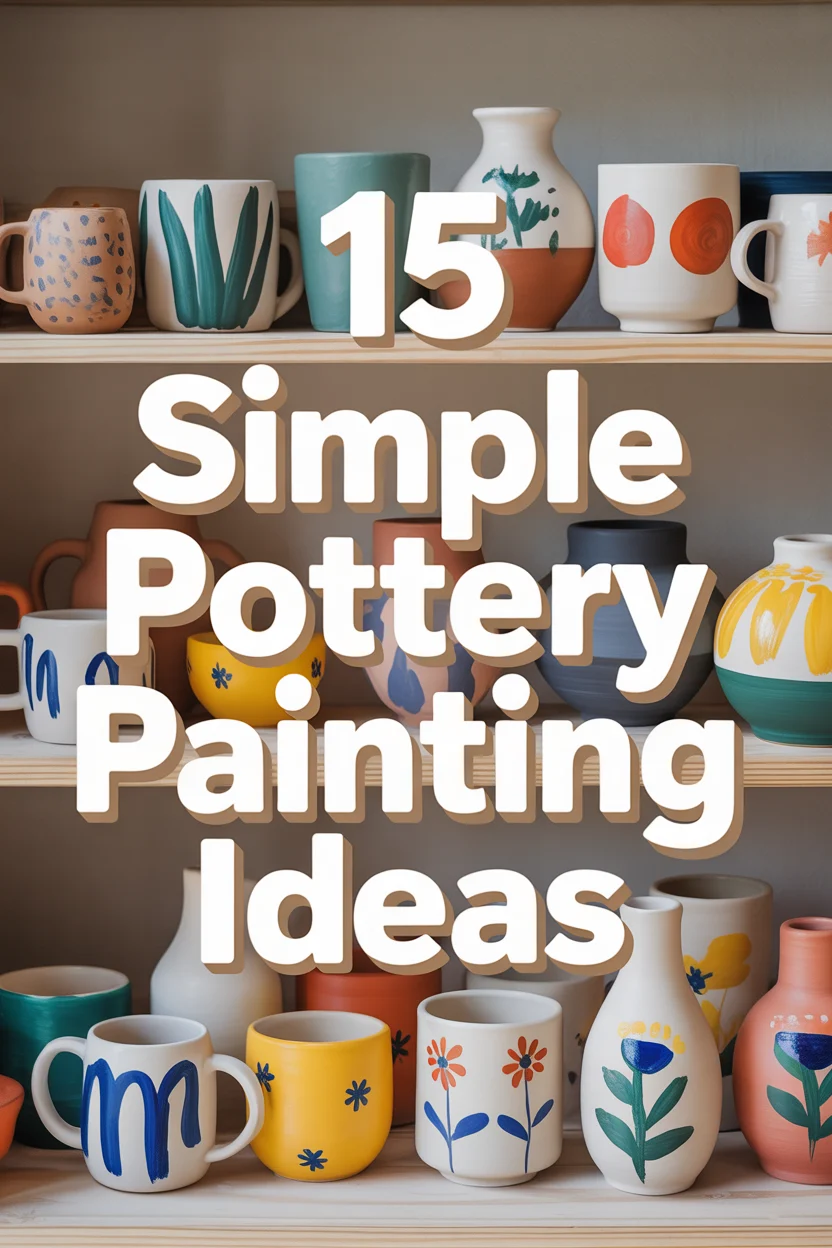
🎨 15 Simple Pottery Painting Ideas
🛠️ The Ultimate Maker's Toolkit
I've tested thousands of craft tools over the years. Whether you are quilting, crafting, or building mixed-media art, these are the top 5 absolute non-negotiable tools I personally recommend to guarantee professional results.
🪡 SINGER Heavy Duty 4452 Sewing Machine
The sewing community highly recommends this as the ultimate "bulletproof" entry-level machine. Its heavy metal frame powerfully pushes through thick denim and heavy quilt layers that would instantly jam a standard plastic machine.
✂️ Fiskars 8" Orange-Handled Scissors
Never settle for dull dollar-store blades. Wirecutter repeatedly names Fiskars the absolute best all-purpose craft scissor due to its legendary precision-ground blades and an ergonomic grip that prevents hand-cramping.
🔥 Gorilla Dual Temp Hot Glue Gun
Named Wirecutter's top choice because it literally does the work of two tools. It features dual-temperature settings offering low heat for delicate florals and blistering high heat for heavy wood adhesion repairs.
🖌️ Mod Podge Waterbase Gloss Sealer
The absolute undisputed champion of decoupage and paper crafts. Experts rely exclusively on this exact water-based formula because it glues, seals, and finishes beautifully without yellowing or flaking over time.
🎨 Apple Barrel Acrylic Paint (2 oz)
The quintessential, incredibly inexpensive craft paint. Woodworkers and hobby painters swear by its smooth flow and matte finish, providing massive value and remarkably thick color coverage on rough surfaces.
Hey, ready to ditch the screen and get your hands dirty? We’re talking pottery painting, but not the ‘masterpiece’ kind. Think ‘I actually made this and it looks cool’ kind of vibe. You don’t need to be Picasso; you just need a brush and a good playlist. Let’s get those creative juices flowing without, you know, stressing out.
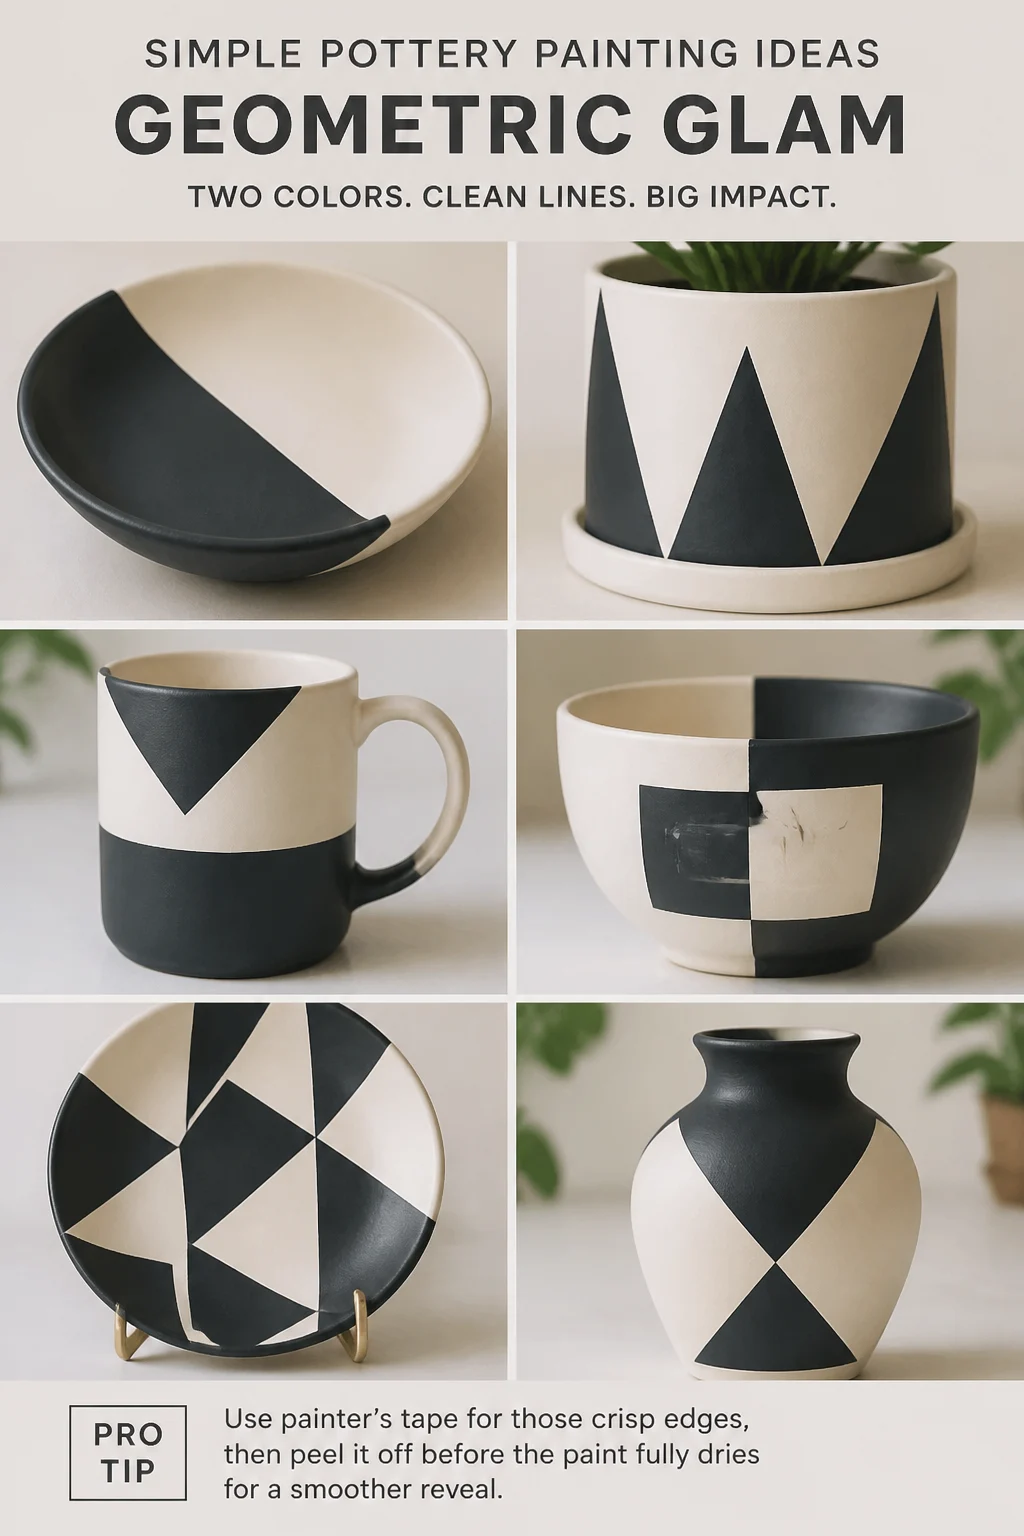
1. Geometric Glam
Think clean lines, triangles, squares. This look is super easy to tape off and paint, making you look like a design genius with minimal effort. Pick two contrasting colors and let the shapes do all the talking, because sometimes less really is more. Pro tip: Use painter’s tape for those crisp edges, then peel it off before the paint fully dries for a smoother reveal. It’s chic, it’s modern, and you totally pulled it off.
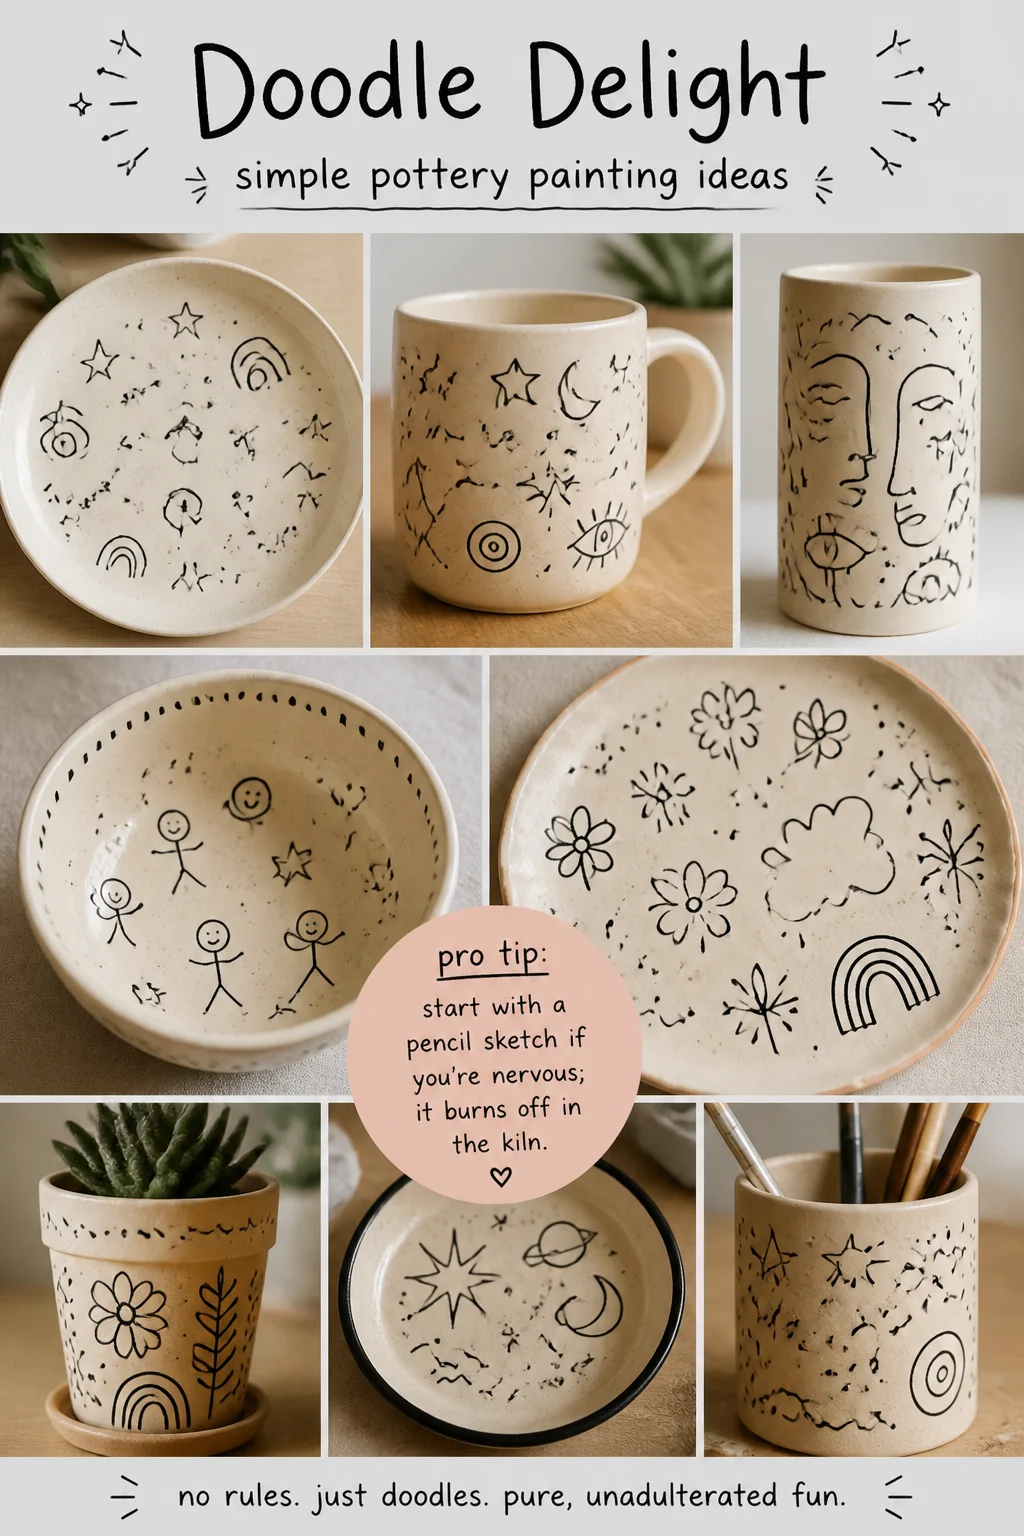
2. Doodle Delight
Grab a fine-tip brush or a ceramic pen and just go wild. Draw squiggles, tiny stars, abstract lines, or even stick figures. There are literally no rules here, just pure, unadulterated freehand fun. Pro tip: Start with a pencil sketch if you’re feeling nervous; it burns off in the kiln. This idea screams “effortless cool,” and we’re totally here for it.
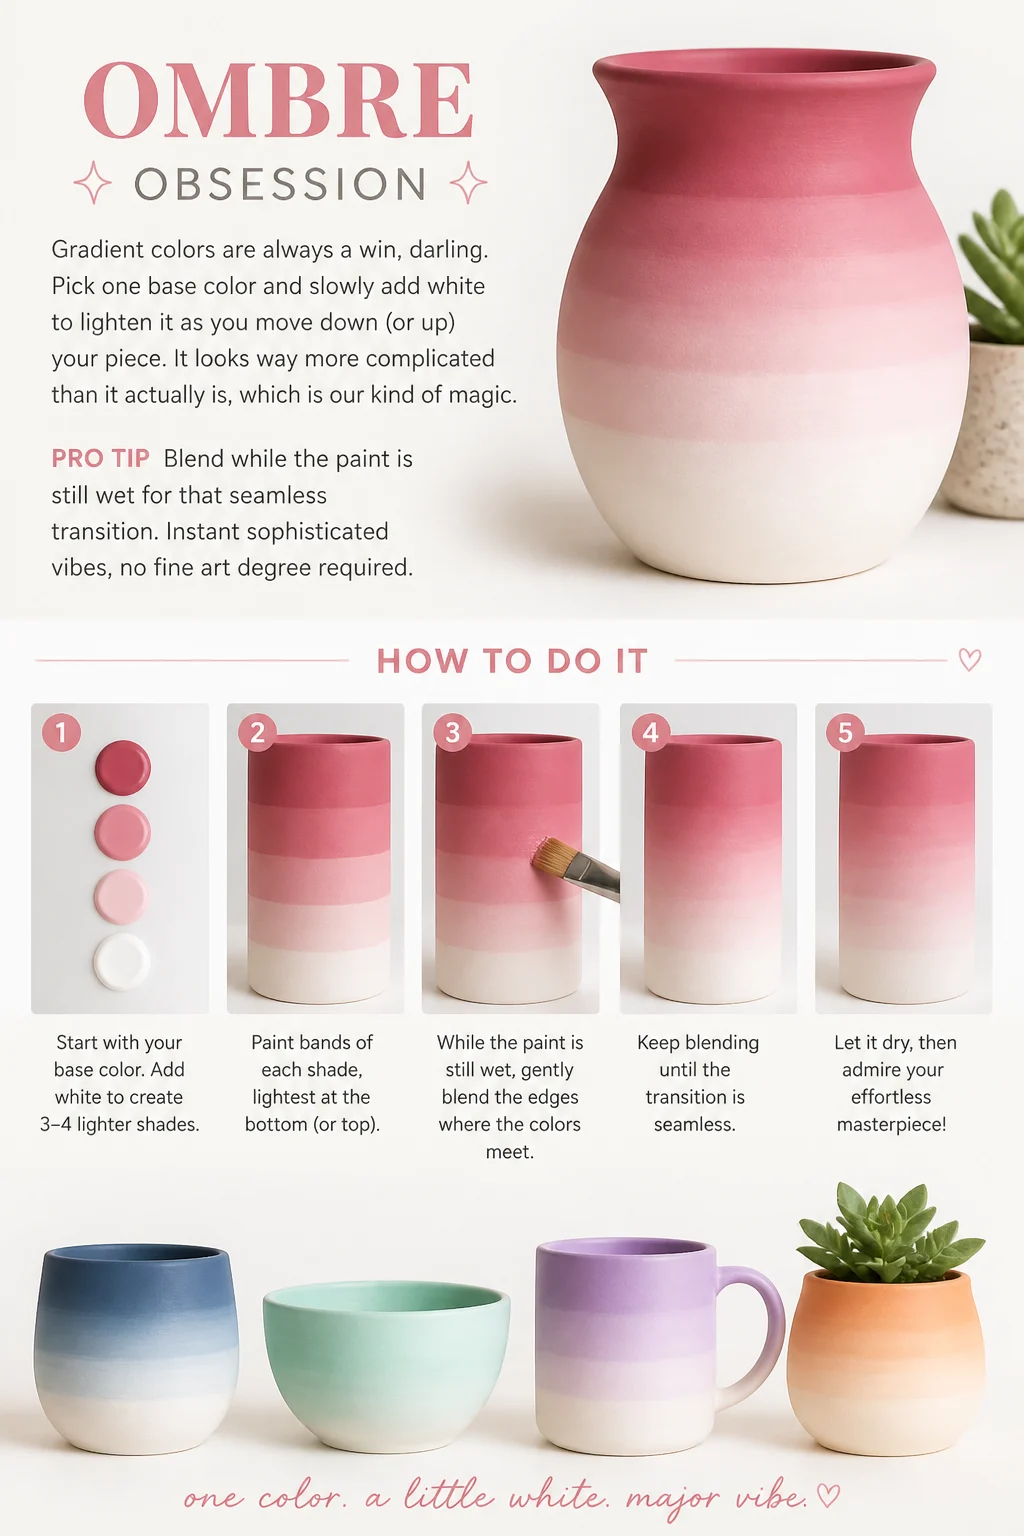
3. Ombre Obsession
Gradient colors are always a win, darling. Pick one base color and slowly add white to lighten it as you move down (or up) your piece. It looks way more complicated than it actually is, which is our kind of magic. Pro tip: Blend while the paint is still wet for that seamless transition. Instant sophisticated vibes, no fine art degree required.
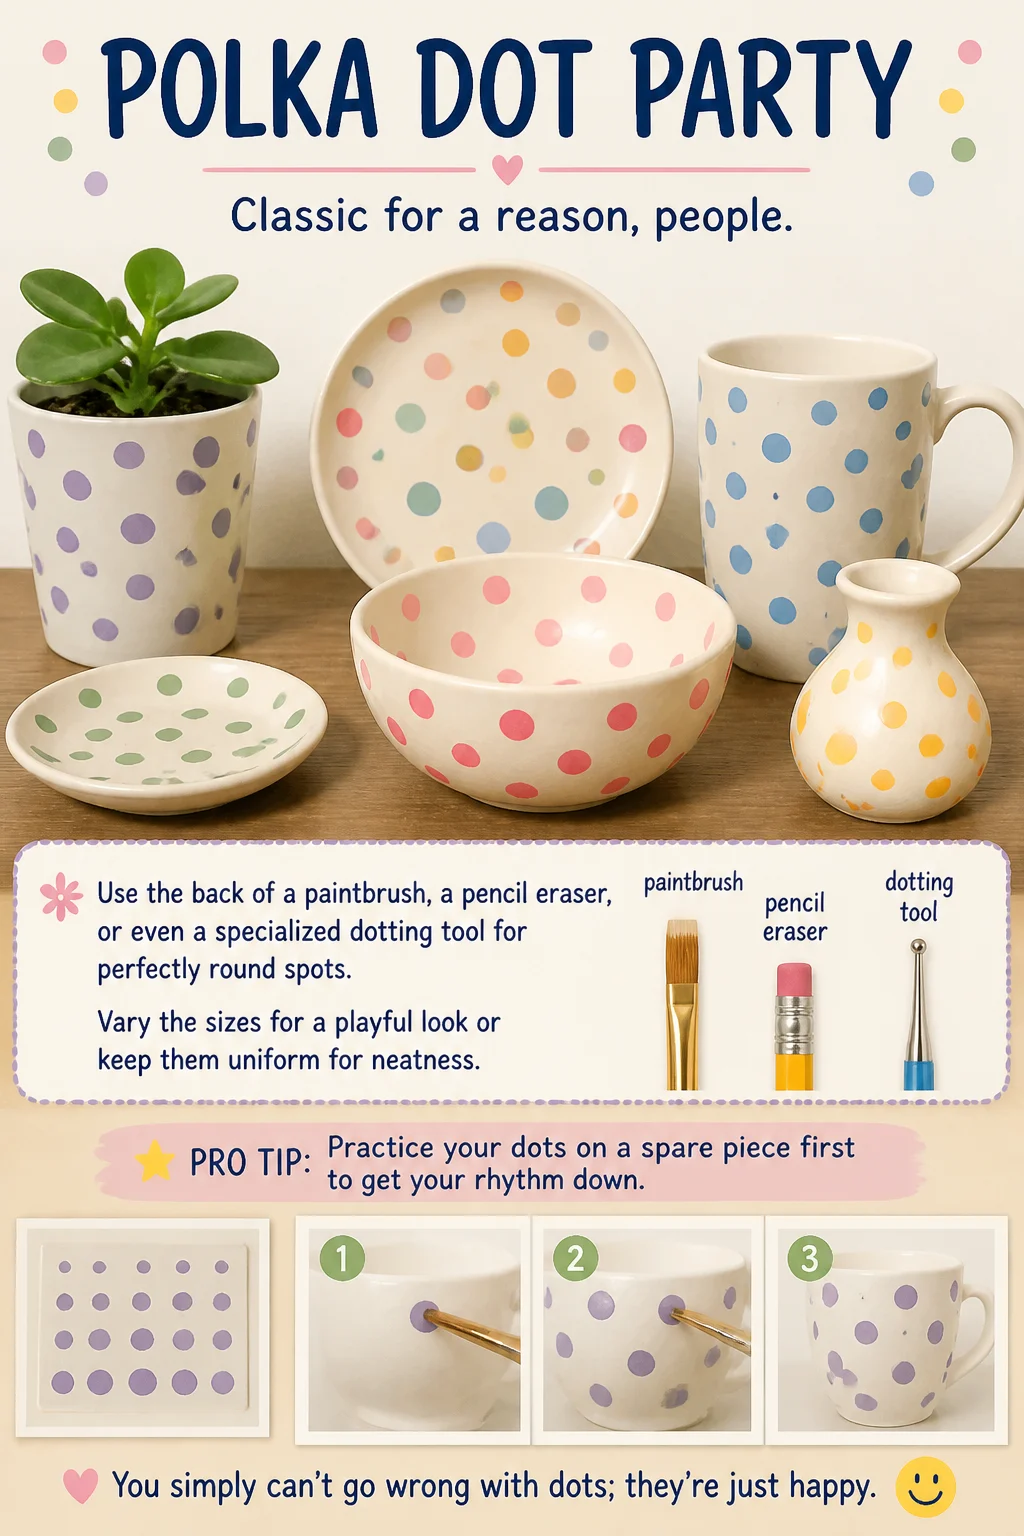
4. Polka Dot Party
Classic for a reason, people. Use the back of a paintbrush, a pencil eraser, or even a specialized dotting tool for perfectly round spots. Vary the sizes for a playful look or keep them uniform for neatness. Pro tip: Practice your dots on a spare piece first to get your rhythm down. You simply can’t go wrong with dots; they’re just happy.
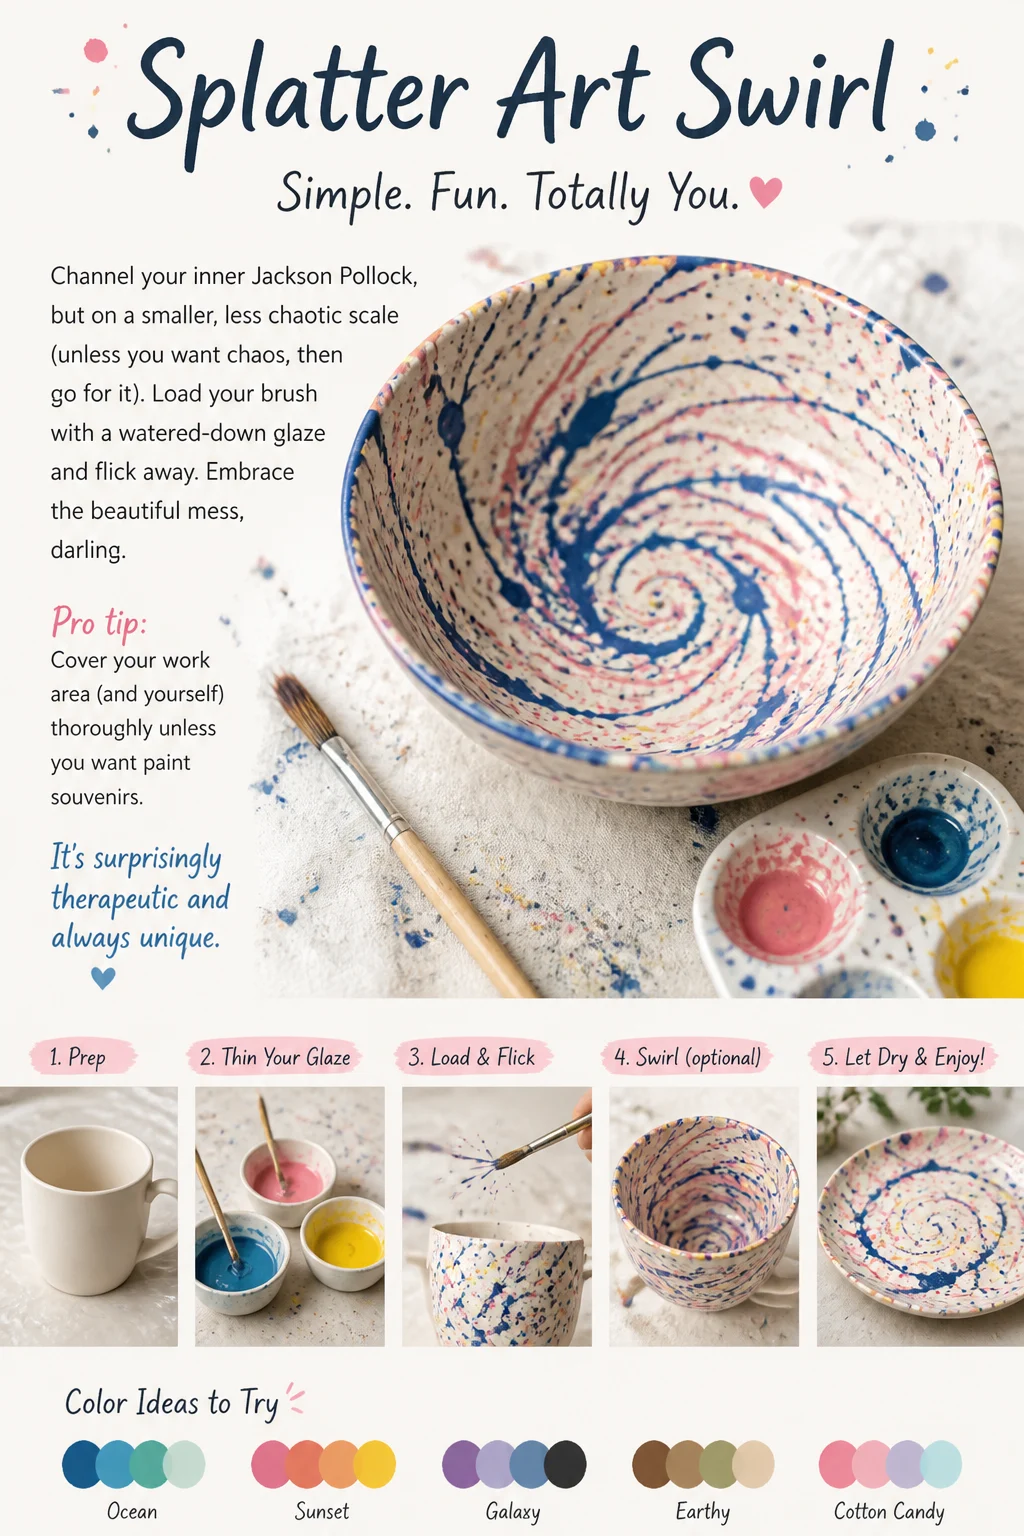
5. Splatter Art Swirl
Channel your inner Jackson Pollock, but on a smaller, less chaotic scale (unless you want chaos, then go for it!). Load your brush with a watered-down glaze and flick away. Embrace the beautiful mess, darling. Pro tip: Cover your work area (and yourself) thoroughly unless you want paint souvenirs. It’s surprisingly therapeutic and always unique.
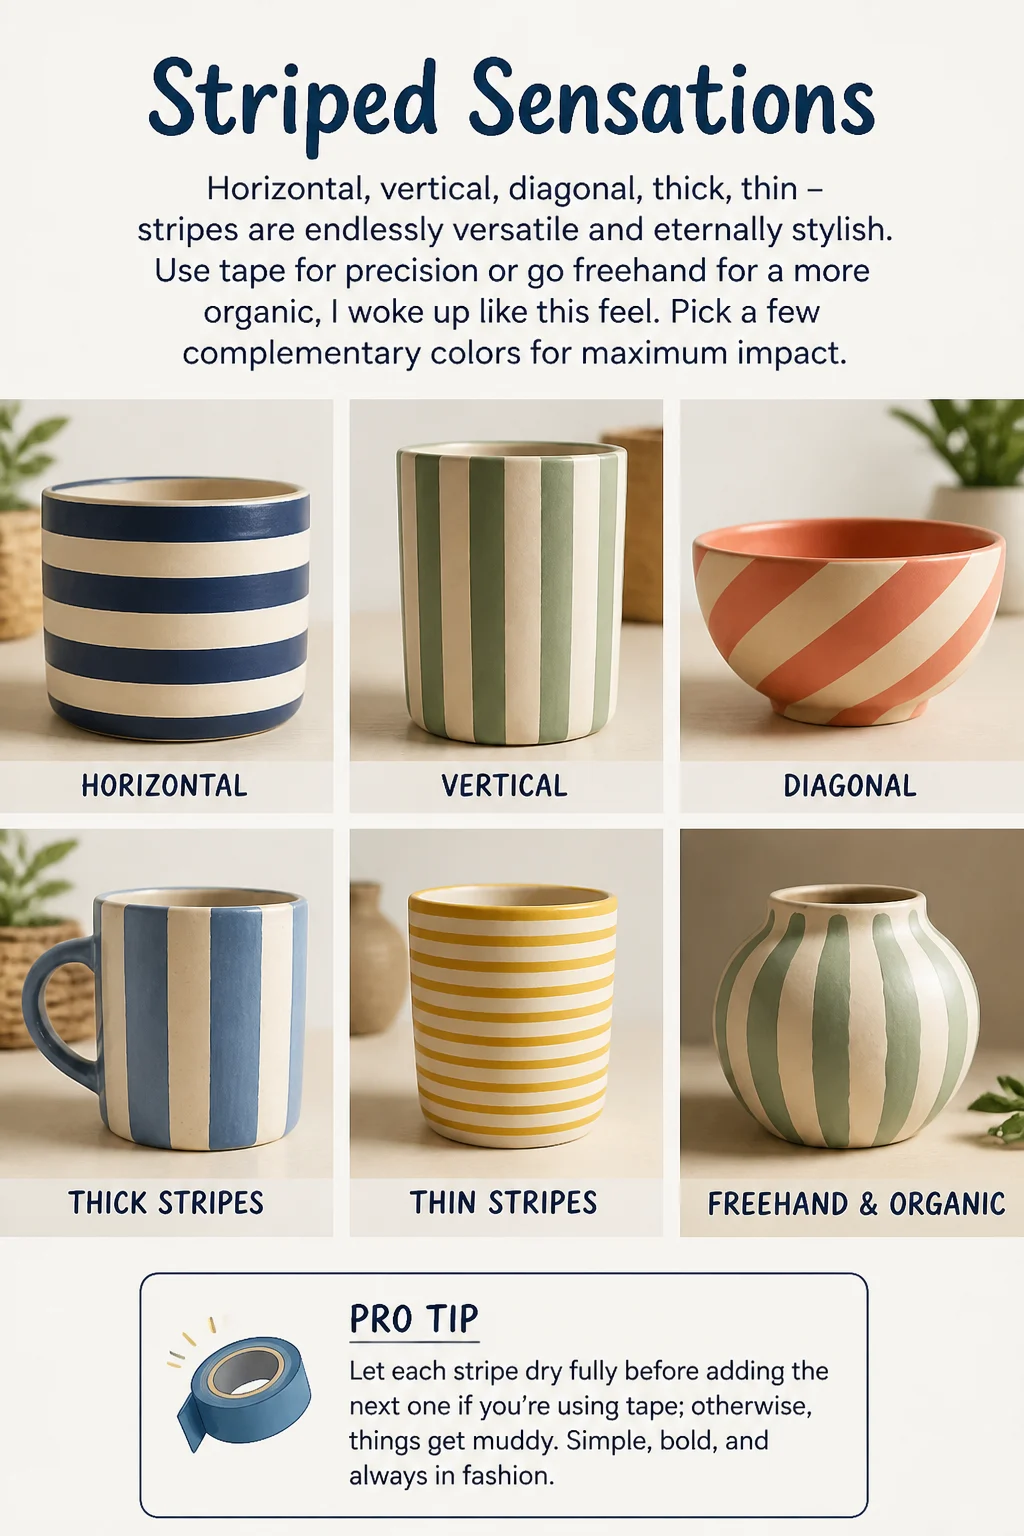
6. Striped Sensations
Horizontal, vertical, diagonal, thick, thin – stripes are endlessly versatile and eternally stylish. Use tape for precision or go freehand for a more organic, “I woke up like this” feel. Pick a few complementary colors for maximum impact. Pro tip: Let each stripe dry fully before adding the next one if you’re using tape; otherwise, things get muddy. Simple, bold, and always in fashion.
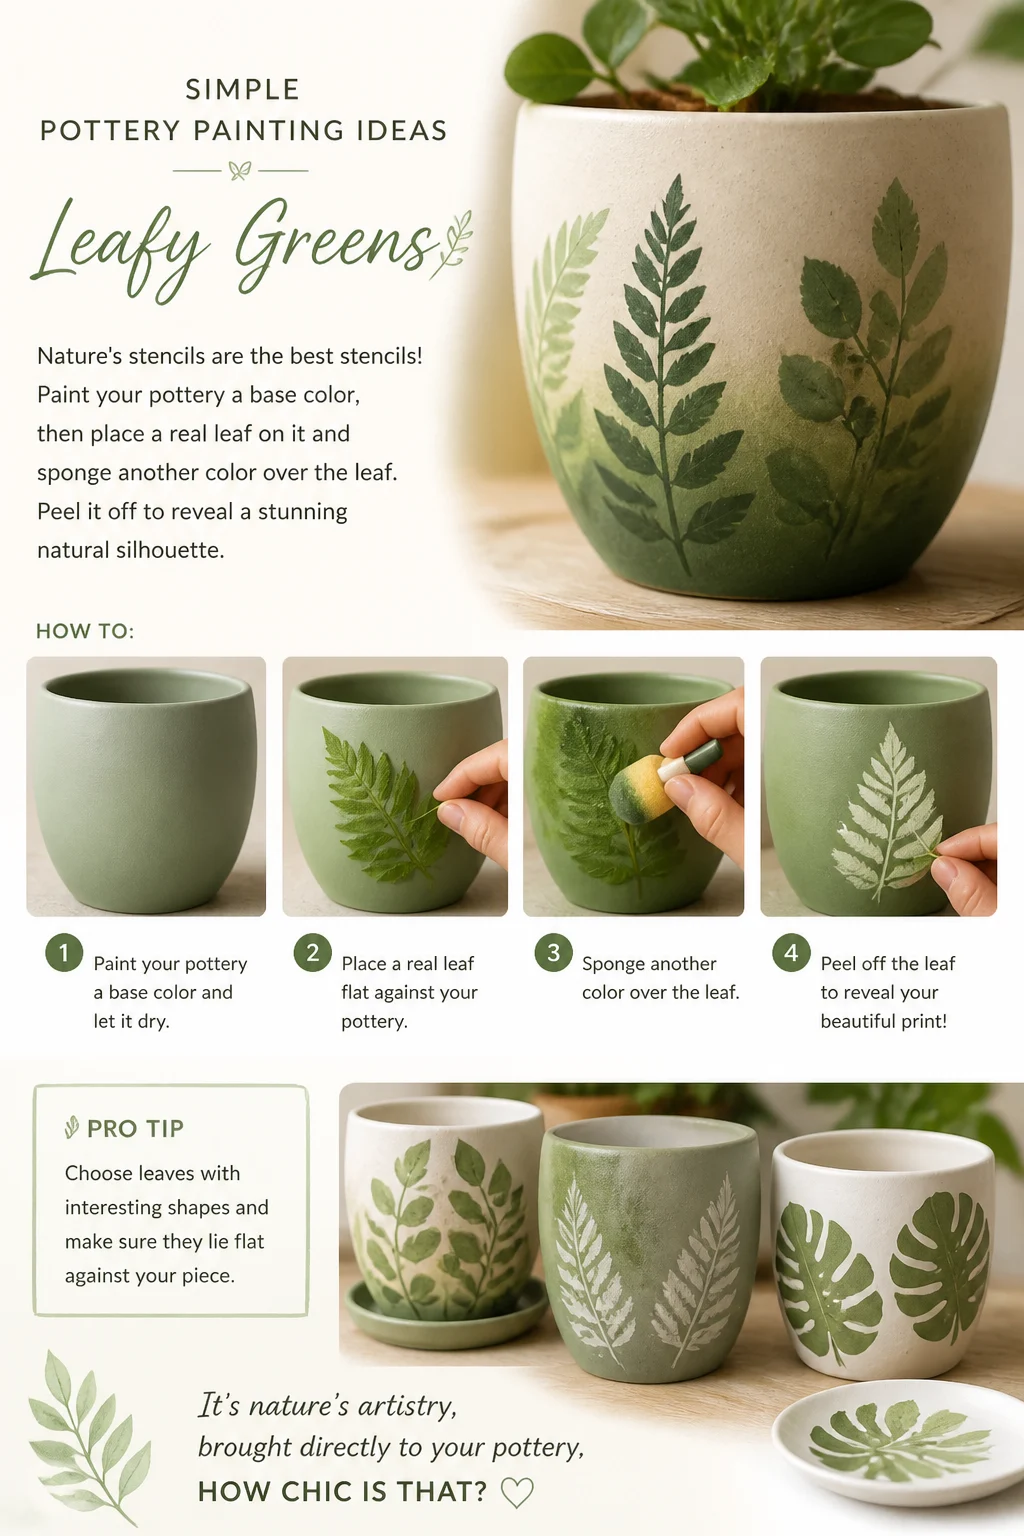
7. Leafy Greens
Nature’s stencils are the best stencils! Paint your pottery a base color, then place a real leaf on it and sponge another color over the leaf. Peel it off to reveal a stunning natural silhouette. Pro tip: Choose leaves with interesting shapes and make sure they lie flat against your piece. It’s nature’s artistry, brought directly to your pottery, how chic is that?
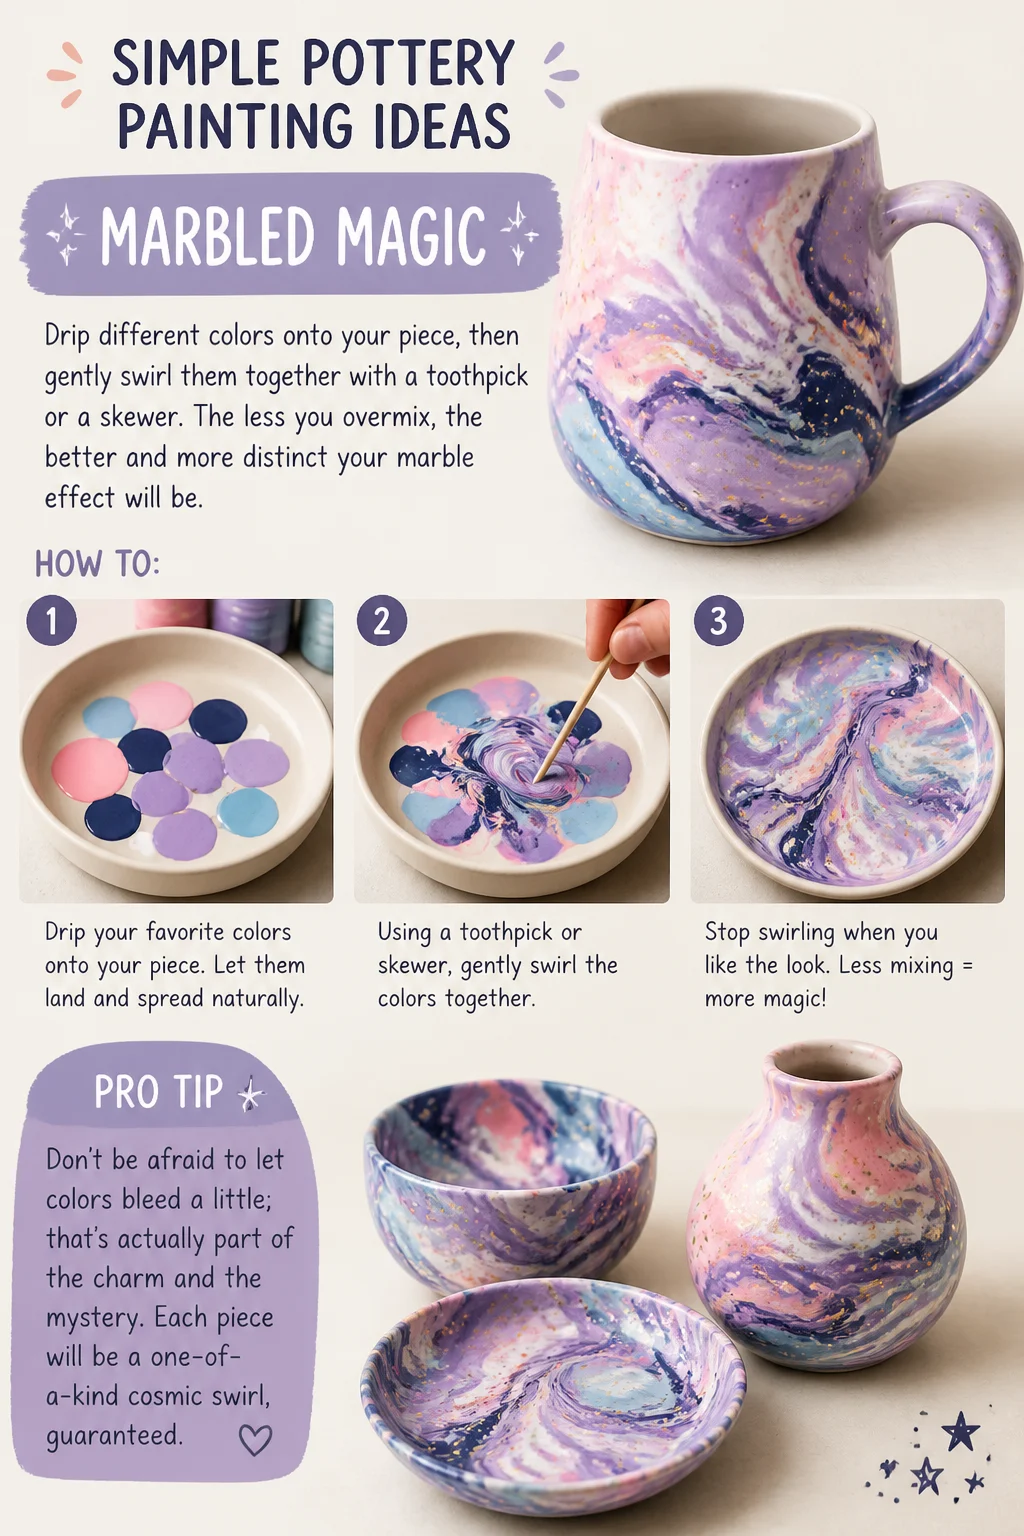
8. Marbled Magic
Drip different colors onto your piece, then gently swirl them together with a toothpick or a skewer. The less you overmix, the better and more distinct your marble effect will be. Pro tip: Don’t be afraid to let colors bleed a little; that’s actually part of the charm and the mystery. Each piece will be a one-of-a-kind cosmic swirl, guaranteed.
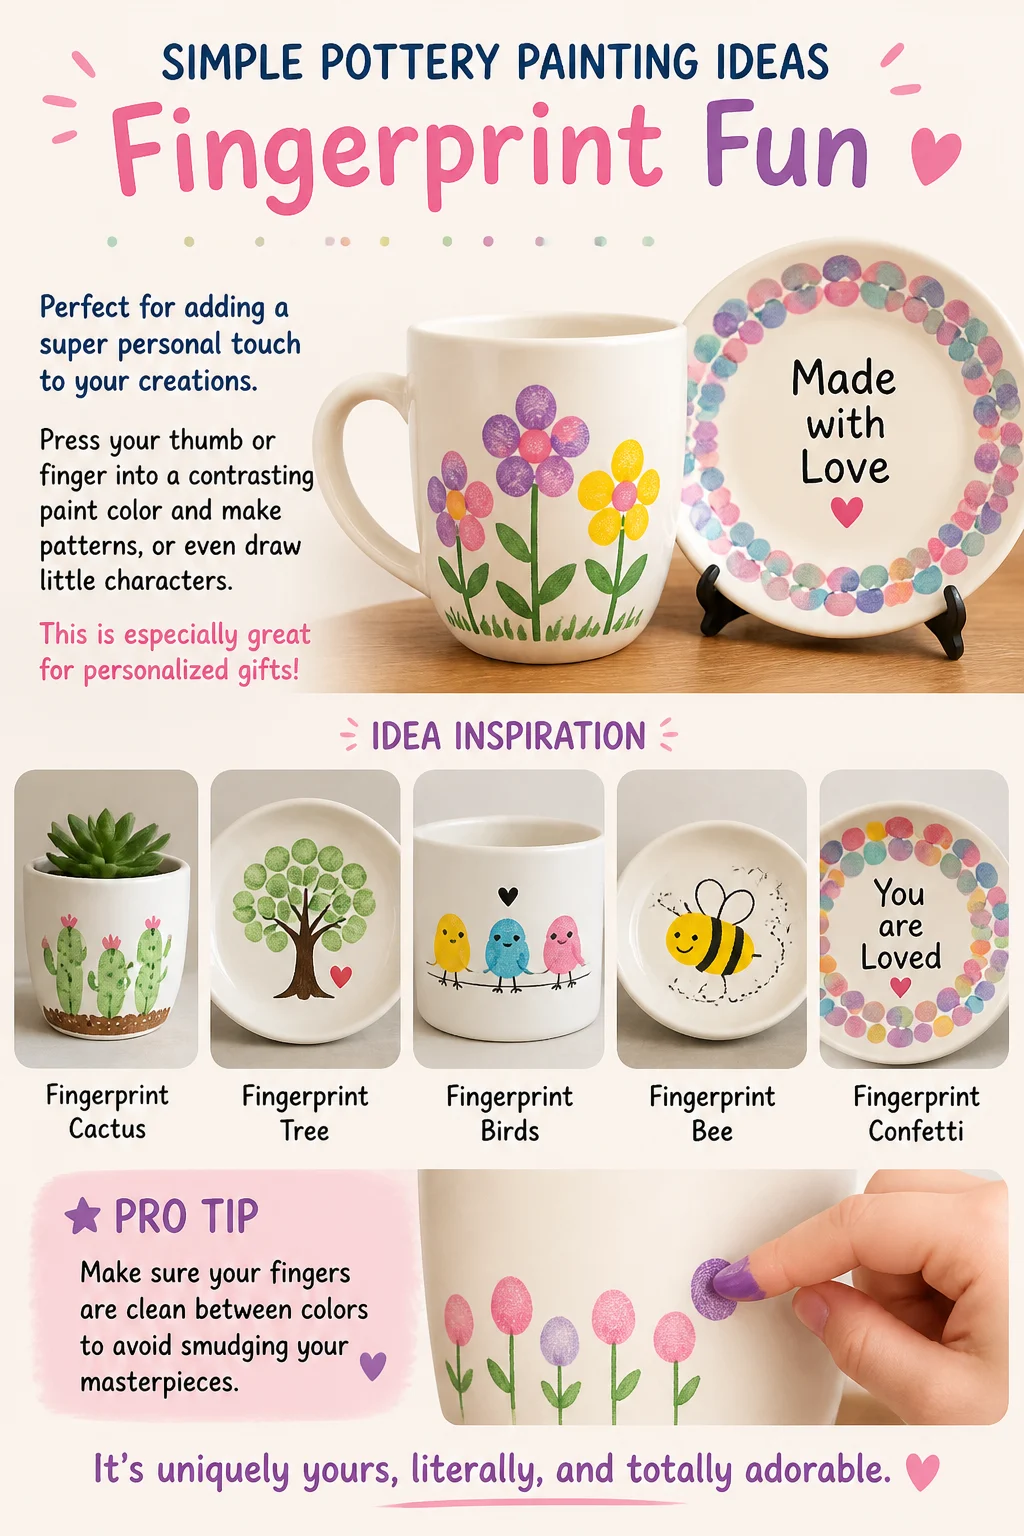
9. Fingerprint Fun
Perfect for adding a super personal touch to your creations. Press your thumb or finger into a contrasting paint color and make patterns, or even “draw” little characters. This is especially great for personalized gifts! Pro tip: Make sure your fingers are clean between colors to avoid smudging your masterpieces. It’s uniquely yours, literally, and totally adorable.
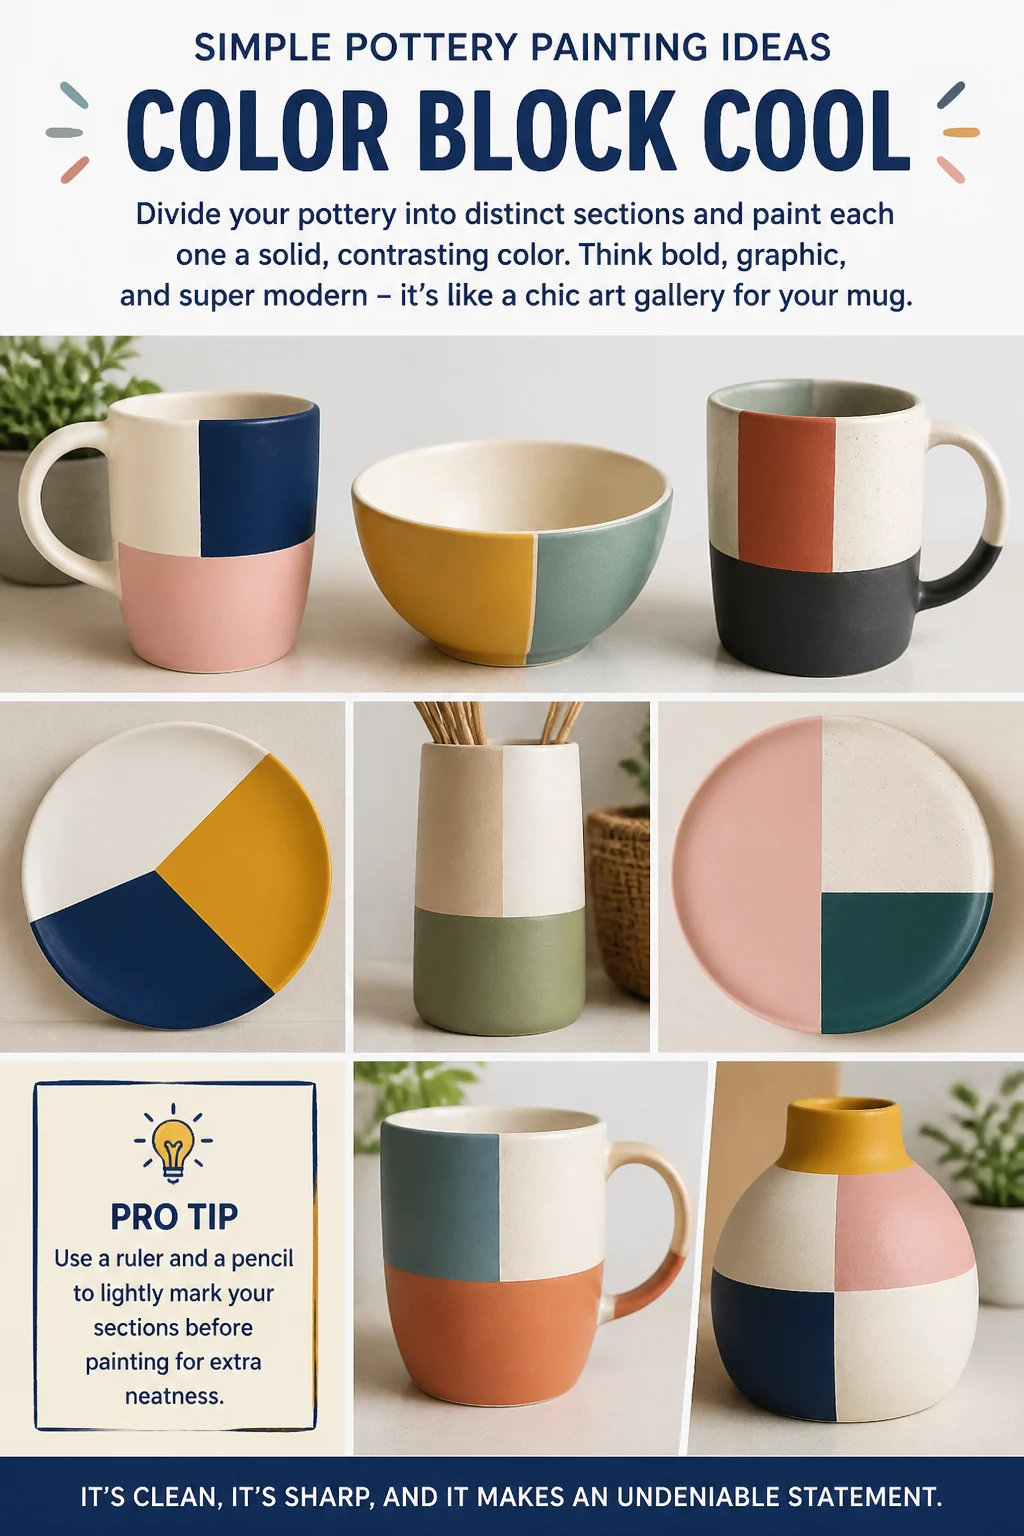
10. Color Block Cool
Divide your pottery into distinct sections and paint each one a solid, contrasting color. Think bold, graphic, and super modern – it’s like a chic art gallery for your mug. Pro tip: Use a ruler and a pencil to lightly mark your sections before painting for extra neatness. It’s clean, it’s sharp, and it makes an undeniable statement.
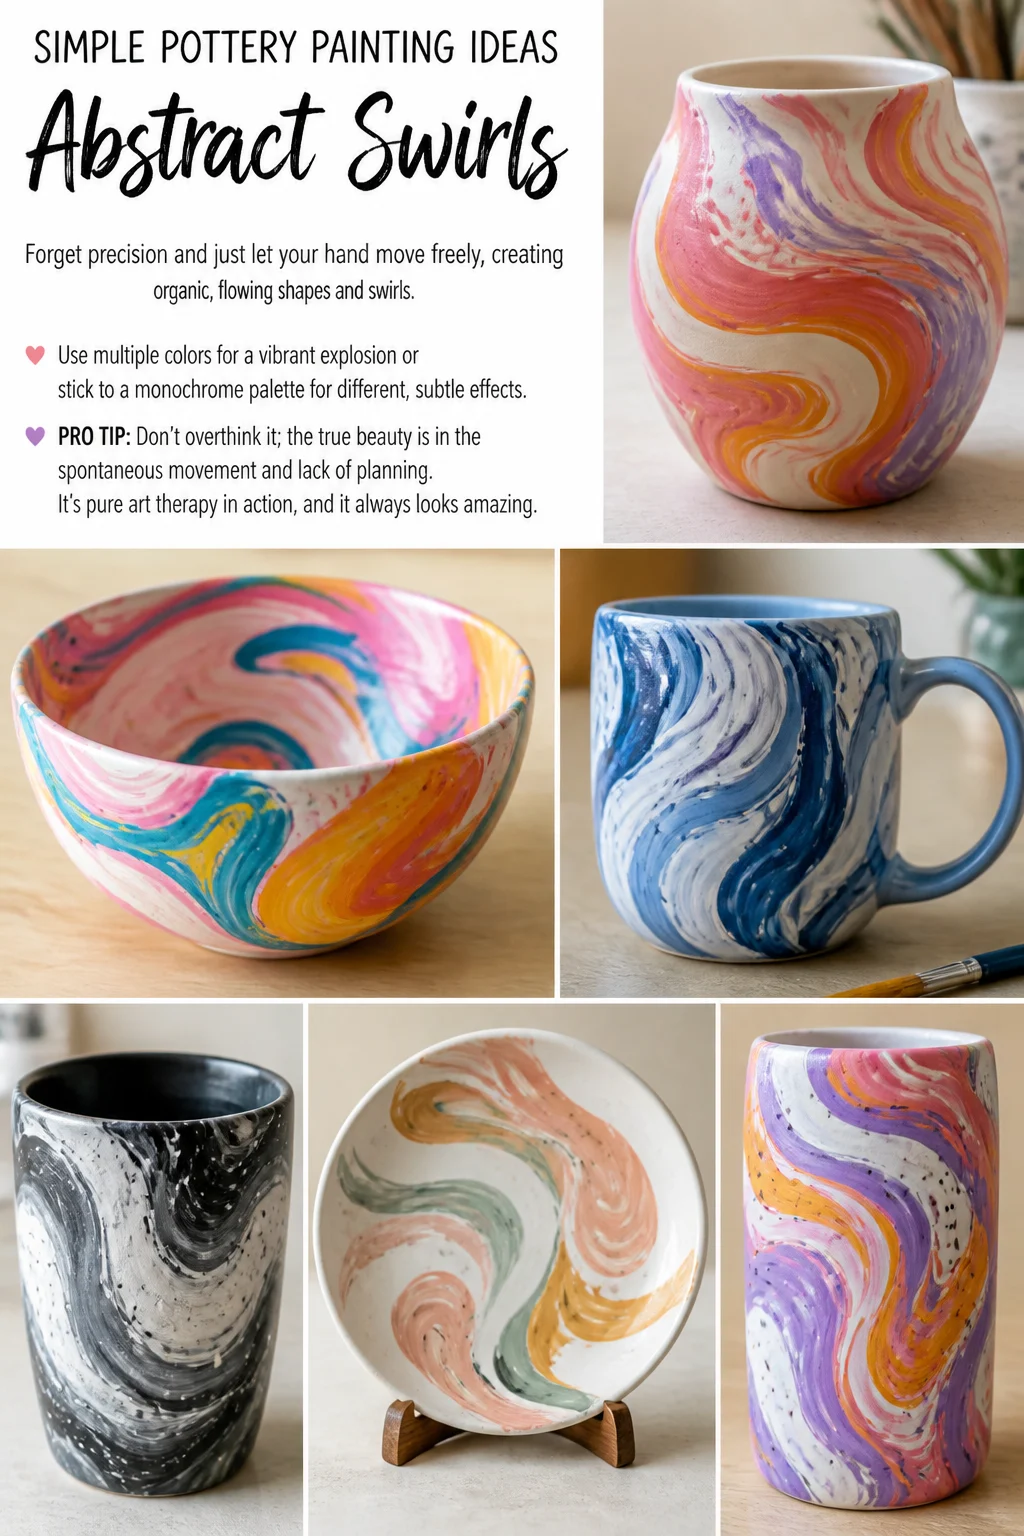
11. Abstract Swirls
Forget precision and just let your hand move freely, creating organic, flowing shapes and swirls. Use multiple colors for a vibrant explosion or stick to a monochrome palette for different, subtle effects. Pro tip: Don’t overthink it; the true beauty is in the spontaneous movement and lack of planning. It’s pure art therapy in action, and it always looks amazing.
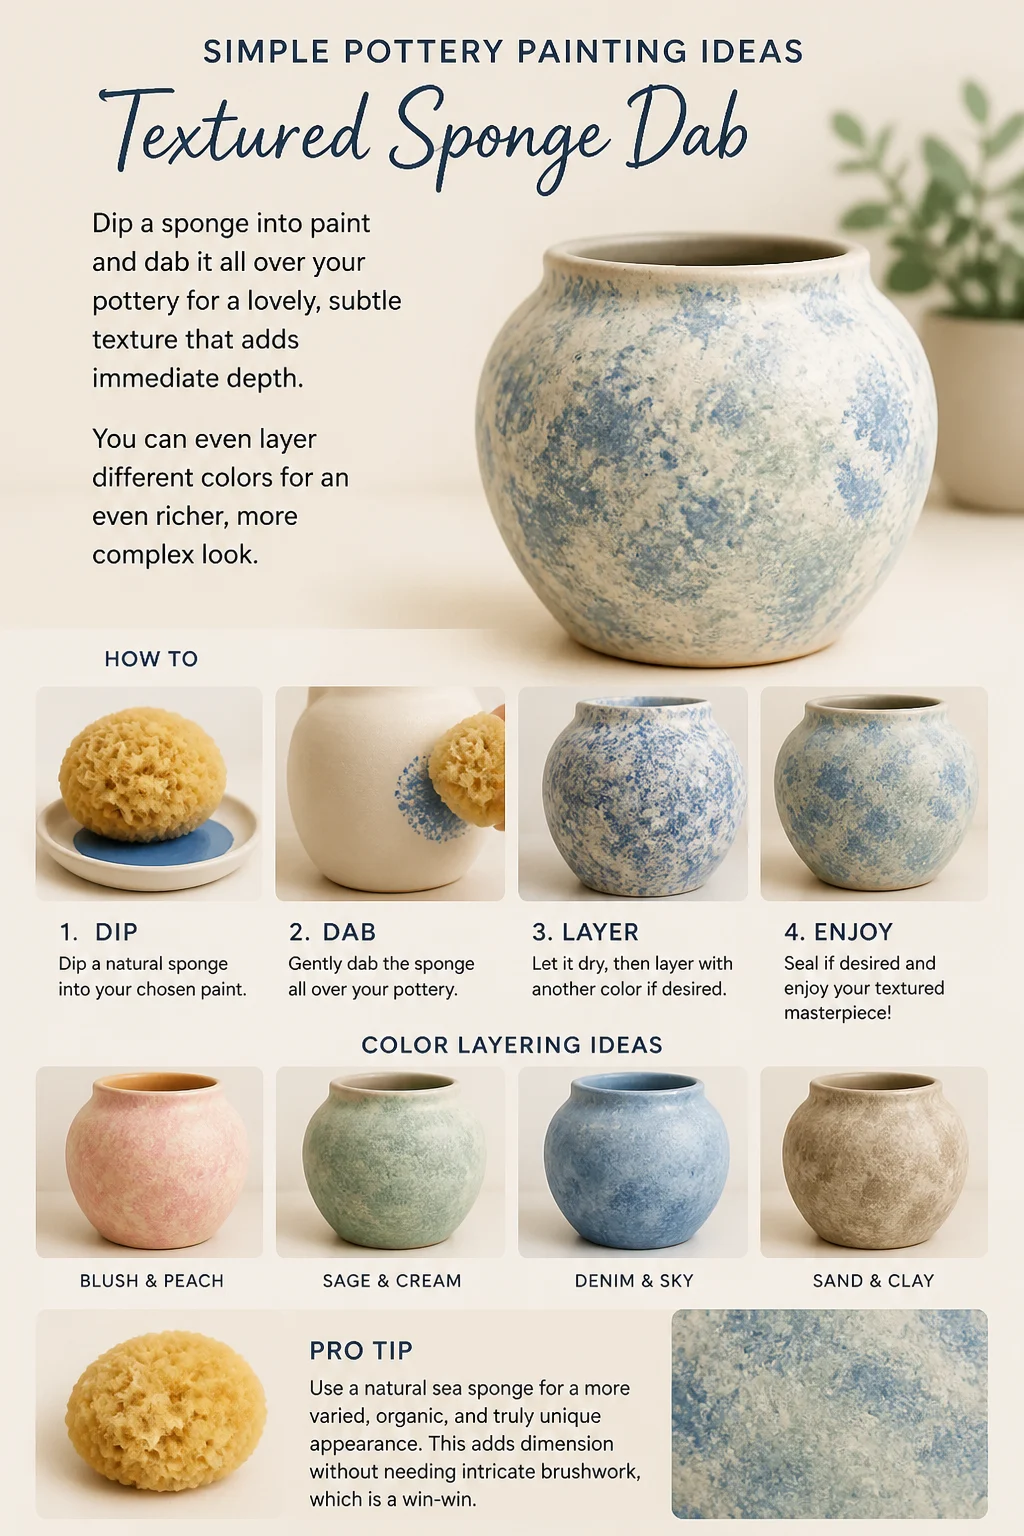
12. Textured Sponge Dab
Dip a sponge into paint and dab it all over your pottery for a lovely, subtle texture that adds immediate depth. You can even layer different colors for an even richer, more complex look. Pro tip: Use a natural sea sponge for a more varied, organic, and truly unique appearance. This adds dimension without needing intricate brushwork, which is a win-win.
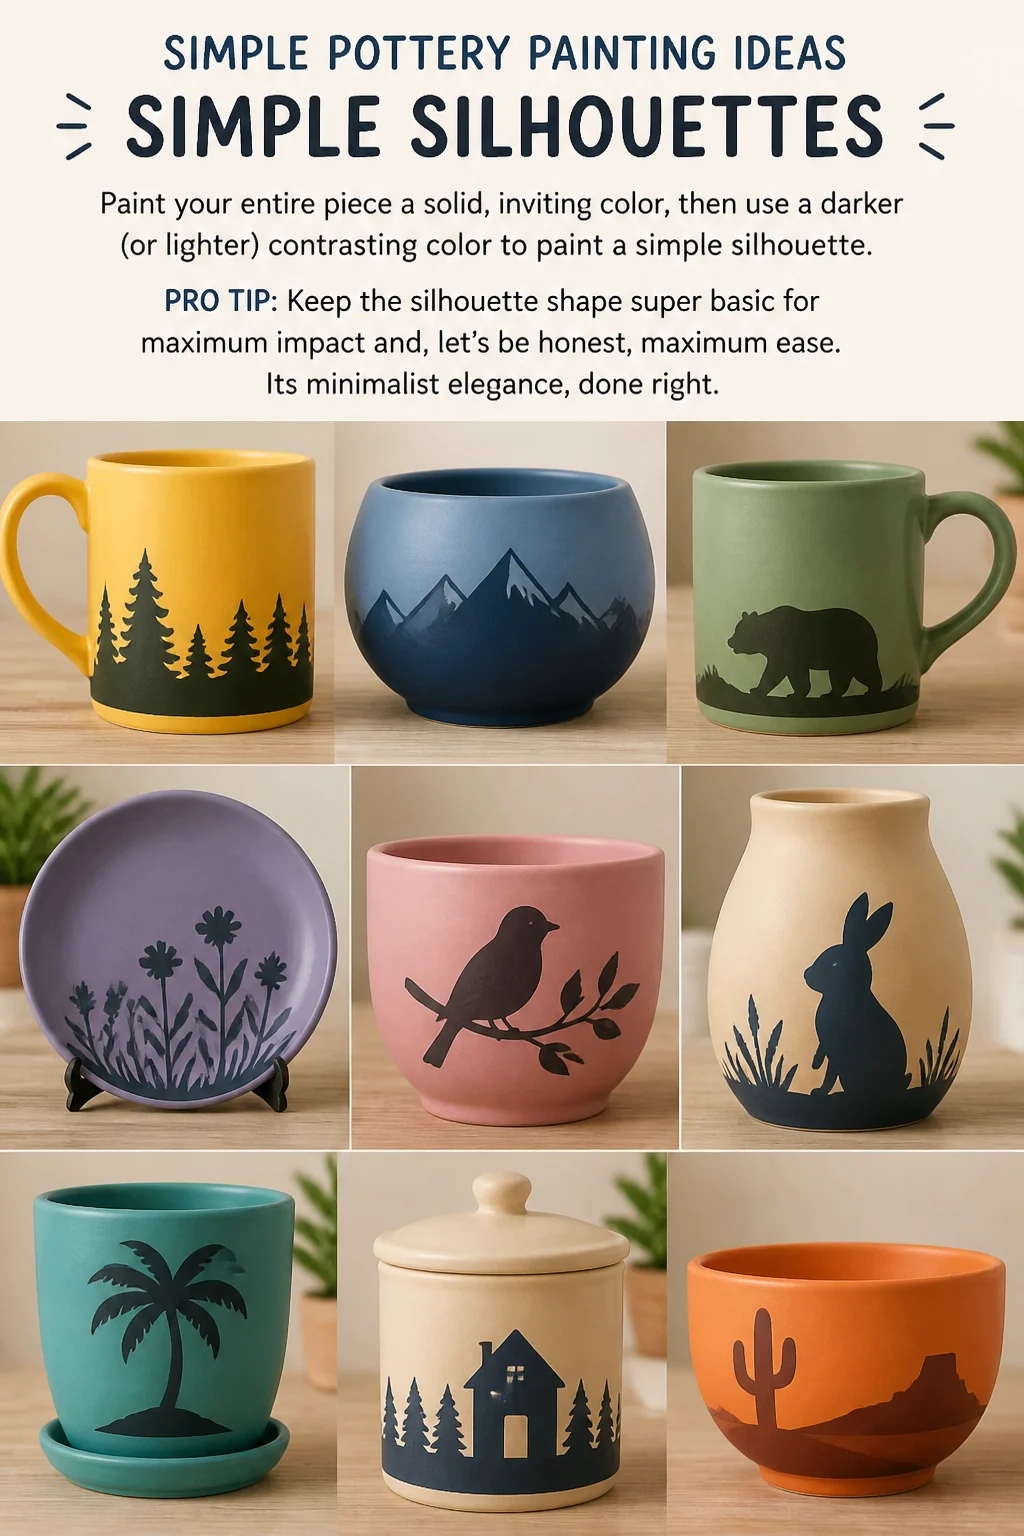
13. Simple Silhouettes
Paint your entire piece a solid, inviting color, then use a darker (or lighter) contrasting color to paint a simple silhouette. Think a tree, a mountain range, or even a charming little animal. Pro tip: Keep the silhouette shape super basic for maximum impact and, let’s be honest, maximum ease. It’s minimalist elegance, done right.
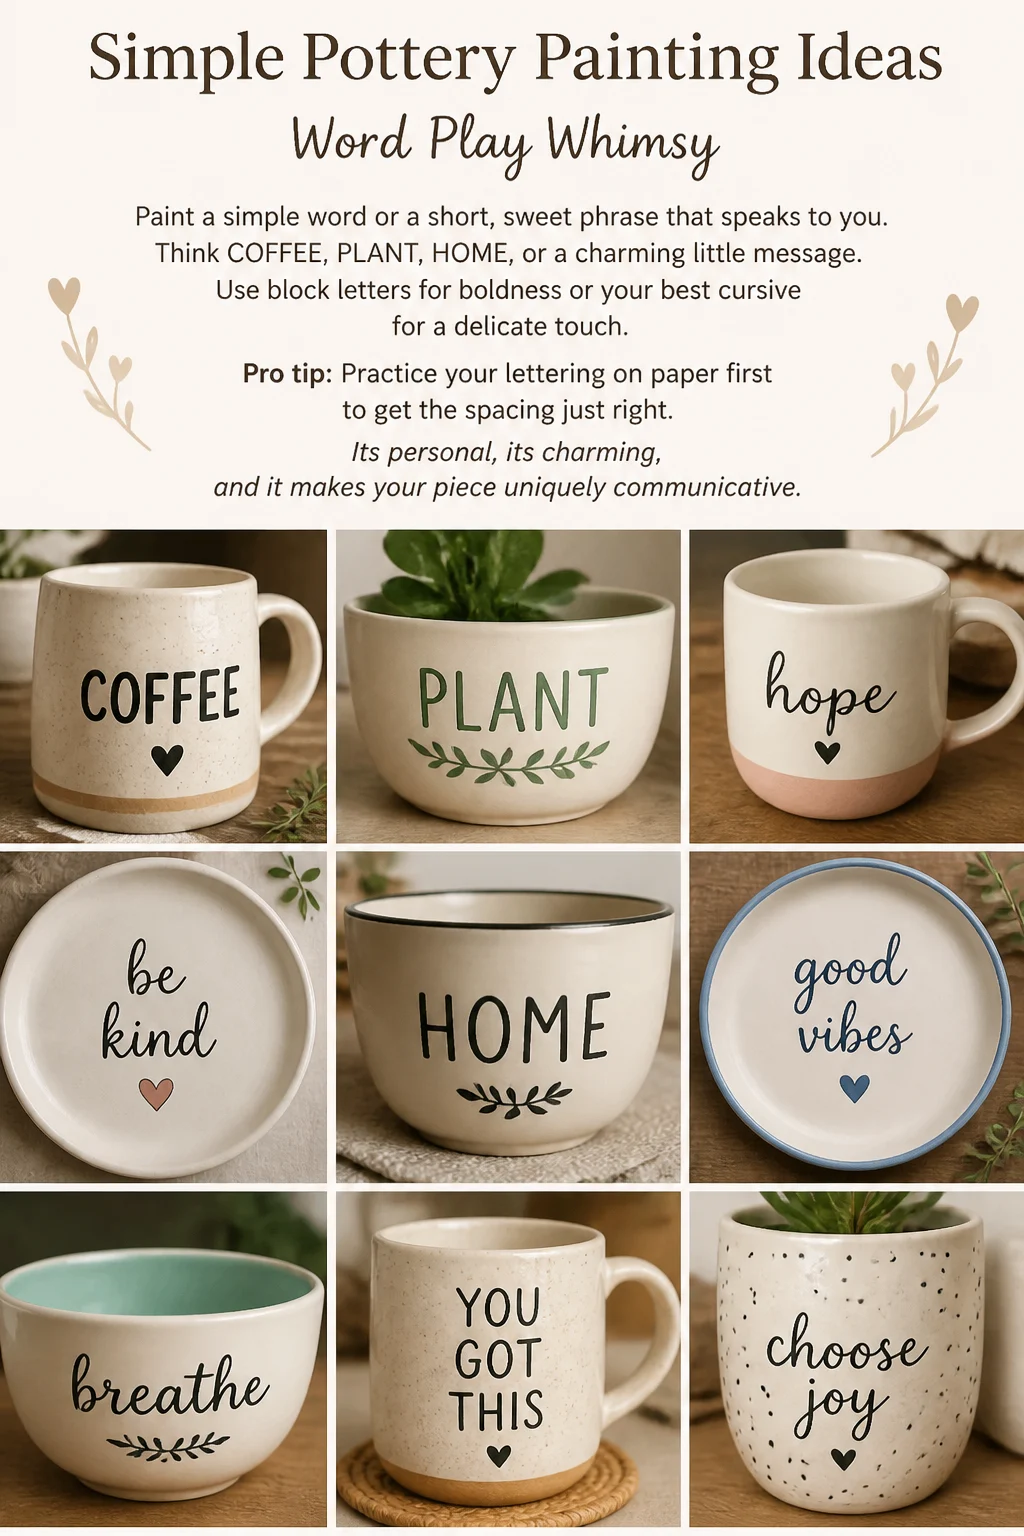
14. Word Play Whimsy
Paint a simple word or a short, sweet phrase that speaks to you. Think “COFFEE,” “PLANT,” “HOME,” or a charming little message. Use block letters for boldness or your best cursive for a delicate touch. Pro tip: Practice your lettering on paper first to get the spacing just right. It’s personal, it’s charming, and it makes your piece uniquely communicative.
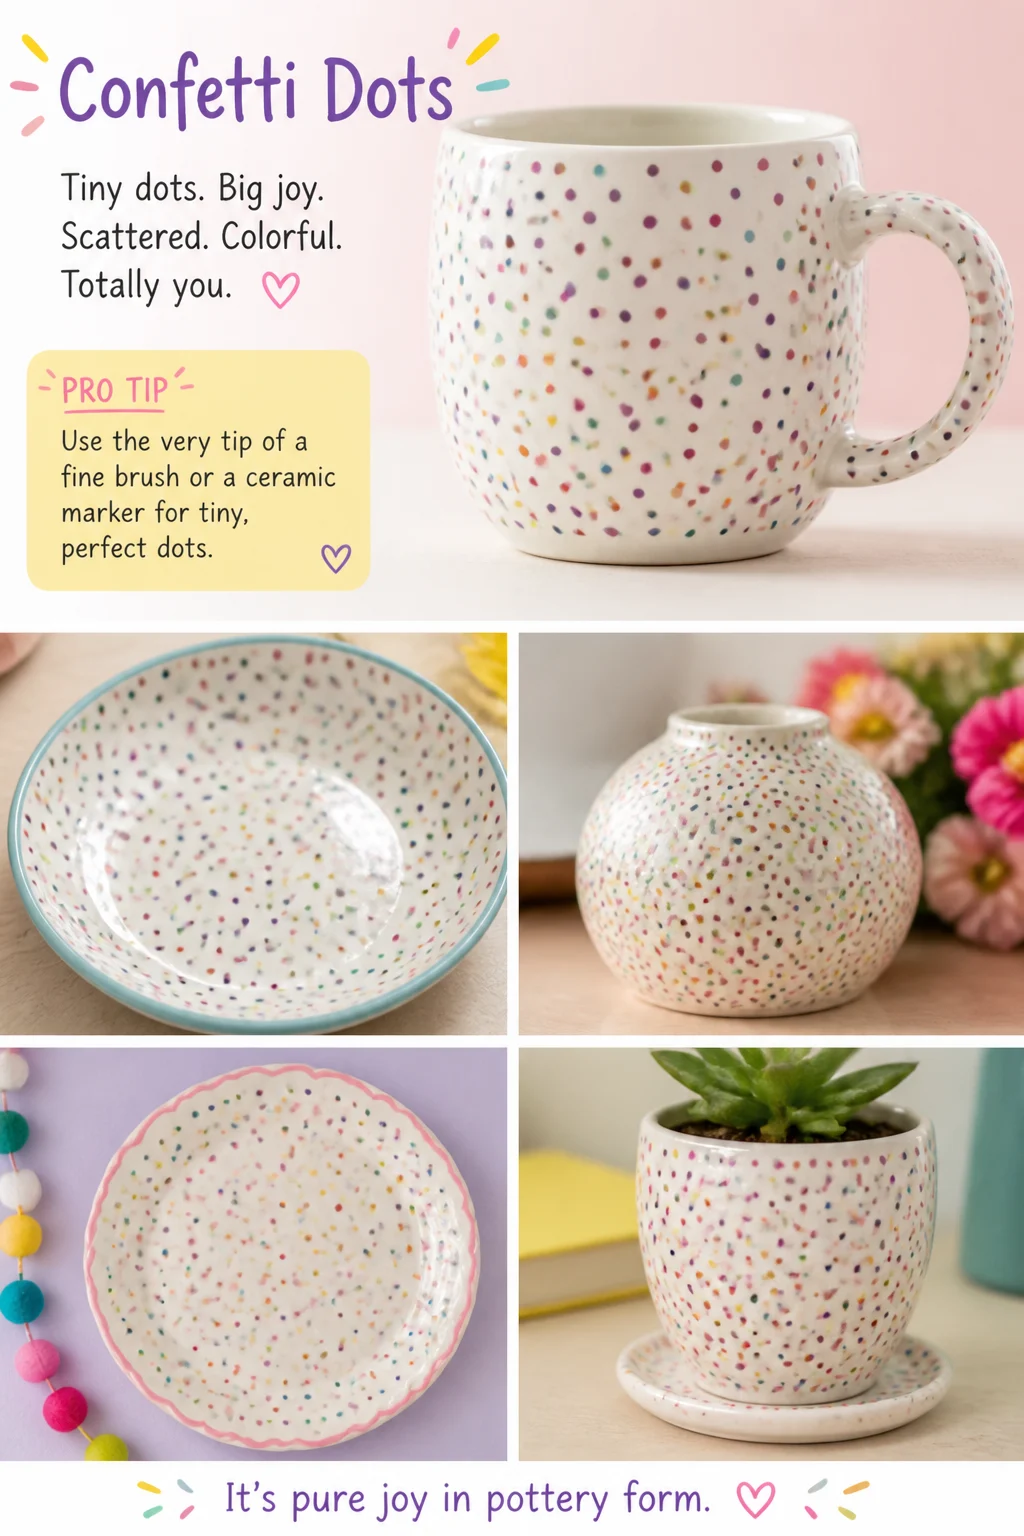
15. Confetti Dots
Similar to polka dots but smaller, more numerous, and scattered with delightful randomness. Think tiny specks of color like fallen confetti, bringing a party to your pottery. Use several bright colors for a truly festive and joyful feel. Pro tip: Use the very tip of a fine brush or a ceramic marker for these tiny, perfect dots. It’s pure joy in pottery form.
✨ New Member Etsy Shops (100% Unsponsored!)
We are incredibly proud of the talent in this community! 💖 We've rounded up some gorgeous new Etsy shops launched by our very own members.
There are ZERO affiliate links in this post—just 100% pure support for our makers. Click below to shop small, show them some love, and find your new favorite items! 👇🛍️


Conclusion
See? Told you it wasn’t rocket science. Pottery painting is all about having a good time, making something uniquely yours, and maybe getting a little messy in the process. So grab some bisque, pick your favorite idea (or mix and match!), and unleash that inner artist. Your shelves are begging for some fresh, hand-painted flair!