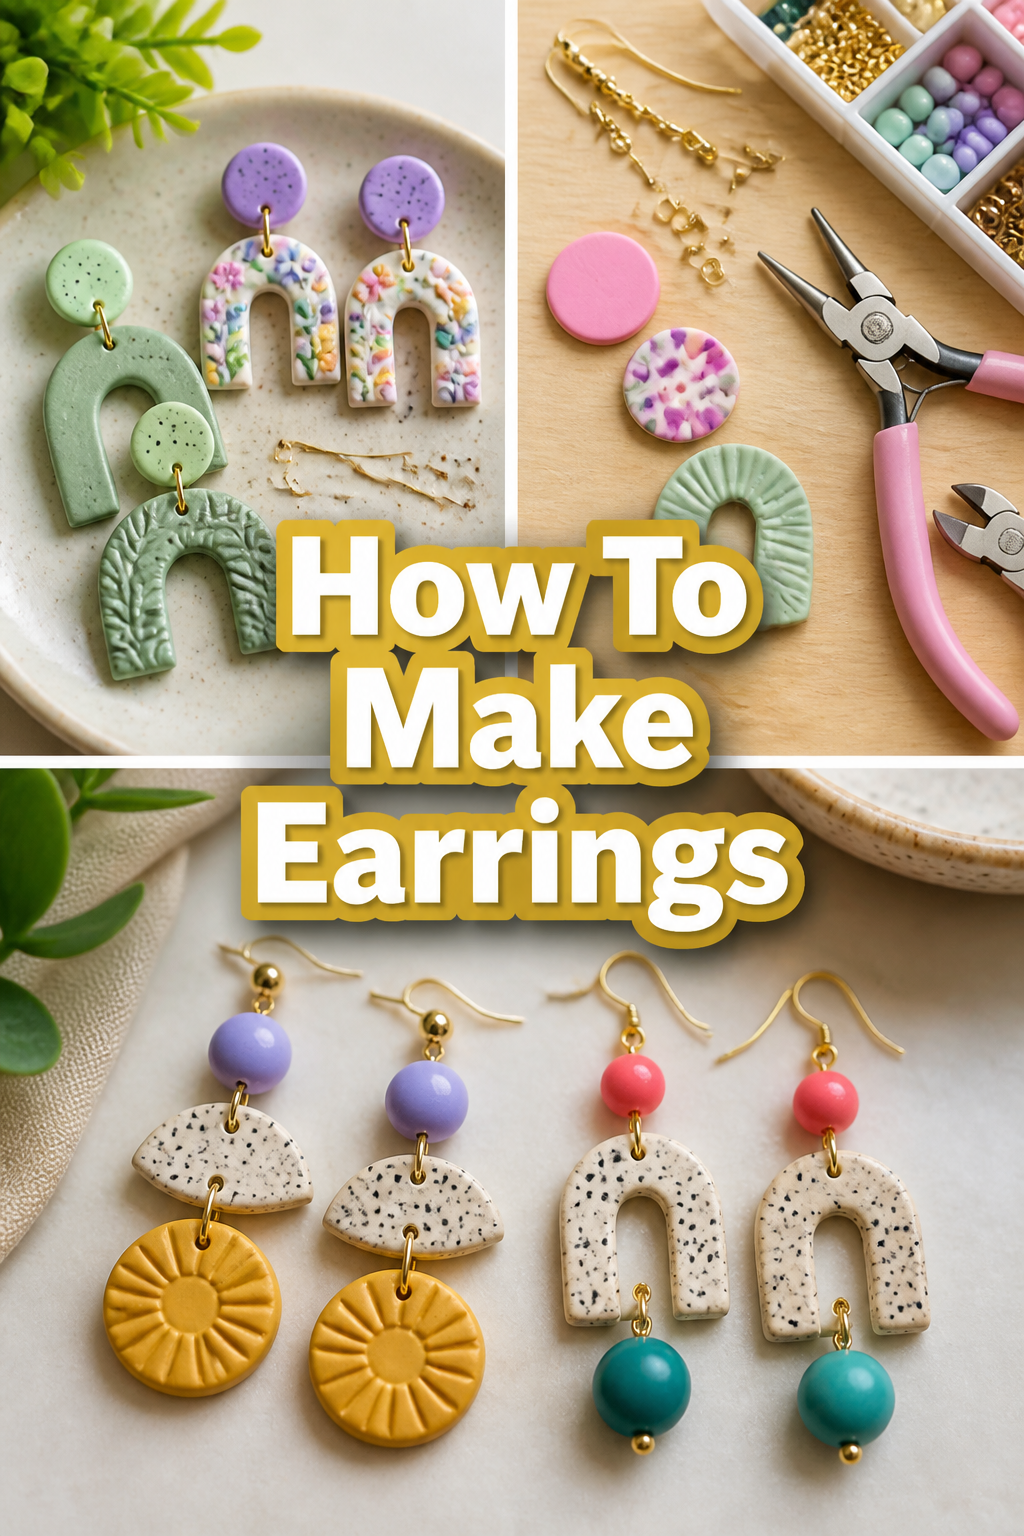
🎨 How To Make Earrings
🛠️ The Ultimate Maker's Toolkit
I've tested thousands of craft tools over the years. Whether you are quilting, crafting, or building mixed-media art, these are the top 5 absolute non-negotiable tools I personally recommend to guarantee professional results.
🪡 SINGER Heavy Duty 4452 Sewing Machine
The sewing community highly recommends this as the ultimate "bulletproof" entry-level machine. Its heavy metal frame powerfully pushes through thick denim and heavy quilt layers that would instantly jam a standard plastic machine.
✂️ Fiskars 8" Orange-Handled Scissors
Never settle for dull dollar-store blades. Wirecutter repeatedly names Fiskars the absolute best all-purpose craft scissor due to its legendary precision-ground blades and an ergonomic grip that prevents hand-cramping.
🔥 Gorilla Dual Temp Hot Glue Gun
Named Wirecutter's top choice because it literally does the work of two tools. It features dual-temperature settings offering low heat for delicate florals and blistering high heat for heavy wood adhesion repairs.
🖌️ Mod Podge Waterbase Gloss Sealer
The absolute undisputed champion of decoupage and paper crafts. Experts rely exclusively on this exact water-based formula because it glues, seals, and finishes beautifully without yellowing or flaking over time.
🎨 Apple Barrel Acrylic Paint (2 oz)
The quintessential, incredibly inexpensive craft paint. Woodworkers and hobby painters swear by its smooth flow and matte finish, providing massive value and remarkably thick color coverage on rough surfaces.
There is a unique kind of magic in wearing jewelry you crafted with your own hands.
I started making earrings ten years ago when I couldn’t find the perfect shade of blue to match a favorite dress.
Since then, I have designed hundreds of pairs and taught many friends how to master this surprisingly simple craft.

Quick Overview
Making your own earrings is a rewarding hobby that combines fine motor skills with artistic expression.
In this guide, you will learn how to create a classic pair of beaded drop earrings from scratch.
- Time needed: 30 to 45 minutes
- Difficulty: Beginner
- What you’ll need: Pliers (round-nose, chain-nose, and cutters), headpins, beads, and ear wires.
Step-by-Step Instructions
Step 1: Organize Your Workspace
Clear a flat, well-lit surface before you begin your project.
Lay down a bead mat or a piece of soft felt to prevent your beads from rolling away while you work.
Sort your beads by size and color so you can easily see your options as you design.
Pro Tip: Using a white or light-colored mat makes it much easier to see small silver or gold components.
Step 2: Choose Your Beads and Design
Select the beads you want to use for your first pair of earrings.
Arrange them in the order you want them to appear on the earring, starting from the bottom and working up.
Consider the weight of the beads, as heavy stones can become uncomfortable if worn for long periods.
Experiment with different textures, such as mixing smooth glass beads with faceted crystals or wooden spacers.
Step 3: Prepare the Headpin
Pick up a headpin, which is a thin piece of wire with a flat “head” at one end to stop beads from falling off.
Slide your beads onto the headpin in the exact order you planned during the design phase.
Push the beads all the way down so they rest firmly against the flat head of the pin.
Check that there is at least one inch of bare wire remaining at the top of the beads.
Pro Tip: If your bead hole is too large and slides over the headpin, add a tiny “seed bead” at the bottom first.
Step 4: Create a 90-Degree Bend
Grip the wire with your chain-nose pliers just above the top bead.
Bend the wire away from you at a sharp 90-degree angle.
Ensure the bend is as close to the bead as possible to prevent the beads from wobbling later.
Verify that the wire is straight and the angle is crisp before moving to the next step.
Step 5: Trim the Excess Wire
Measure about 10 millimeters (roughly 3/8 of an inch) from the bend you just made.
Use your wire cutters to snip off the extra wire at this specific mark.
Point the wire end toward your workspace or hold it with your finger to keep the scrap from flying across the room.
Double-check that the remaining wire length is consistent for both earrings in the pair.
Step 6: Roll the Loop
Hold the very tip of the wire with your round-nose pliers.
Rotate your wrist toward the beads, wrapping the wire around the jaw of the pliers to form a circle.
Keep rolling until the tip of the wire touches the base of the 90-degree bend.
Adjust the loop with your pliers until it looks centered and symmetrical above the beads.
Pro Tip: Mark your round-nose pliers with a fine-tip marker so you always wrap the wire at the same spot for consistent loop sizes.
Step 7: Attach the Ear Wire
Locate the small loop at the bottom of your ear wire (the hook that goes through your ear).
Open this loop by twisting it sideways with your chain-nose pliers, rather than pulling it apart.
Slide the loop you created on your beaded headpin onto the open ear wire loop.
Close the ear wire loop by twisting it back into its original position until the ends meet perfectly.
Step 8: Repeat for the Second Earring
Follow the exact same steps to create the second earring of the pair.
Hold both finished earrings side-by-side to ensure they are the same length and the loops are uniform.
Make any small adjustments needed by gently bending the wire with your pliers.
Clean the ear wires with a jewelry cloth or a bit of rubbing alcohol before wearing them for the first time.
Common Mistakes to Avoid
Opening Loops Outward
Many beginners try to open loops by pulling the wire ends away from each other like a wishbone.
This weakens the metal and ruins the circular shape of the loop, making it difficult to close securely.
Always twist the wire sideways to maintain the structural integrity and shape of the circle.
Leaving Too Much Space
If you don’t make your 90-degree bend close enough to the beads, they will slide up and down on the wire.
This looks unprofessional and can cause the wire to fatigue and break over time.
Make sure your pliers are resting right against the top bead before you make that first bend.
Using the Wrong Wire Gauge
Using wire that is too thin will result in earrings that bend out of shape easily during normal wear.
Using wire that is too thick might not fit through the holes of your favorite beads.
For most beaded earrings, a 20-gauge or 22-gauge headpin provides the perfect balance of strength and flexibility.
Troubleshooting
The Loop Is Not Round
If your loop looks more like a triangle or an oval, you may be using the wrong part of the round-nose pliers.
Round-nose pliers are tapered, meaning they are thinner at the tip and thicker toward the handle.
Try to keep the wire at the same point on the pliers as you roll to ensure a consistent, circular shape.
The Wire Broke While Bending
Wire can become “work-hardened” if it is bent back and forth too many times in the same spot.
If your wire snaps, you will need to start over with a fresh headpin and be more deliberate with your movements.
Try to make your bends and loops in one smooth motion to keep the metal supple.
The Earring Feels Too Heavy
Sometimes a design looks great but feels like a lead weight on your earlobe.
If this happens, try replacing some of the stone beads with acrylic or hollow metal beads that look similar but weigh less.
You can also use a shorter headpin to reduce the overall number of beads in the design.
Key Takeaways
- Tools matter: Having a dedicated set of jewelry pliers makes the process significantly easier and more precise.
- Twist, don’t pull: Always open and close loops with a lateral twisting motion to preserve the metal’s strength.
- Consistency is key: Use markings on your tools to ensure both earrings in a pair are identical in size and shape.
- Quality materials: Use 20-gauge or 22-gauge wire for the best results in durability and ease of use.
- Design first: Laying out your beads on a mat before stringing them saves time and prevents mistakes.
- Practice makes perfect: Don’t be discouraged if your first few loops are a bit wonky; your hands will learn the rhythm.
Frequently Asked Questions
What is the best metal for sensitive ears?
If you have sensitive skin, look for ear wires made of sterling silver, 14k gold-filled, titanium, or niobium.
Avoid “base metal” or “nickel-plated” options, as nickel is a common allergen that causes itching and redness.
Where can I find unique beads for my projects?
Local craft stores are a great place to start, but you can also find treasures at vintage shops or by taking apart old necklaces.
Online marketplaces offer a massive variety of hand-blown glass, semi-precious stones, and artisan-made ceramic beads.
Do I really need three different types of pliers?
While you can technically get by with just round-nose pliers and cutters, chain-nose pliers are essential for gripping and tucking wire ends.
Each tool serves a specific purpose that contributes to a professional-looking finished product.
How do I stop my earrings from falling out?
You can slide a small clear rubber “earring back” onto the hook after you put the earring in your ear.
Alternatively, you can use “lever-back” ear wires, which have a hinged closure that locks the earring in place.
Our Top Recommended Finds
- Precision Jewelry Pliers Set: Look for a set that includes comfortable ergonomic grips to reduce hand fatigue during long crafting sessions.
- Bead Design Board: These boards feature U-shaped channels that allow you to lay out your designs and measure the length before you commit to stringing.
- Assorted Headpin Variety Pack: A pack containing various lengths and finishes (silver, gold, copper) gives you the flexibility to match any bead style.
Expand Your Jewelry Collection
Now that you have mastered the basic drop earring, the possibilities for your jewelry box are endless.
You can try creating “chandelier” earrings by adding multiple dangles to a single base or experiment with wire-wrapping techniques for a more rustic look.
Consider making a matching necklace or bracelet using the same beads to create a complete set for yourself or as a thoughtful gift.
Pick up your pliers today and let your personal style shine through your very own handmade creations.