✉️ How To Make An Envelope
& CRAFT IDEAS
Beginner-friendly tutorials, creative projects,
and weekly inspiration in your inbox.
🛠️ The Ultimate Maker's Toolkit
I've tested thousands of craft tools over the years. Whether you are quilting, crafting, or building mixed-media art, these are the top 5 absolute non-negotiable tools I personally recommend to guarantee professional results.
🪡 SINGER Heavy Duty 4452 Sewing Machine
The sewing community highly recommends this as the ultimate "bulletproof" entry-level machine. Its heavy metal frame powerfully pushes through thick denim and heavy quilt layers that would instantly jam a standard plastic machine.
✂️ Fiskars 8" Orange-Handled Scissors
Never settle for dull dollar-store blades. Wirecutter repeatedly names Fiskars the absolute best all-purpose craft scissor due to its legendary precision-ground blades and an ergonomic grip that prevents hand-cramping.
🔥 Gorilla Dual Temp Hot Glue Gun
Named Wirecutter's top choice because it literally does the work of two tools. It features dual-temperature settings offering low heat for delicate florals and blistering high heat for heavy wood adhesion repairs.
🖌️ Mod Podge Waterbase Gloss Sealer
The absolute undisputed champion of decoupage and paper crafts. Experts rely exclusively on this exact water-based formula because it glues, seals, and finishes beautifully without yellowing or flaking over time.
🎨 Apple Barrel Acrylic Paint (2 oz)
The quintessential, incredibly inexpensive craft paint. Woodworkers and hobby painters swear by its smooth flow and matte finish, providing massive value and remarkably thick color coverage on rough surfaces.
Got a letter, card, or secret snack recipe that needs a cute outfit? Let’s make an envelope that slaps—without a craft store marathon. Grab paper, a flat surface, and your inner geometry nerd. We’re going from “uhh, where’s a stamp?” to “I made this” in minutes.
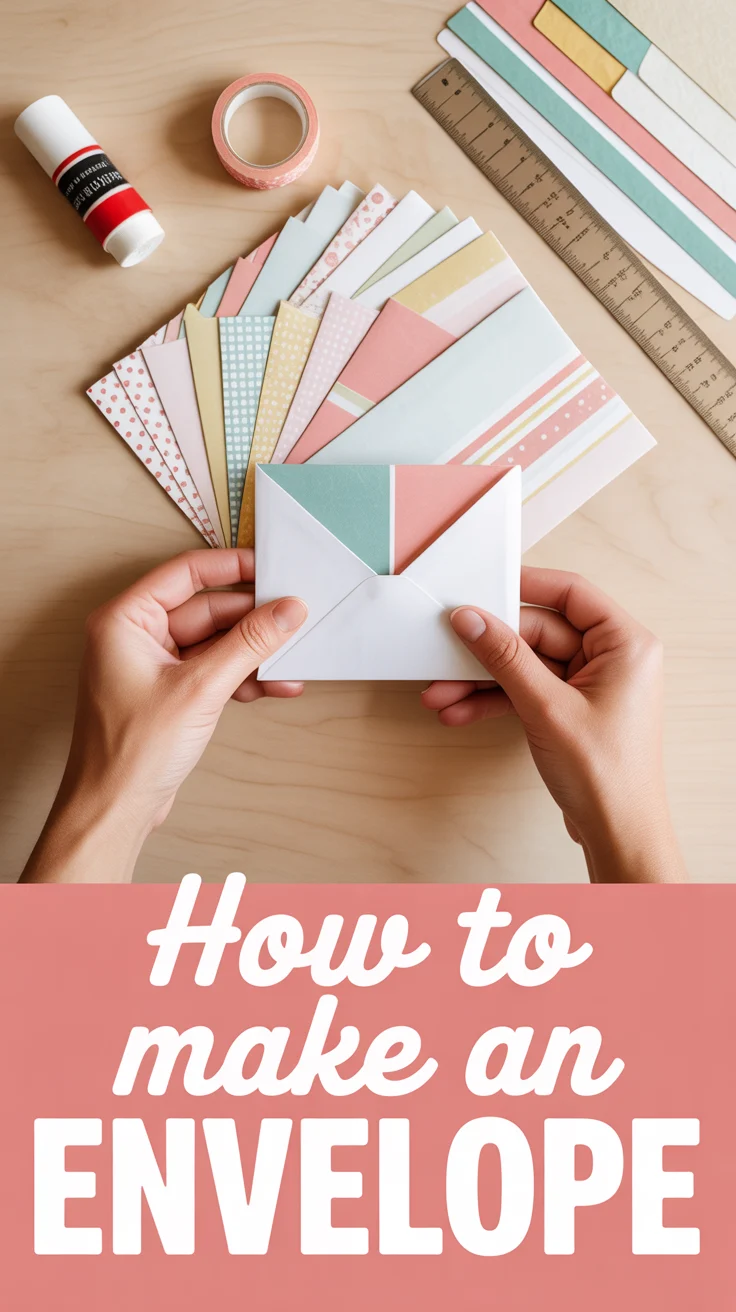
1. Classic Square Fold
Simple, sleek, and zero fuss. You’ll fold a square sheet into a tidy diamond that hugs your card perfectly.
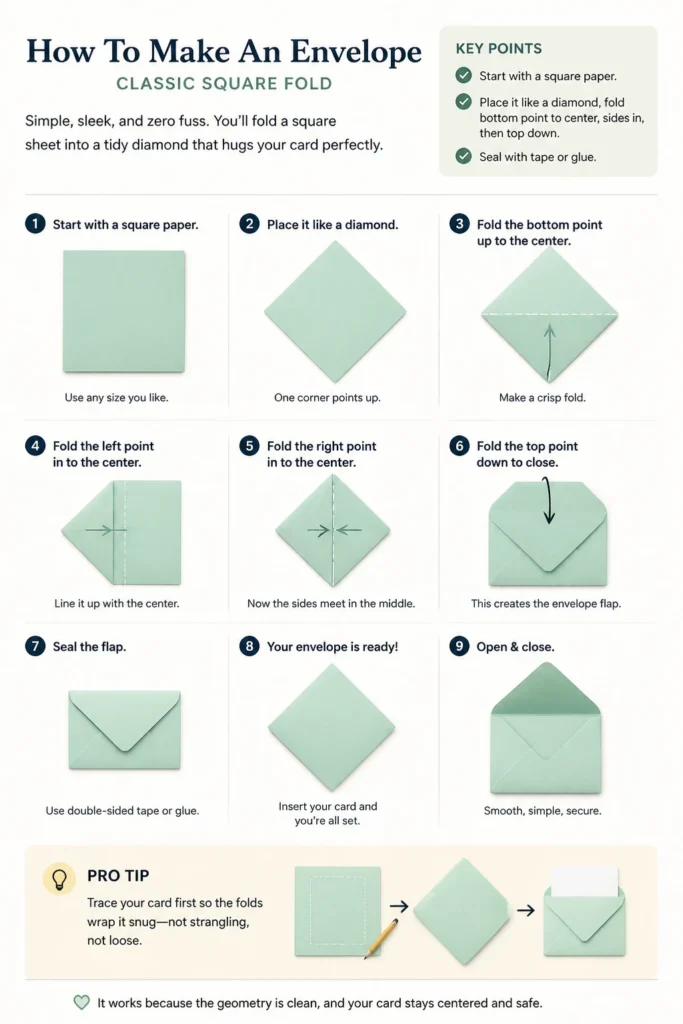
Key points: Start with a square paper. Place it like a diamond, fold bottom point to center, sides in, then top down. Seal with tape or glue.
Pro tip: Trace your card first so the folds wrap it snug—not strangling, not loose.
It works because the geometry is clean, and your card stays centered and safe.
2. Origami Pocket Style
No glue? No problem. This fold locks itself like a tiny paper vault.
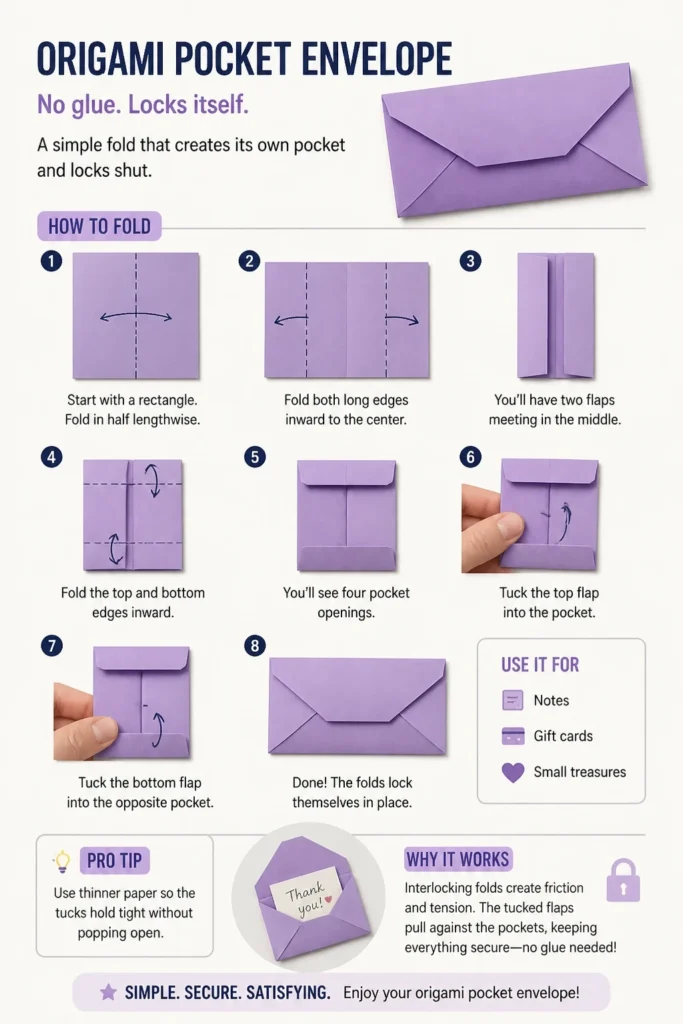
Key points: Use a rectangle. Fold in half lengthwise, create side pockets, then tuck flaps for a clean closure. Great for notes or gift cards.
Pro tip: Use thinner paper so the tucks hold tight without popping open.
It works because interlocking folds do the sealing for you—satisfying and sturdy.
3. A2 Card Envelope Template
Got a standard greeting card? Match it with a standard envelope—no guesswork.
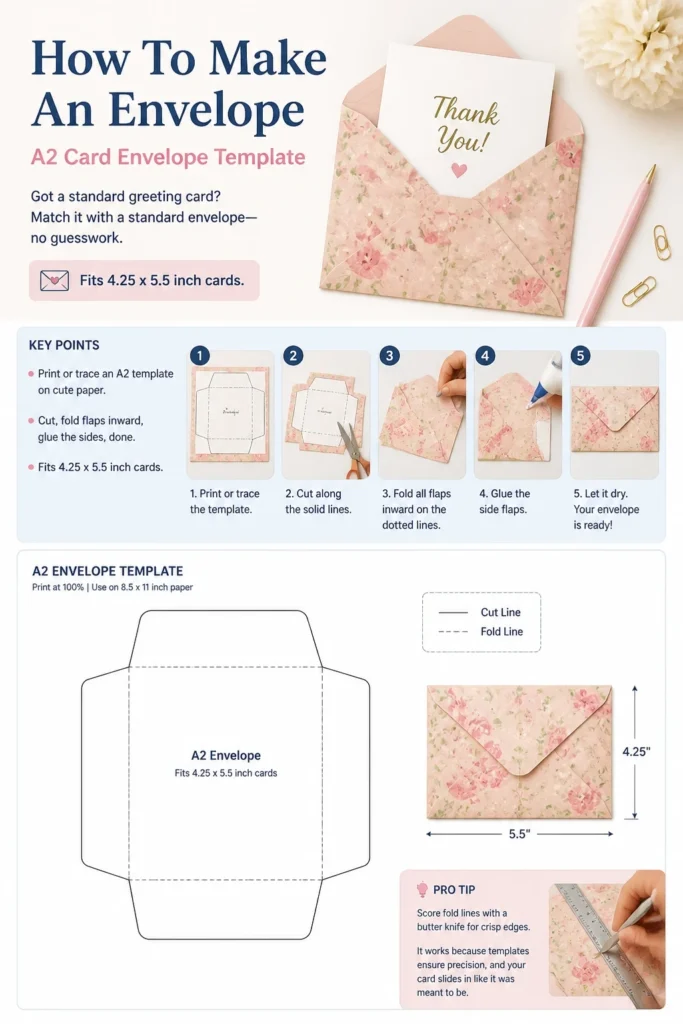
Key points: Print or trace an A2 template on cute paper. Cut, fold flaps inward, glue the sides, done. Fits 4.25 x 5.5 inch cards.
Pro tip: Score fold lines with a butter knife for crisp edges.
It works because templates ensure precision, and your card slides in like it was meant to be.
4. Square Flap with Liner
Dress your envelope in a nice outfit—inside. The liner screams “I tried.”
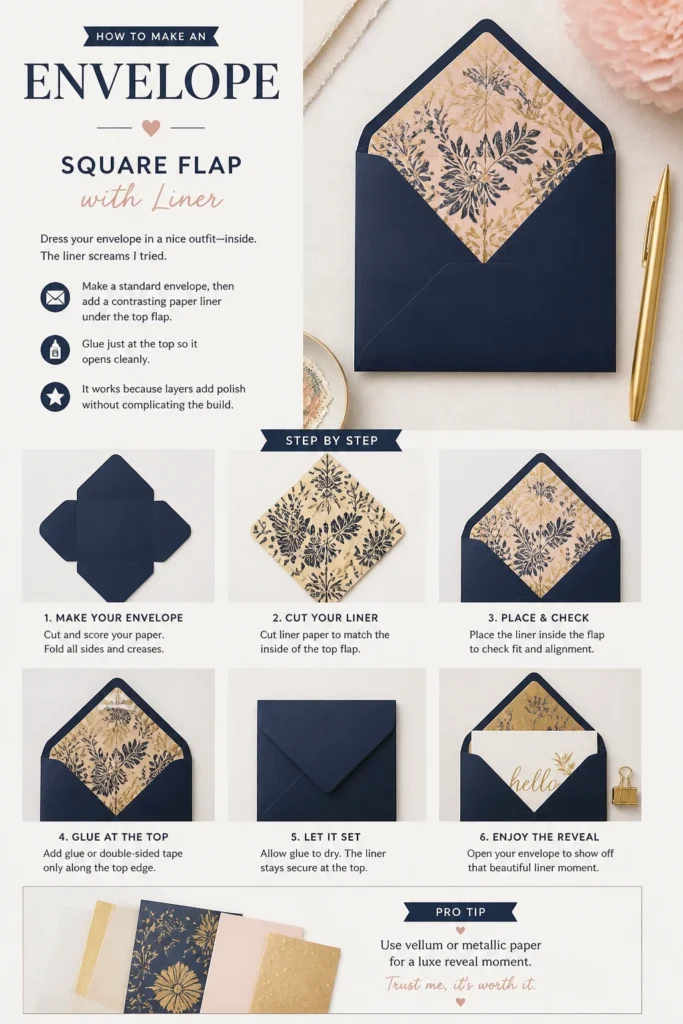
Key points: Make a standard envelope, then add a contrasting paper liner under the top flap. Glue just at the top so it opens cleanly.
Pro tip: Use vellum or metallic paper for a luxe reveal moment.
It works because layers add polish without complicating the build.
5. No-Cut Wrap Envelope
Minimalist energy: just fold your paper around the card like a snug burrito.
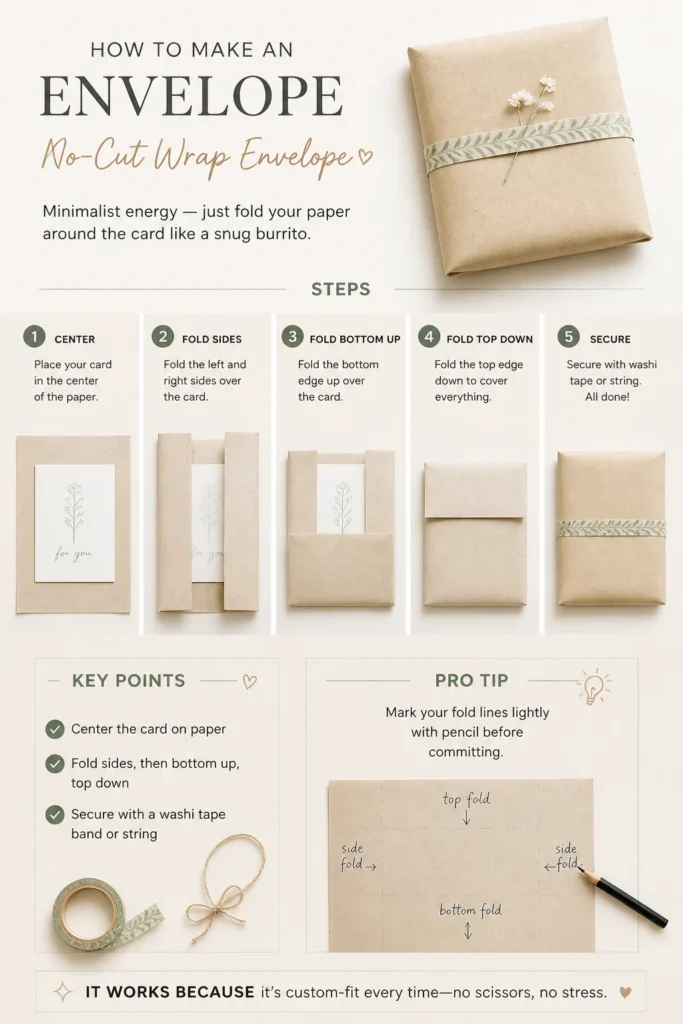
Key points: Center the card on paper, fold sides, then bottom up, top down. Secure with a washi tape band or string.
Pro tip: Mark your fold lines lightly with pencil before committing.
It works because it’s custom-fit every time—no scissors, no stress.
6. Wax Seal Finish
Instant drama. Your envelope looks like it has secrets and a royal decree.
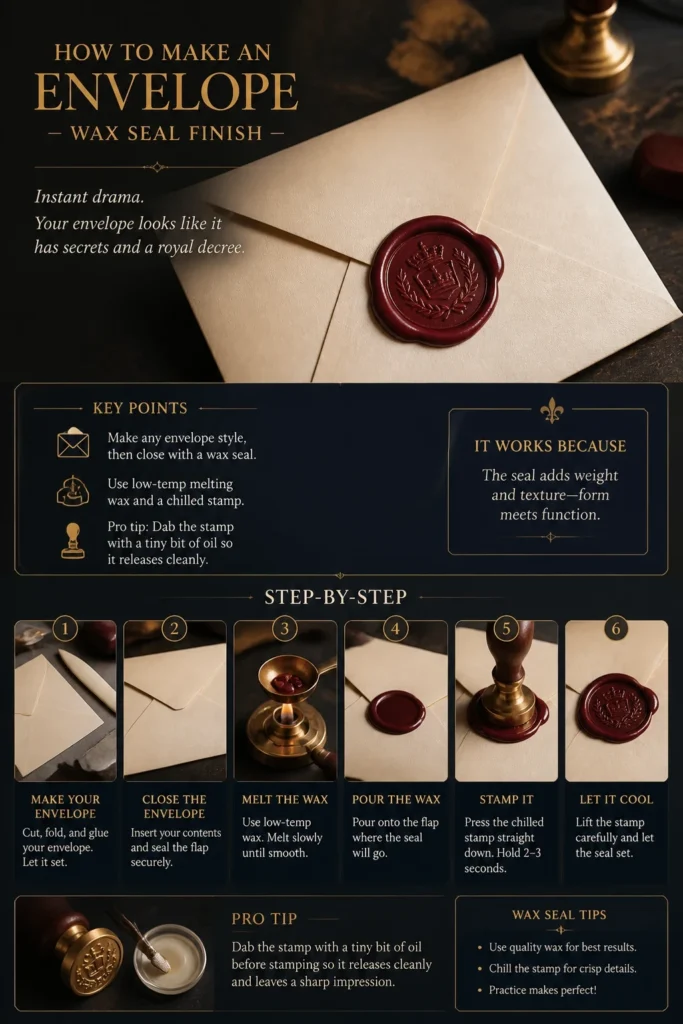
Key points: Make any envelope style, then close with a wax seal. Use low-temp melting wax and a chilled stamp.
Pro tip: Dab the stamp with a tiny bit of oil so it releases cleanly.
It works because the seal adds weight and texture—form meets function.
7. String and Button Closure
Reusable, cute, and very “studio supply.” Great for keepsakes.
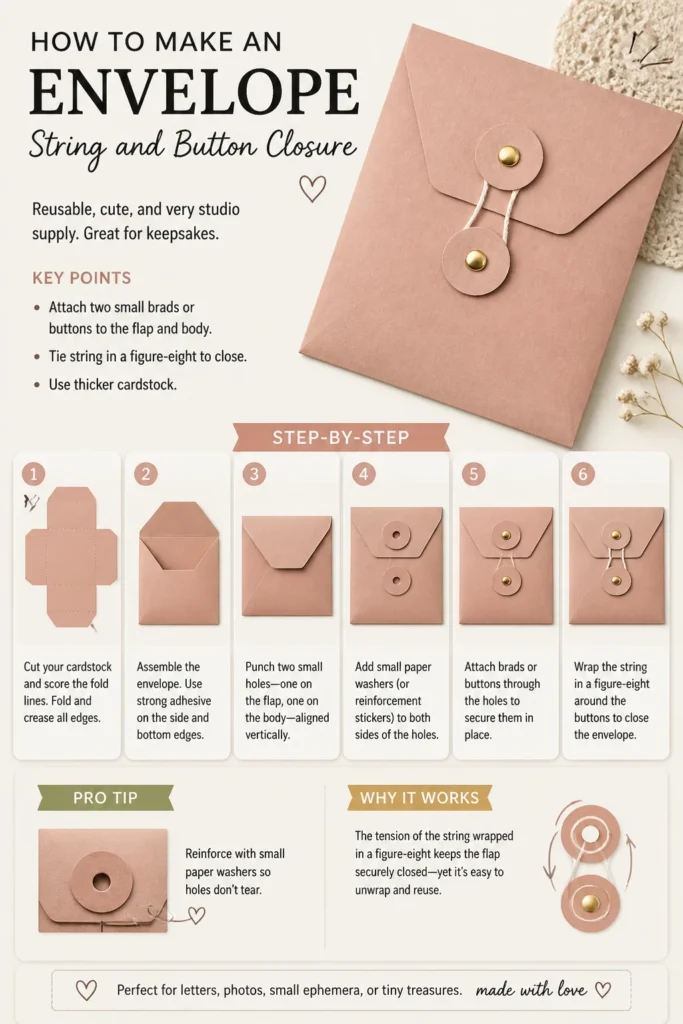
Key points: Attach two small brads or buttons to the flap and body. Tie string in a figure-eight to close. Use thicker cardstock.
Pro tip: Reinforce with small paper washers so holes don’t tear.
It works because tension keeps it closed, and it looks handcrafted in the best way.
8. Padded Envelope Hack
Mailing something delicate? Give it a cushy ride without buying bubble mailers.
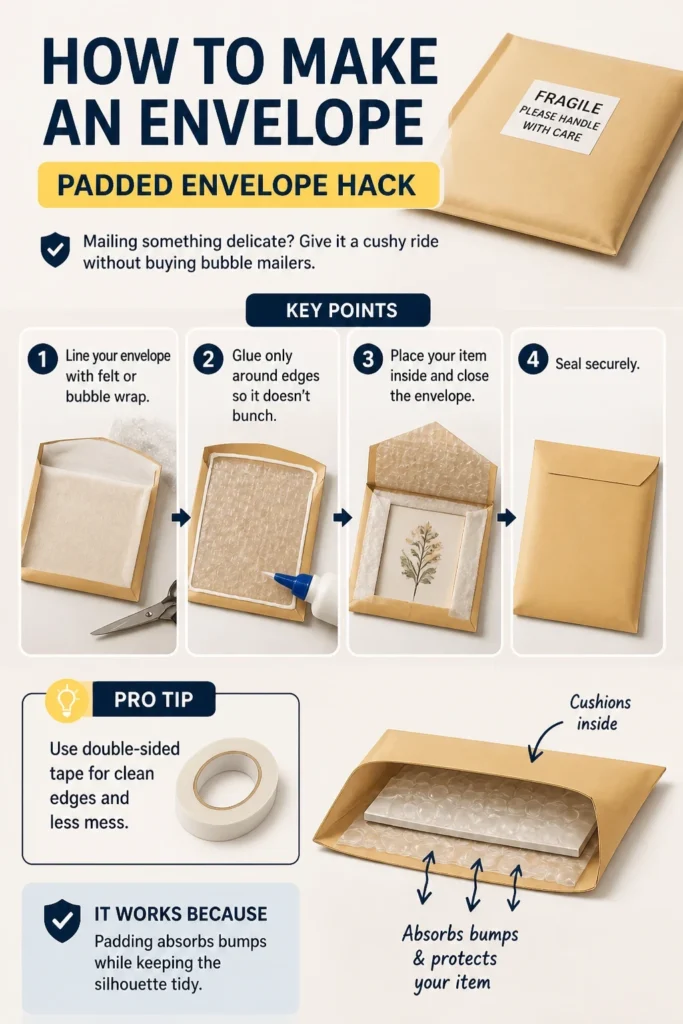
Key points: Line your envelope with felt or bubble wrap. Glue only around edges so it doesn’t bunch. Seal securely.
Pro tip: Use double-sided tape for clean edges and less mess.
It works because padding absorbs bumps while keeping the silhouette tidy.
9. Window Envelope
Let the card peek through like a little teaser trailer.
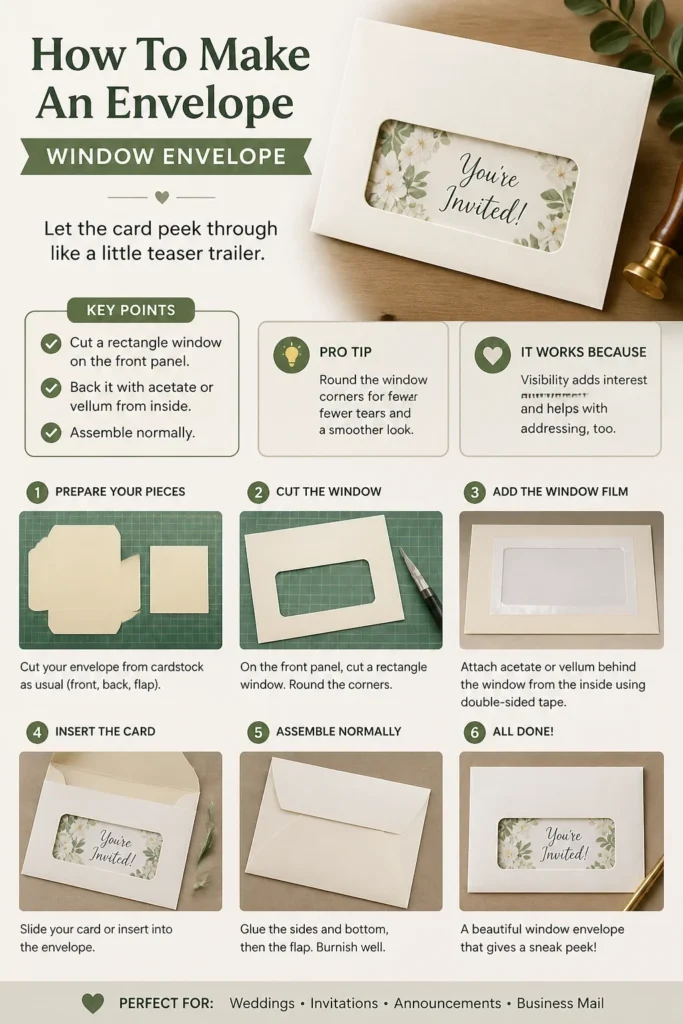
Key points: Cut a rectangle window on the front panel. Back it with acetate or vellum from inside. Assemble normally.
Pro tip: Round the window corners for fewer tears and a smoother look.
It works because visibility adds interest and helps with addressing, too.
10. Map or Magazine Page Envelope
Upcycle and flex your personality. Old maps and glossy pages make instant art.
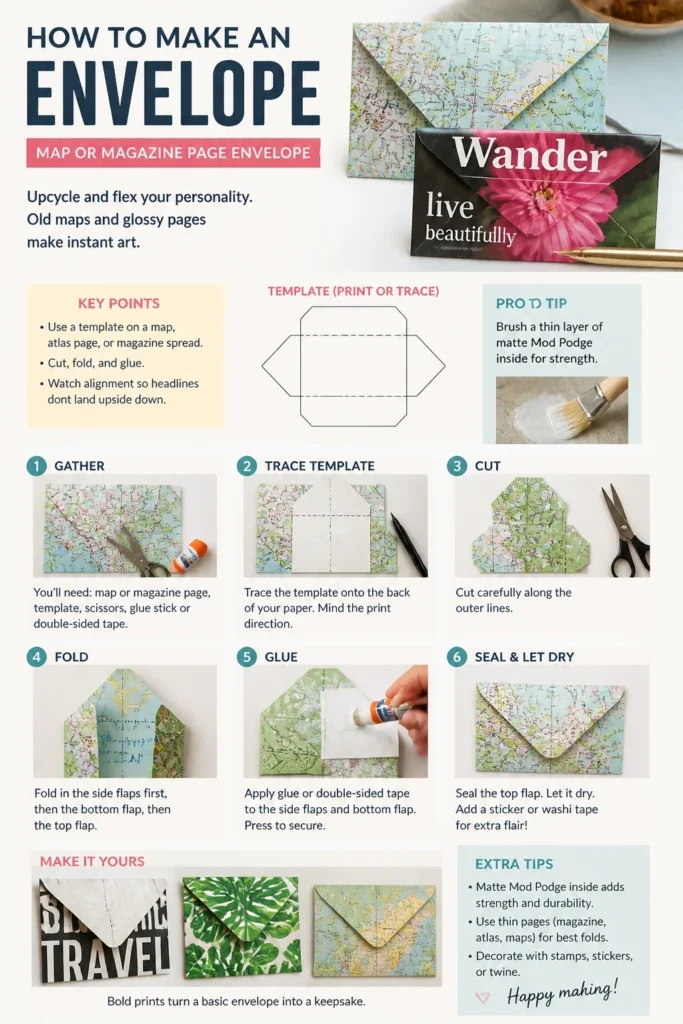
Key points: Use a template on a map, atlas page, or magazine spread. Cut, fold, and glue. Watch alignment so headlines don’t land upside down.
Pro tip: Brush a thin layer of matte Mod Podge inside for strength.
It works because bold prints turn a basic envelope into a keepsake.
Conclusion
Congrats—you just unlocked envelope wizardry. From origami pockets to wax-sealed drama, you’ve got options for every mood and mailbox. Make it fast, make it fancy, and maybe—just maybe—actually mail that card this time.
& CRAFT IDEAS
Beginner-friendly tutorials, creative projects,
and weekly inspiration in your inbox.