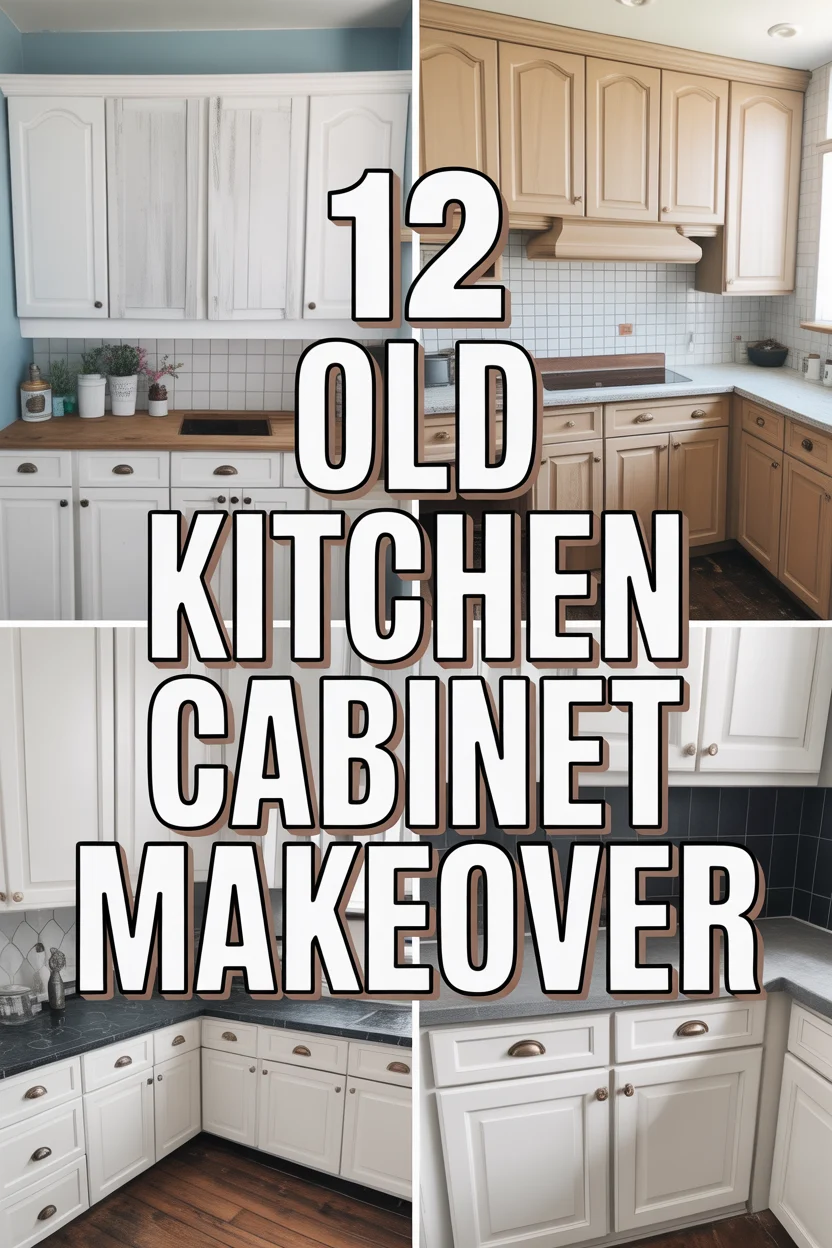
🎨 12 Old Kitchen Cabinet Makeover
🛠️ The Ultimate Maker's Toolkit
I've tested thousands of craft tools over the years. Whether you are quilting, crafting, or building mixed-media art, these are the top 5 absolute non-negotiable tools I personally recommend to guarantee professional results.
🪡 SINGER Heavy Duty 4452 Sewing Machine
The sewing community highly recommends this as the ultimate "bulletproof" entry-level machine. Its heavy metal frame powerfully pushes through thick denim and heavy quilt layers that would instantly jam a standard plastic machine.
✂️ Fiskars 8" Orange-Handled Scissors
Never settle for dull dollar-store blades. Wirecutter repeatedly names Fiskars the absolute best all-purpose craft scissor due to its legendary precision-ground blades and an ergonomic grip that prevents hand-cramping.
🔥 Gorilla Dual Temp Hot Glue Gun
Named Wirecutter's top choice because it literally does the work of two tools. It features dual-temperature settings offering low heat for delicate florals and blistering high heat for heavy wood adhesion repairs.
🖌️ Mod Podge Waterbase Gloss Sealer
The absolute undisputed champion of decoupage and paper crafts. Experts rely exclusively on this exact water-based formula because it glues, seals, and finishes beautifully without yellowing or flaking over time.
🎨 Apple Barrel Acrylic Paint (2 oz)
The quintessential, incredibly inexpensive craft paint. Woodworkers and hobby painters swear by its smooth flow and matte finish, providing massive value and remarkably thick color coverage on rough surfaces.
Your kitchen currently looks like a 1970s horror movie set.
Those orange oak cabinets are staring you down every morning.
It is time to stop crying into your cereal and start painting.
Check out these easy ways to fix your space.

1. Two-Tone Paint
- Best For: Indecisive decorators
- Vibe: High-end designer kitchen
- Why it works: Darker bottom cabinets ground the room while light tops keep it airy.
Paint your lower cabinets a moody Hale Navy or Forest Green. Keep the uppers a crisp Chantilly Lace white for contrast. This trick makes your ceiling feel way higher than it actually is.
Pro Tip: Use a high-quality angled brush for those annoying corners.
2. Open Shelving
- Best For: People with cute dishes
- Vibe: Airy and modern
- Why it works: Removing doors instantly opens up a cramped kitchen layout.
Tear those heavy doors right off the hinges. Patch the holes with wood filler and sand them smooth. Now everyone can see your mismatched mug collection in all its glory.
Pro Tip: Only do this if you actually wash your dishes regularly.
3. Shaker Trim
- Best For: Flat panel victims
- Vibe: Classic farmhouse
- Why it works: Adding thin strips of wood creates expensive-looking depth.
Buy some thin plywood strips and glue them to your flat doors. This DIY shaker style hides a multitude of sins from previous decades. Paint the whole thing for a seamless look.
Pro Tip: Use liquid nails and a brad nailer for a permanent bond.
4. Peel and Stick Paper
- Best For: Renters or the lazy
- Vibe: Temporary chic
- Why it works: It covers ugly wood grain without the mess of sanding.
Grab a roll of marble or wood grain vinyl. Carefully smooth it over the flat surfaces of your cabinets. It is basically a giant sticker for your kitchen that you can peel off later.
Pro Tip: Use a hairdryer to help the vinyl wrap around edges.
5. New Hardware
- Best For: The absolute bare minimum effort
- Vibe: Instant upgrade
- Why it works: Shiny new knobs distract the eye from old wood.
Swap those crusty brass handles for matte black pulls or satin gold knobs. It takes about twenty minutes and a screwdriver. You will feel like a professional contractor without the sweat.
Pro Tip: Measure the center-to-center distance of your current holes before buying.
6. Glass Inserts
- Best For: Showing off the good china
- Vibe: Sophisticated bistro
- Why it works: Reflective surfaces bounce light around a dark room.
Cut out the center panel of your door and replace it with fluted or frosted glass. It adds a custom look for a fraction of the price of new cabinets. Use clear silicone to hold the glass in place.
Pro Tip: Frosted glass hides the fact that your pantry is a mess.
7. Under Cabinet Lighting
- Best For: Midnight snackers
- Vibe: Warm and expensive
- Why it works: Good lighting makes even cheap cabinets look high-end.
Stick some LED light strips underneath the upper cabinets. It illuminates your quartz or butcher block countertops perfectly. You can even find motion-sensor versions that plug into the wall.
Pro Tip: Choose warm white bulbs to avoid that sterile hospital feeling.
8. Distressed Finish
- Best For: People who hate perfection
- Vibe: Rustic cottage
- Why it works: Scuffs and scratches just add to the character.
Paint your cabinets and then hit the edges with sandpaper. This shabby chic look is very forgiving if you have kids or pets. Finish it with a dark wax to bring out the details.
Pro Tip: Focus on the areas that would naturally wear down over time.
9. Beadboard Backing
- Best For: Coastal enthusiasts
- Vibe: Beach house vibes
- Why it works: Vertical lines make short cabinets look much taller.
Glue beadboard panels to the back of open cabinets or the sides of the island. It adds textural interest that paint alone cannot provide. Paint it a soft sage green for the ultimate look.
Pro Tip: Buy the pre-primed panels to save yourself a massive headache.
10. Hidden Storage
- Best For: Clutter bugs
- Vibe: Organized bliss
- Why it works: Utilizing the inside of doors doubles your space.
Screw spice racks or cork boards to the inside of your cabinet doors. This clears off your cluttered countertops instantly. It is the smartest way to use dead space in a small kitchen.
Pro Tip: Use heavy-duty command strips if you are afraid of drilling.
11. Chalk Paint
- Best For: Sanding haters
- Vibe: Matte and velvety
- Why it works: It sticks to almost anything without a primer.
Slap some chalk-style paint directly onto that old varnish. It covers grime and grease like a total champion. You get a vintage matte finish that feels incredibly smooth to the touch.
Pro Tip: You must use a clear topcoat or the paint will chip off.
12. Interior Pops of Color
- Best For: Secret bold personalities
- Vibe: Unexpected joy
- Why it works: It is a fun surprise every time you grab a plate.
Paint the inside of your cabinets a bright, shocking color like canary yellow. Keep the outside neutral to maintain your sanity. It is like a party for your plates hidden behind closed doors.
Pro Tip: Use a glossy finish inside to make cleaning up spills easier.
Our Top Recommended Finds
- A high-density foam roller ensures your paint looks like a factory finish rather than a DIY disaster.
- Deglossing cleaner removes years of bacon grease so your new look actually sticks to the wood.
- Hardware templates prevent you from drilling crooked holes and ruining your hard work on the doors.
Which of these will you try first?
Your kitchen does not have to stay stuck in the past forever.
Pick one project this weekend and finally reclaim your space from the 1970s.
Are you going for a bold color or just swapping the knobs for a quick win?