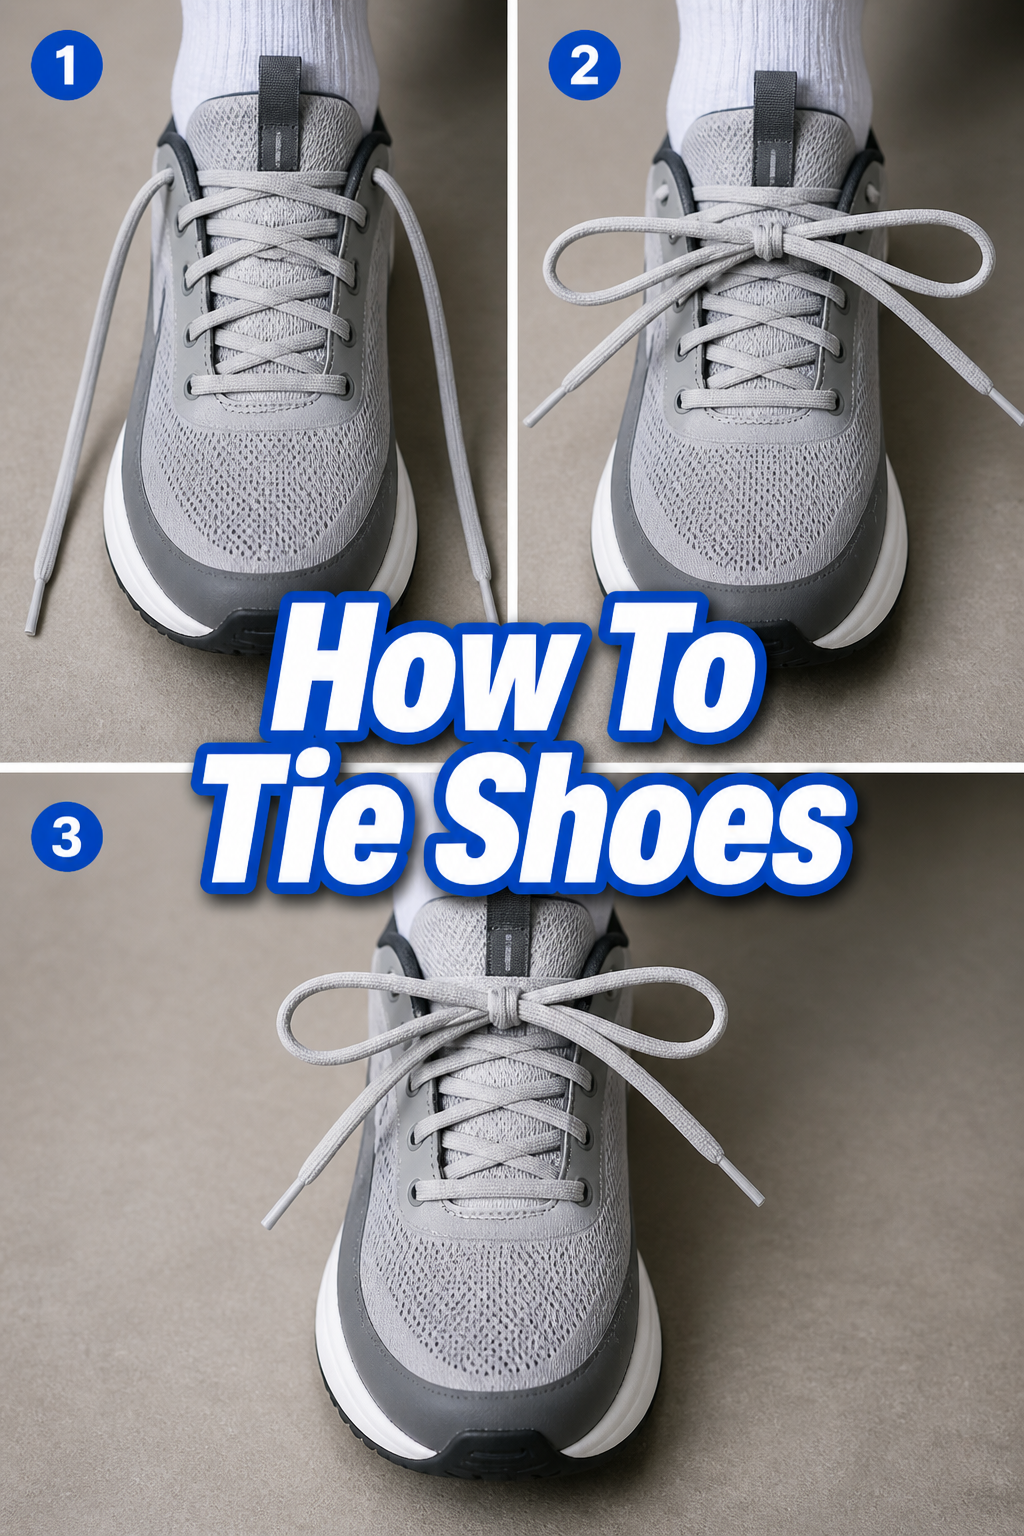
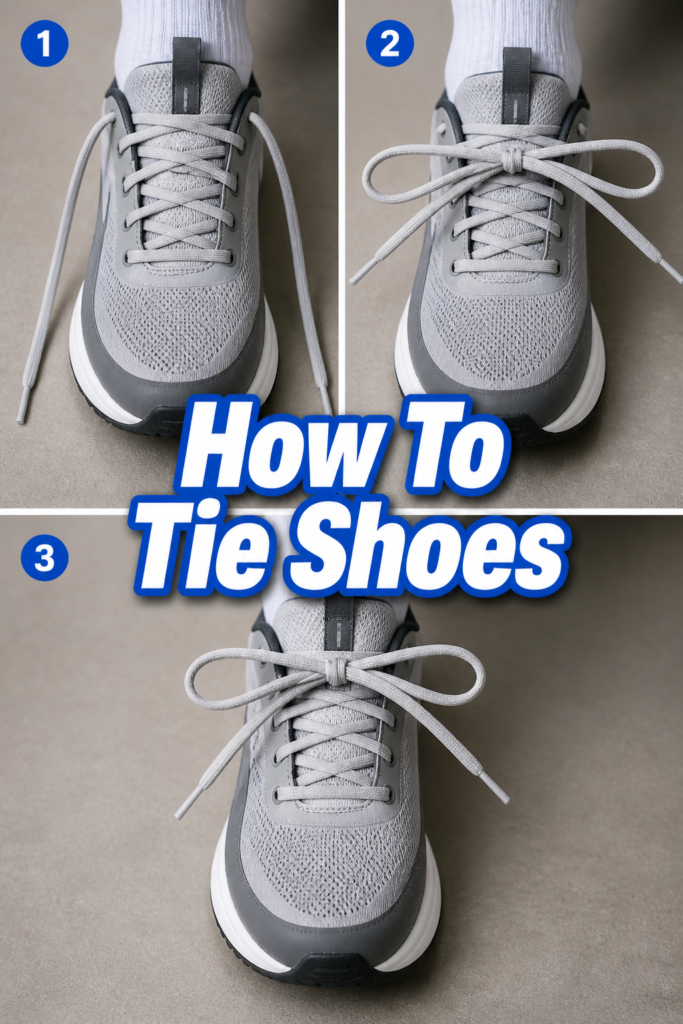
👟 How To Tie Shoes
🛠️ The Ultimate Maker's Toolkit
I've tested thousands of craft tools over the years. Whether you are quilting, crafting, or building mixed-media art, these are the top 5 absolute non-negotiable tools I personally recommend to guarantee professional results.
🪡 SINGER Heavy Duty 4452 Sewing Machine
The sewing community highly recommends this as the ultimate "bulletproof" entry-level machine. Its heavy metal frame powerfully pushes through thick denim and heavy quilt layers that would instantly jam a standard plastic machine.
✂️ Fiskars 8" Orange-Handled Scissors
Never settle for dull dollar-store blades. Wirecutter repeatedly names Fiskars the absolute best all-purpose craft scissor due to its legendary precision-ground blades and an ergonomic grip that prevents hand-cramping.
🔥 Gorilla Dual Temp Hot Glue Gun
Named Wirecutter's top choice because it literally does the work of two tools. It features dual-temperature settings offering low heat for delicate florals and blistering high heat for heavy wood adhesion repairs.
🖌️ Mod Podge Waterbase Gloss Sealer
The absolute undisputed champion of decoupage and paper crafts. Experts rely exclusively on this exact water-based formula because it glues, seals, and finishes beautifully without yellowing or flaking over time.
🎨 Apple Barrel Acrylic Paint (2 oz)
The quintessential, incredibly inexpensive craft paint. Woodworkers and hobby painters swear by its smooth flow and matte finish, providing massive value and remarkably thick color coverage on rough surfaces.
Learning to tie your shoes is a small step that opens up a world of independence and confidence.
I remember the sheer joy of finally mastering this skill as a kid, feeling like I could conquer anything.
This guide will walk you through each movement with patience and clarity, helping you achieve that same triumphant feeling.
Quick Overview
You’re about to gain a fundamental life skill, transforming unruly laces into a neat, secure bow.
By the end of this guide, you’ll be confidently tying your shoes, ready for any adventure.
- Time needed: 15-30 minutes for initial learning, then a few seconds per tie.
- Difficulty: Beginner
- What you’ll need: A pair of shoes with laces, or just two pieces of string.
Step-by-Step Instructions
Step 1: Prepare Your Laces and Find Your Grip
First, make sure your shoes are on your feet, or place them comfortably in front of you if you’re practicing.
Ensure the laces are completely untangled and lying flat, ready to be worked with.
Hold one lace in each hand, near the eyelets closest to your toes, allowing enough slack for comfortable movement.
Take a moment to feel the laces, noticing their texture and flexibility. This initial connection is key.
Pro Tip: If you’re struggling with dexterity, try using two different colored shoelaces for practice. This visual distinction helps immensely in tracking which lace is which during the process.
Step 2: Create the Base Knot (The Starting X)
Bring the right lace over the top of the left lace, forming an ‘X’ shape directly above your shoe.
Once crossed, take the lace that is now underneath (it should be the original right lace, but now on the left side) and thread it up through the loop created by the ‘X’.
Pull both laces firmly, but gently, away from each other until a snug, flat knot forms at the base of your shoe’s tongue.
This foundational knot is crucial for the stability of your entire tie; it keeps everything secure.
Step 3: Form the First Bunny Ear
Now, with one of your laces (let’s say the right one), create a loop that resembles a bunny ear.
Pinch the lace near its base with your thumb and forefinger, then fold the lace back on itself to create a small, neat loop.
Hold this loop securely between your thumb and forefinger, making sure it’s firm but not overly tight.
The size of this loop will dictate the size of your final bow, so aim for a moderate, comfortable length.
Step 4: Form the Second Bunny Ear
Repeat the same process with the other lace (the left one), creating an identical second bunny ear loop.
Pinch this lace and fold it back, forming a loop that mirrors the first one in size and shape.
Hold both loops steady, one in each hand, ensuring they are roughly equal in length and tension.
Having two balanced loops sets you up for a symmetrical and strong final knot.
Pro Tip: Practice forming these loops without trying to tie them together initially. Focus on creating consistent, evenly sized loops until it feels natural. This builds muscle memory.
Step 5: Cross the Bunny Ears
Bring the first bunny ear (the one in your right hand) over the top of the second bunny ear (the one in your left hand).
Just like with the initial base knot, you’re creating another ‘X’ shape, but this time with your loops.
This crossover creates a central point where the magic of the final knot will happen.
Keep a gentle but firm grip on both loops as you perform this action.
Step 6: Tuck and Pull Through the Opening
Take the bunny ear that is now on top (the one you just moved over) and tuck it underneath the other loop, guiding it through the small opening created by the ‘X’.
Push the top loop all the way through this gap, so it emerges on the other side as a new loop.
This action can feel a bit fiddly at first, so take your time and be precise with your movements.
Once it’s through, you’ll have two new loops formed, ready for the final tightening.
Step 7: Pull Both Loops Tight
Now, grasp both of the newly formed loops firmly, one in each hand.
Pull them away from each other with a strong, even motion.
As you pull, you’ll feel the knot cinching down and tightening around the base you created in Step 2.
Keep pulling until the knot feels secure and snug against your shoe, forming a neat, symmetrical bow.
Step 8: Adjust and Secure Your Knot
Take a moment to inspect your freshly tied knot. Are the loops even? Is it centered?
Gently tug on the loops and the free ends of the laces to fine-tune the tension and appearance.
If you want extra security, especially for active days, you can create a “double knot.”
Simply take one loop and pass it over and through the other loop one more time, then pull tightly again.
Common Mistakes to Avoid
Too Loose or Too Tight Base Knot
If your initial cross-over knot (Step 2) is too loose, your entire shoelace tie will feel flimsy and come undone easily.
Conversely, pulling it too tight can make it difficult to form the bunny ears and create an uncomfortable pressure point on your foot.
Aim for a snug fit that holds the laces securely but still allows for comfortable movement and the creation of subsequent loops.
Uneven Bunny Ears
Creating loops of different sizes (Step 3 and 4) often leads to a lopsided or unstable bow.
One loop might be too long and floppy, while the other is too short and tight, making it harder to pull the final knot evenly.
Take extra time to ensure your two bunny ears are as close to identical in length as possible before moving to the next step.
Tucking in the Wrong Direction
When crossing and tucking the loops (Step 5 and 6), it’s easy to get confused about which way to thread the lace.
Tucking the top loop over and around rather than under and through the opening will result in a knot that doesn’t hold or looks incorrect.
Always aim to bring the top loop underneath the crossed loops and through the central hole, ensuring the knot locks properly.
Not Pulling Tight Enough
Many beginners are hesitant to pull the final loops (Step 7) with enough force, fearing they might break the laces or make the knot too tight.
Insufficient pulling results in a loose knot that will quickly unravel as you move, defeating the purpose of tying your shoes.
Give those loops a good, firm tug until the knot feels solid and secure, ensuring it stays put throughout your day.
Troubleshooting
My Knot Comes Undone Easily
This usually points to one of two issues: either your initial base knot wasn’t tight enough, or you didn’t pull the final loops with sufficient force.
Go back to Step 2, ensuring that first cross-over is snug against your shoe’s tongue. Then, when you reach Step 7, really give those loops a strong, decisive pull in opposite directions.
Consider adding a double knot (as mentioned in Step 8) for extra security, especially if your laces are particularly slippery or you’re very active.
I Can’t Make Even Loops
The trick here is practice and consistency in your grip. Try focusing only on Step 3 and 4 for a few minutes without attempting to tie them together.
Hold the lace with your thumb and forefinger, then use your other fingers to guide the loop formation. Pay attention to where you’re pinching the lace to start the loop.
Sometimes, simply relaxing your hands a bit can help. Tension can make your movements stiff and less precise, leading to uneven results.
My Bow Looks Lopsided or Crooked
A lopsided bow often stems from uneven tension during the final pull or loops that weren’t quite symmetrical to begin with.
After forming your two bunny ears, take a moment to visually inspect them, adjusting their size slightly if needed before crossing them over.
When you pull tight in Step 7, try to pull both loops with exactly the same amount of force and at the same angle, allowing the knot to settle evenly.
Key Takeaways
- Practice is paramount; repetition builds muscle memory and confidence.
- A solid base knot is the foundation for a secure tie.
- Aim for evenly sized bunny ears for a balanced and stable bow.
- Always tuck the top loop under and through the opening.
- Pull the final loops firmly to ensure the knot is tight and secure.
- Don’t be afraid to double knot for extra security, especially with slippery laces.
Frequently Asked Questions
What if my laces are too short or too long?
Laces that are too short make it difficult to form adequate loops and pull the knot, while overly long laces can trip you or drag on the ground. You can purchase new laces in various lengths to suit your shoe size and preferred tying method. A good rule of thumb is that tied loops should not extend past the sides of your shoe.
Is there a “faster” way to tie shoes?
Yes, once you master the basic bunny ear method, you might explore techniques like the “Ian Knot” or “two-hand knot,” which are often much faster. However, it’s best to master this fundamental method first, as it builds the foundational skills needed for more advanced techniques. Speed comes with consistent practice.
Why does one side of my bow always look bigger?
This is a very common issue and usually means you are pulling one loop tighter than the other in the final step, or your initial bunny ears were not perfectly symmetrical. Focus on creating even loops and then applying equal, consistent tension to both loops when you pull the knot tight. With practice, your hands will learn to balance the pull.
Can I practice without shoes?
Absolutely! Practicing with just two pieces of string or even two different colored shoelaces held in your hands is an excellent way to learn the movements without the distraction of your feet or the shoe itself. It allows you to focus purely on the knot formation and hand coordination, making it a fantastic learning tool.
Our Top Recommended Finds
- Colorful Practice Laces: Finding a set of laces in vibrant, contrasting colors makes learning visually intuitive and fun.
- Shoe Tying Boards: These wooden or plastic boards with attached laces provide a stable, hands-on platform for repetitive practice without needing a shoe.
- Elastic No-Tie Laces: For those days you want convenience, elastic laces offer a secure fit without the need for tying, a great alternative once you’ve mastered the skill.
Embrace Your Knot-Tying Journey
You’ve now taken the first step on a journey that will make countless everyday moments smoother and more confident.
Tying your shoes might seem small, but it’s a powerful symbol of self-reliance and skill.
Don’t just read these steps; grab a pair of shoes, or even just two strings, and start practicing today.
Feel the laces in your hands, celebrate each small success, and soon you’ll be tying your shoes with ease and a smile.