🧵 How To Crop A Shirt
& CRAFT IDEAS
Beginner-friendly tutorials, creative projects,
and weekly inspiration in your inbox.
🛠️ The Ultimate Maker's Toolkit
I've tested thousands of craft tools over the years. Whether you are quilting, crafting, or building mixed-media art, these are the top 5 absolute non-negotiable tools I personally recommend to guarantee professional results.
🪡 SINGER Heavy Duty 4452 Sewing Machine
The sewing community highly recommends this as the ultimate "bulletproof" entry-level machine. Its heavy metal frame powerfully pushes through thick denim and heavy quilt layers that would instantly jam a standard plastic machine.
✂️ Fiskars 8" Orange-Handled Scissors
Never settle for dull dollar-store blades. Wirecutter repeatedly names Fiskars the absolute best all-purpose craft scissor due to its legendary precision-ground blades and an ergonomic grip that prevents hand-cramping.
🔥 Gorilla Dual Temp Hot Glue Gun
Named Wirecutter's top choice because it literally does the work of two tools. It features dual-temperature settings offering low heat for delicate florals and blistering high heat for heavy wood adhesion repairs.
🖌️ Mod Podge Waterbase Gloss Sealer
The absolute undisputed champion of decoupage and paper crafts. Experts rely exclusively on this exact water-based formula because it glues, seals, and finishes beautifully without yellowing or flaking over time.
🎨 Apple Barrel Acrylic Paint (2 oz)
The quintessential, incredibly inexpensive craft paint. Woodworkers and hobby painters swear by its smooth flow and matte finish, providing massive value and remarkably thick color coverage on rough surfaces.
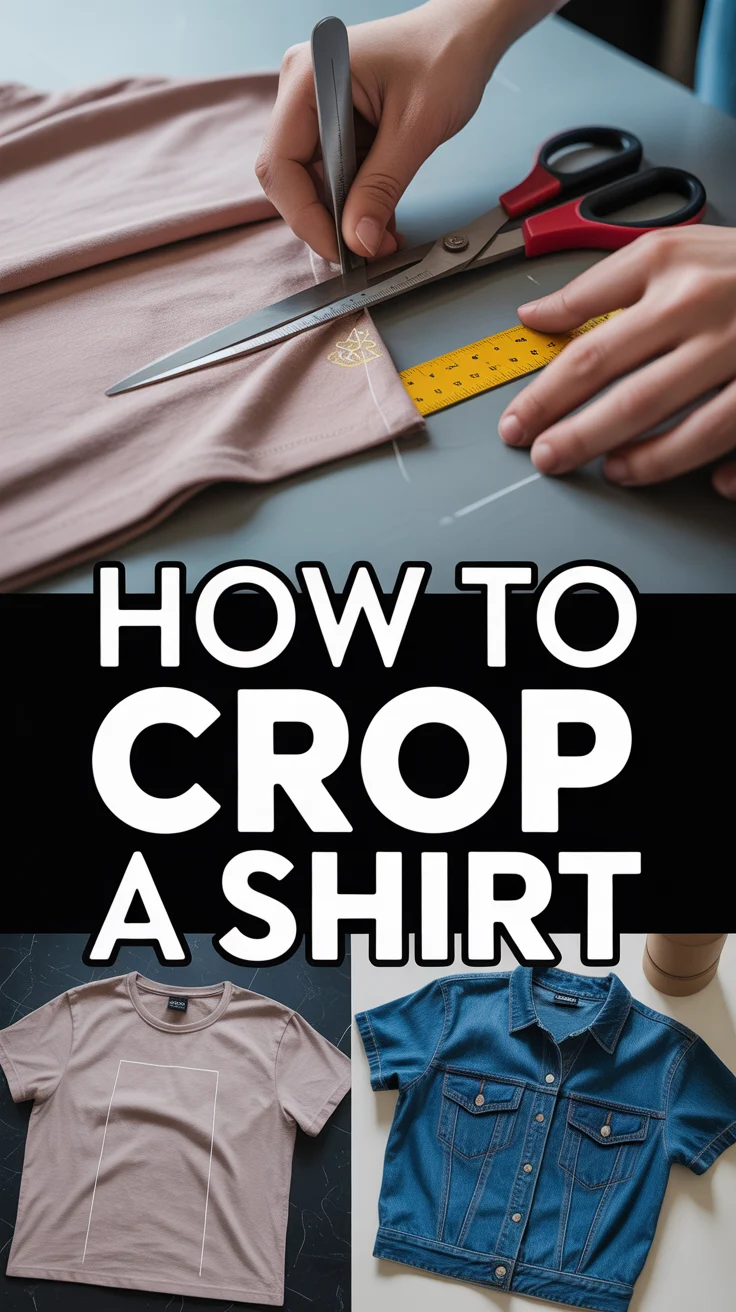
Got a shirt that’s too long, too boxy, or just… meh? Let’s turn it into a cute crop you’ll actually wear. No fashion degree required, just scissors, vibes, and a little confidence.
1. The Classic Straight Cut
Clean, simple, and fast. This is the go-to for tees and tanks. You’ll get a crisp line that shows just enough waist.
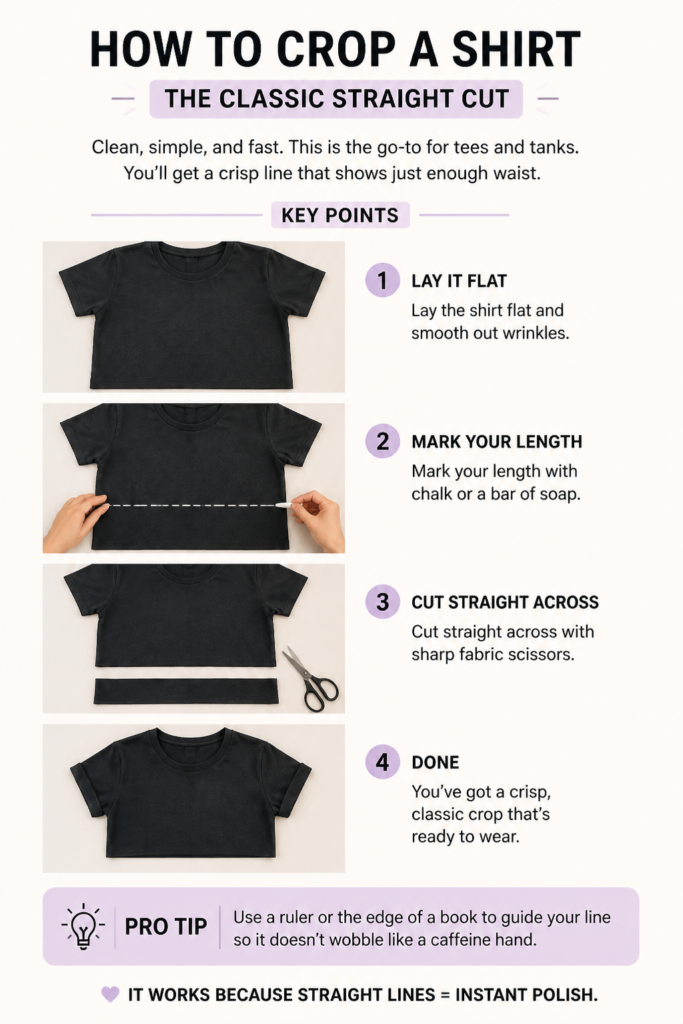
Key points:
- Lay the shirt flat and smooth out wrinkles.
- Mark your length with chalk or a bar of soap.
- Cut straight across with sharp fabric scissors.
Pro tip: Use a ruler or the edge of a book to guide your line so it doesn’t wobble like a caffeine hand. It works because straight lines = instant polish.
2. The Roll Hem Crop
Love a tidy edge? Roll it. This adds structure and keeps the cut from stretching out.
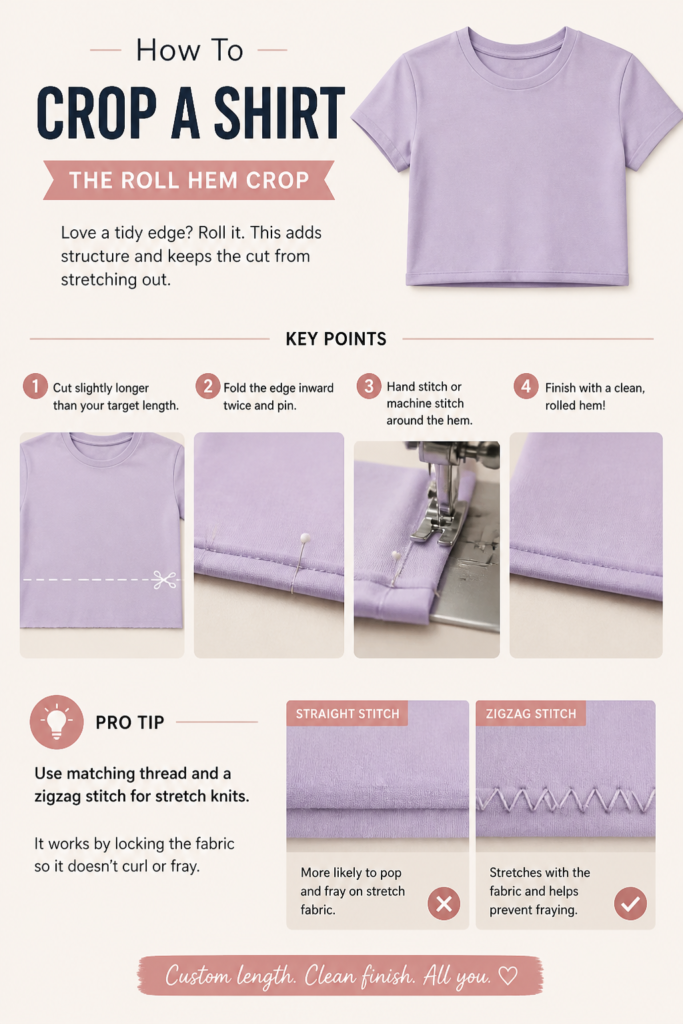
Key points:
- Cut slightly longer than your target length.
- Fold the edge inward twice and pin.
- Hand stitch or machine stitch around the hem.
Pro tip: Use matching thread and a zigzag stitch for stretch knits. It works by locking the fabric so it doesn’t curl or fray.
3. The Raw Edge Curl
Effortless and a little rebellious. Knit tees naturally curl for that off-duty model look.
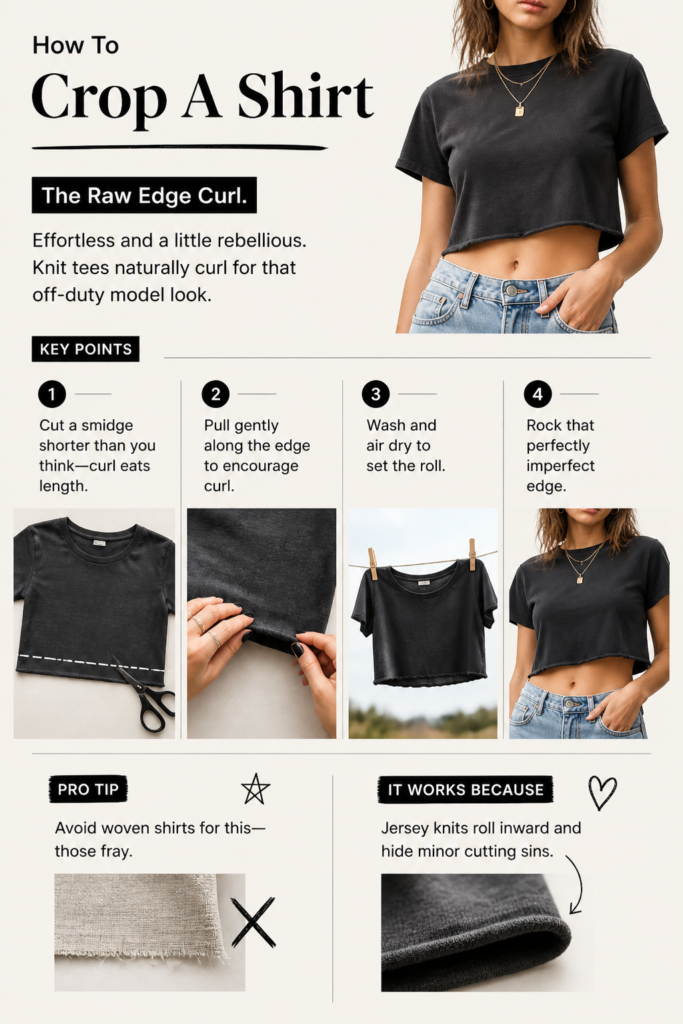
Key points:
- Cut a smidge shorter than you think—curl eats length.
- Pull gently along the edge to encourage curl.
- Wash and air dry to set the roll.
Pro tip: Avoid woven shirts for this—those fray. It works because jersey knits roll inward and hide minor cutting sins.
4. The Tie-Front Knot
No sewing needed, just a cute knot and attitude. Perfect for button-downs and oversized tees.
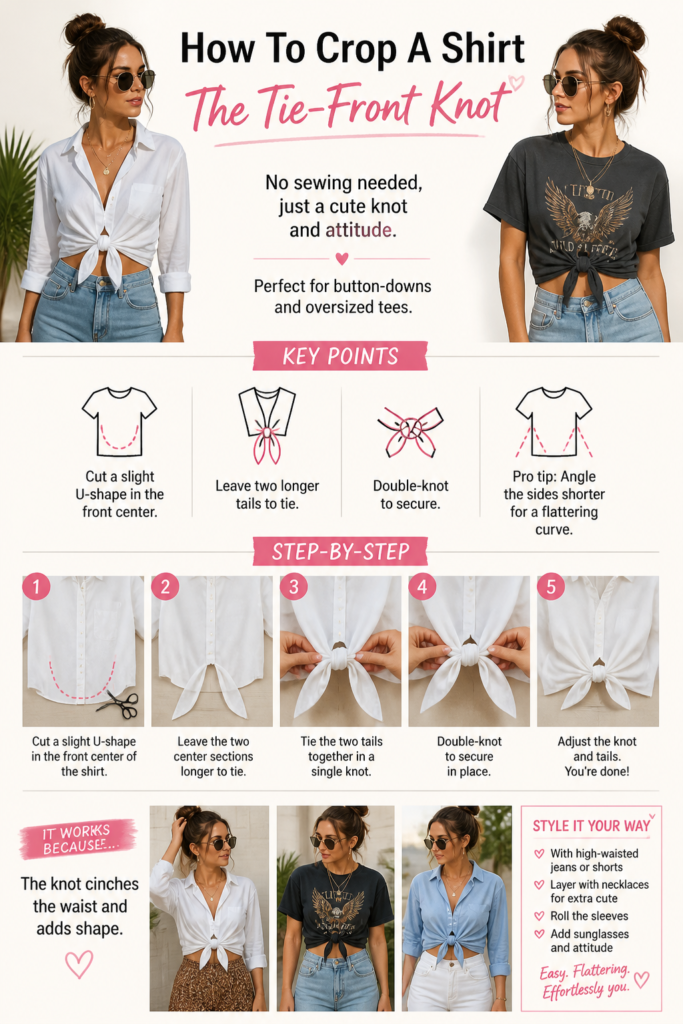
Key points:
- Cut a slight U-shape in the front center.
- Leave two longer tails to tie.
- Double-knot to secure.
Pro tip: Angle the sides shorter for a flattering curve. It works because the knot cinches the waist and adds shape.
5. The Asymmetric Slice
High on one side, low on the other—hello drama. Great for layering over high-rise bottoms.
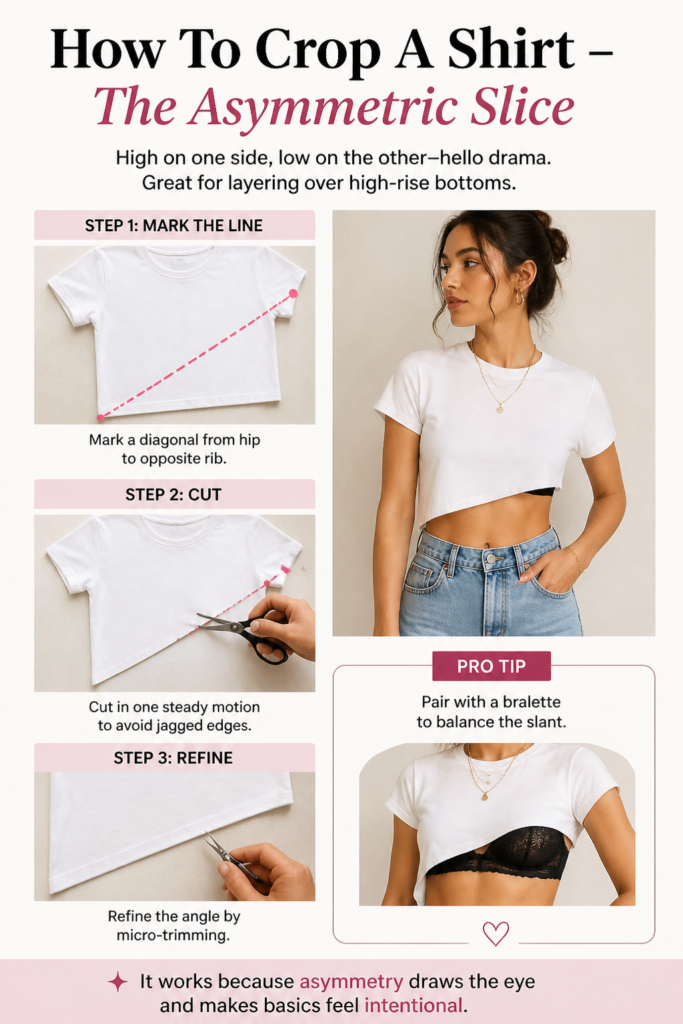
Key points:
- Mark a diagonal from hip to opposite rib.
- Cut in one steady motion to avoid jagged edges.
- Refine the angle by micro-trimming.
Pro tip: Pair with a bralette to balance the slant. It works because asymmetry draws the eye and makes basics feel intentional.
6. The Curved Hem Crop
A soft scoop that flatters your waistline. Looks tailored without trying.
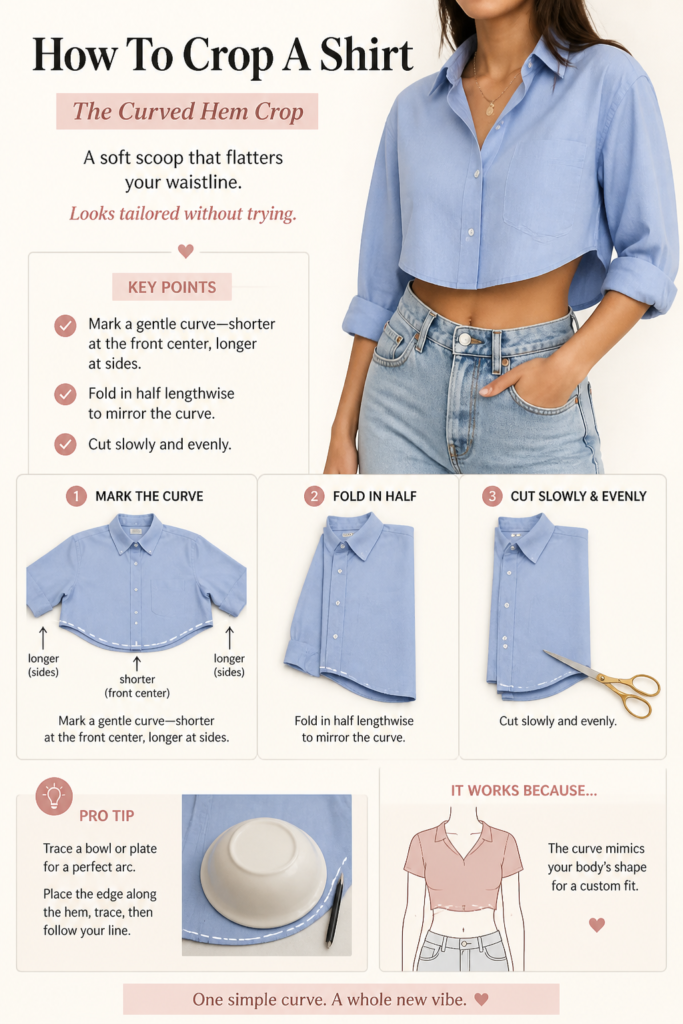
Key points:
- Mark a gentle curve—shorter at the front center, longer at sides.
- Fold in half lengthwise to mirror the curve.
- Cut slowly and evenly.
Pro tip: Trace a bowl or plate for a perfect arc. It works because the curve mimics your body’s shape for a custom fit.
7. The Boxy Crop
Chic, minimal, and very “I woke up stylish.” Especially good for stiff cottons.
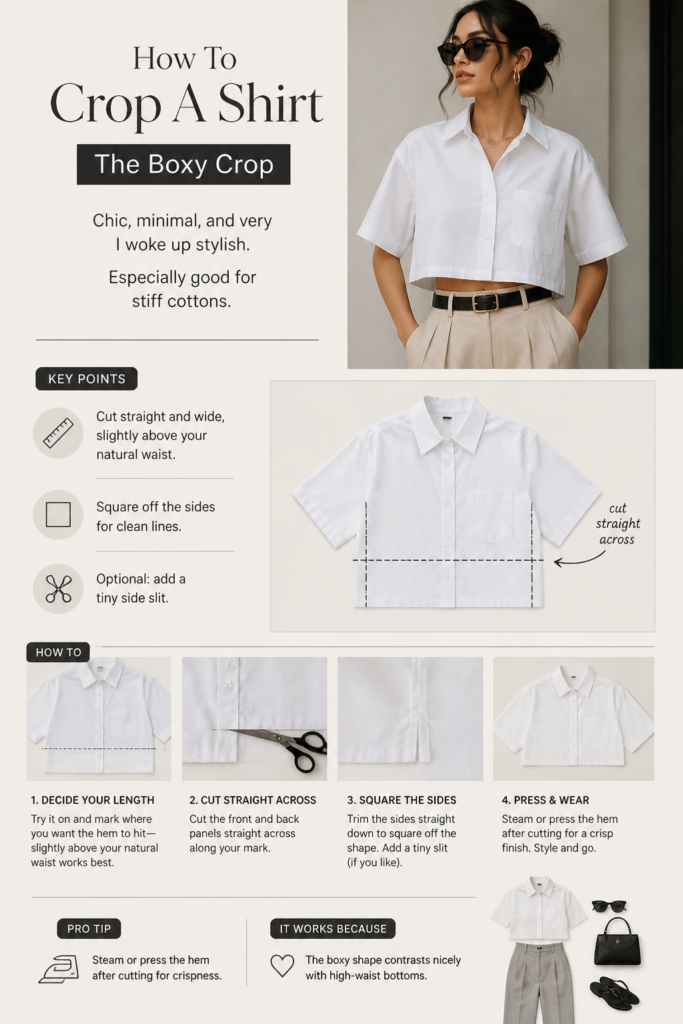
Key points:
- Cut straight and wide, slightly above your natural waist.
- Square off the sides for clean lines.
- Optional: add a tiny side slit.
Pro tip: Steam or press the hem after cutting for crispness. It works because the boxy shape contrasts nicely with high-waist bottoms.
8. The Elastic Cinch Hem
Sporty bubble vibe without the commitment. It hugs the waist and adds volume.
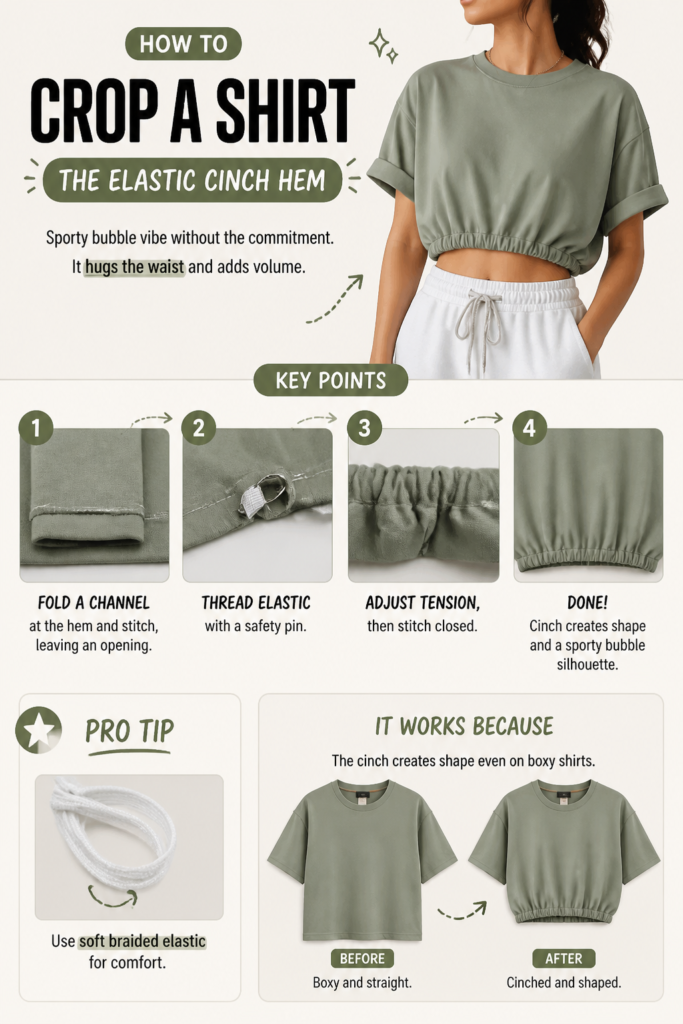
Key points:
- Fold a channel at the hem and stitch, leaving an opening.
- Thread elastic with a safety pin.
- Adjust tension, then stitch closed.
Pro tip: Use soft braided elastic for comfort. It works because the cinch creates shape even on boxy shirts.
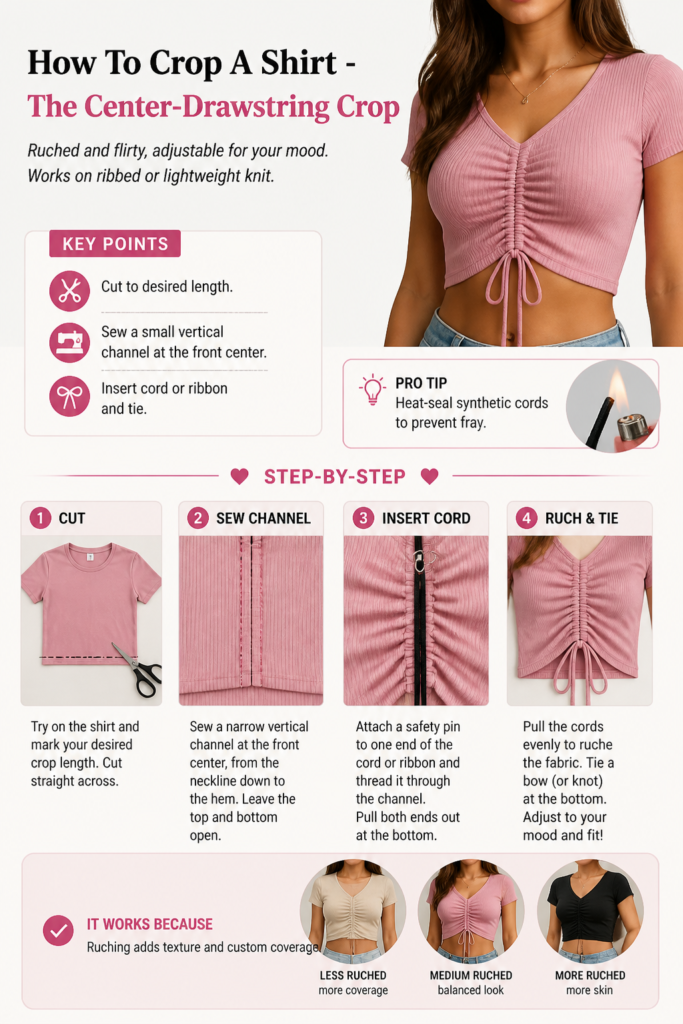
9. The Center-Drawstring Crop
Ruched and flirty, adjustable for your mood. Works on ribbed or lightweight knit.
Key points:
- Cut to desired length.
- Sew a small vertical channel at the front center.
- Insert cord or ribbon and tie.
Pro tip: Heat-seal synthetic cords to prevent fray. It works because ruching adds texture and custom coverage.
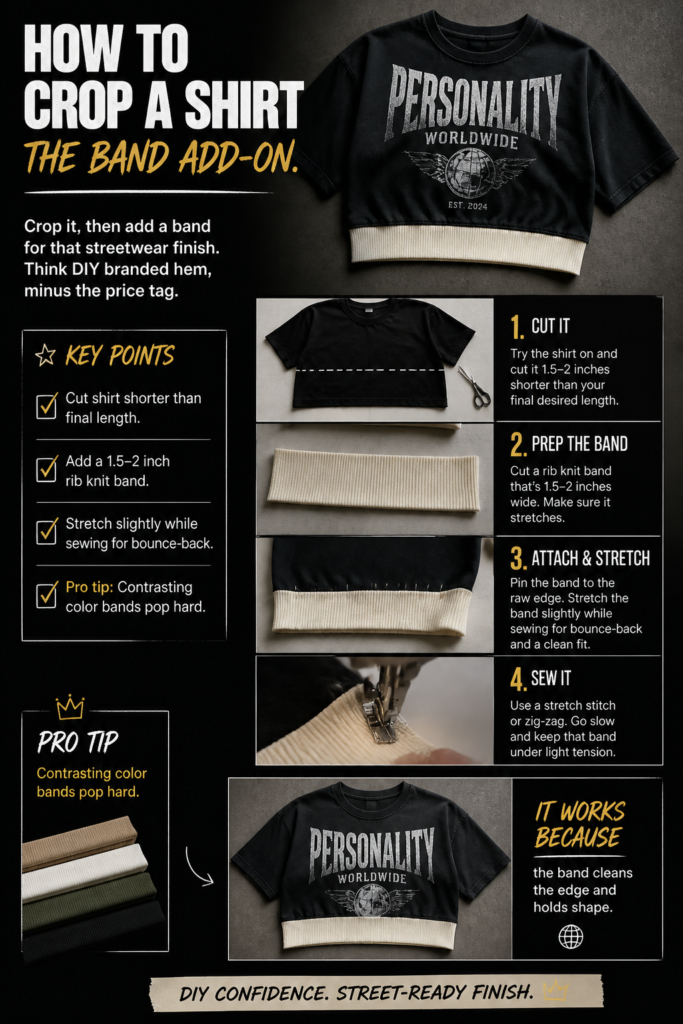
10. The Band Add-On
Crop it, then add a band for that streetwear finish. Think DIY branded hem, minus the price tag.
Key points:
- Cut shirt shorter than final length.
- Add a 1.5–2 inch rib knit band.
- Stretch slightly while sewing for bounce-back.
Pro tip: Contrasting color bands pop hard. It works because the band cleans the edge and holds shape.
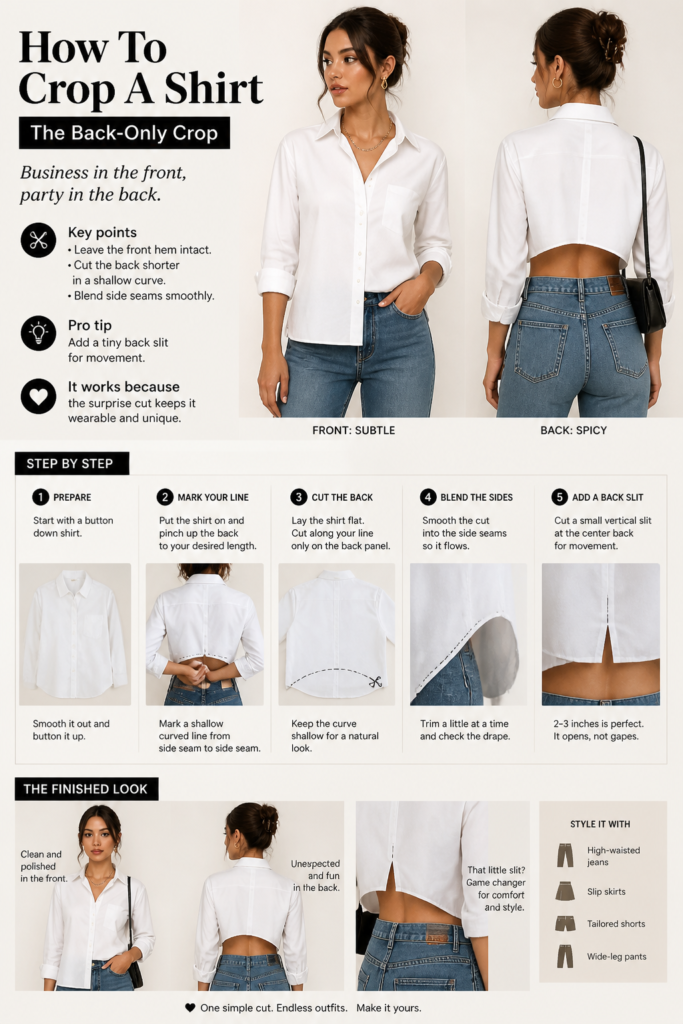
11. The Back-Only Crop
Business in the front, party in the back. Subtle from the front, spicy from behind.
Key points:
- Leave the front hem intact.
- Cut the back shorter in a shallow curve.
- Blend side seams smoothly.
Pro tip: Add a tiny back slit for movement. It works because the surprise cut keeps it wearable and unique.
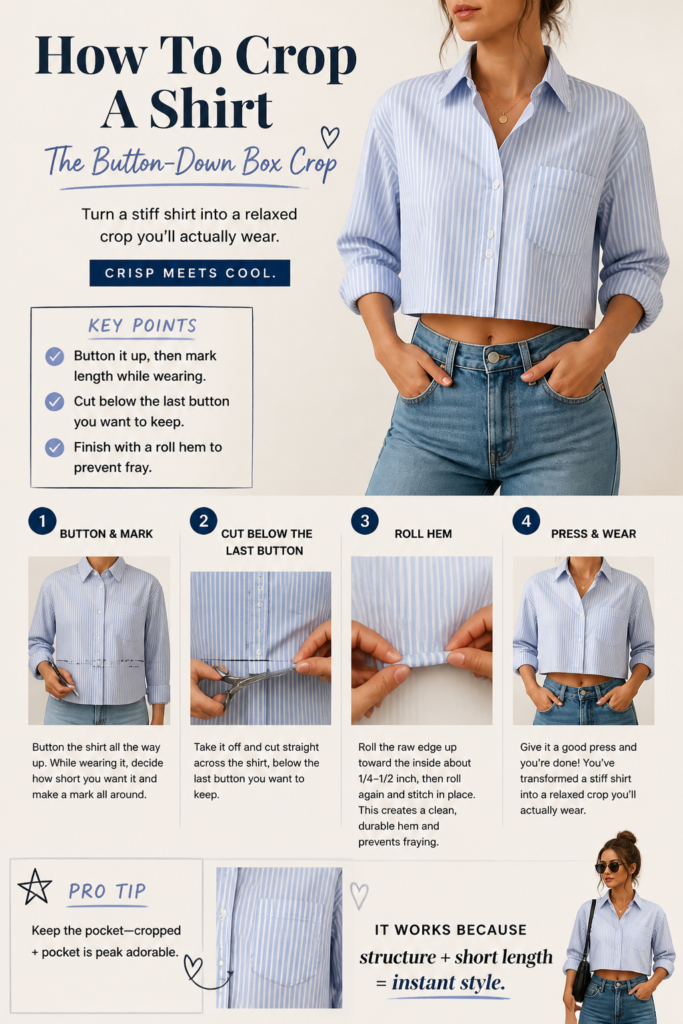
12. The Button-Down Box Crop
Turn a stiff shirt into a relaxed crop you’ll actually wear. Crisp meets cool.
Key points:
- Button it up, then mark length while wearing.
- Cut below the last button you want to keep.
- Finish with a roll hem to prevent fray.
Pro tip: Keep the pocket—cropped + pocket is peak adorable. It works because structure + short length = instant style.
13. The Sleeve-to-Hem Match
Balance is everything. Match the hem vibe to your sleeves so it looks designed, not hacked.
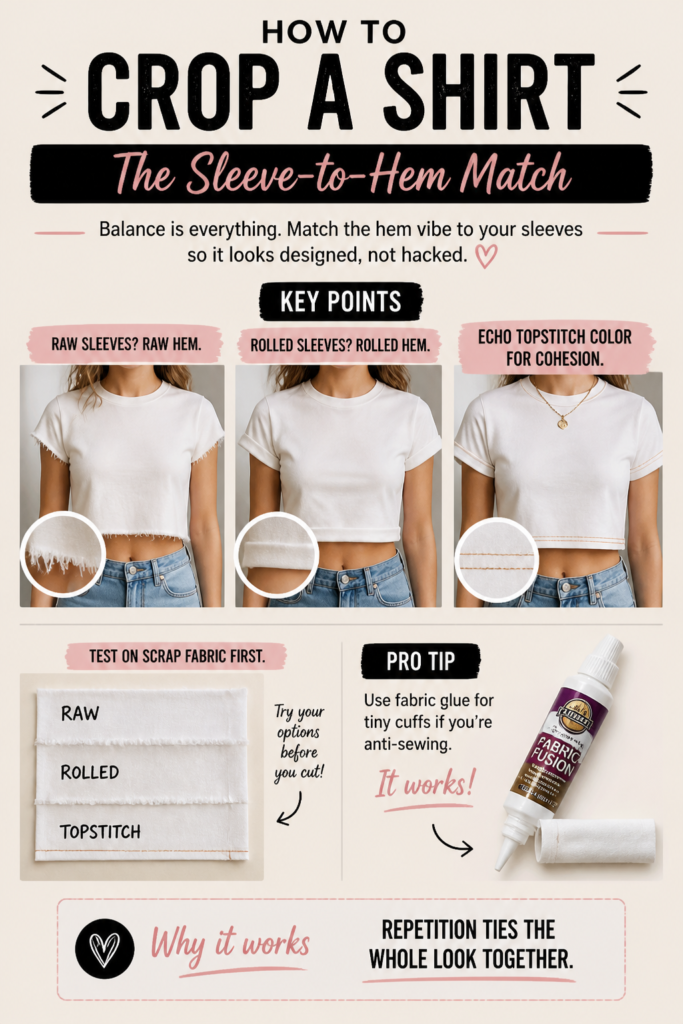
Key points:
- Raw sleeves? Raw hem. Rolled sleeves? Rolled hem.
- Echo topstitch color for cohesion.
- Test on scrap fabric first.
Pro tip: Use fabric glue for tiny cuffs if you’re anti-sewing. It works because repetition ties the whole look together.
Conclusion
Congrats—you’ve just unlocked a closet upgrade with a pair of scissors. Cropping a shirt is part science, part “trust the vibe,” and totally worth it. Start safe, trim slowly, and let your style do the talking.
& CRAFT IDEAS
Beginner-friendly tutorials, creative projects,
and weekly inspiration in your inbox.