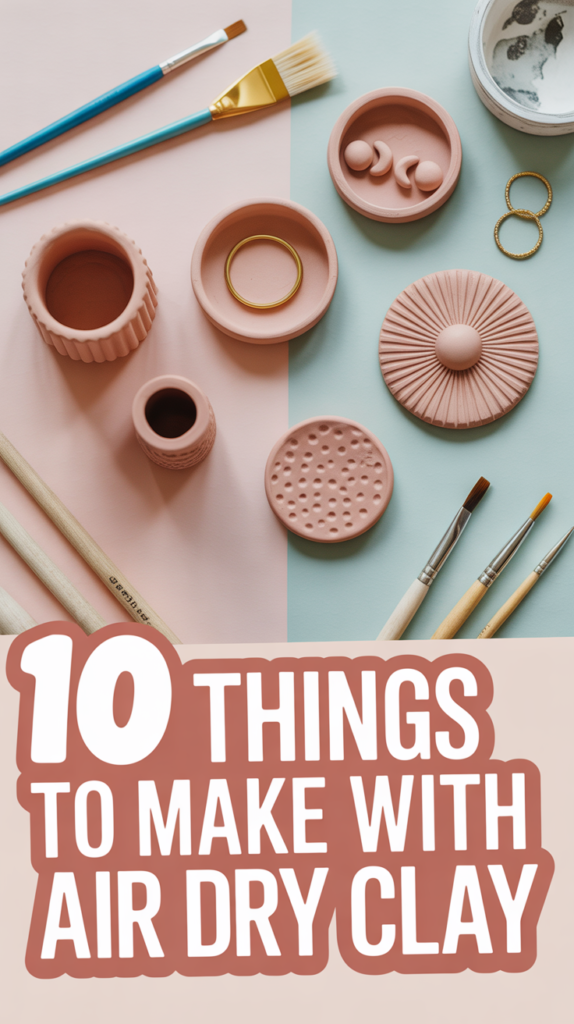
🎨 10 Things To Make With Air Dry Clay
Air dry clay is the crafty bestie that doesn’t ask for a kiln or a degree in ceramics. It’s affordable, forgiving, and weirdly relaxing to squish. Grab a block, a butter knife, and your chaotic creativity. Let’s make cute, useful things your friends will pretend they didn’t copy.
1. Trinket Dishes
Perfect for rings, keys, and random glitter that appears from nowhere. Shape a shallow dish, smooth the edges, and add texture with a leaf or lace.
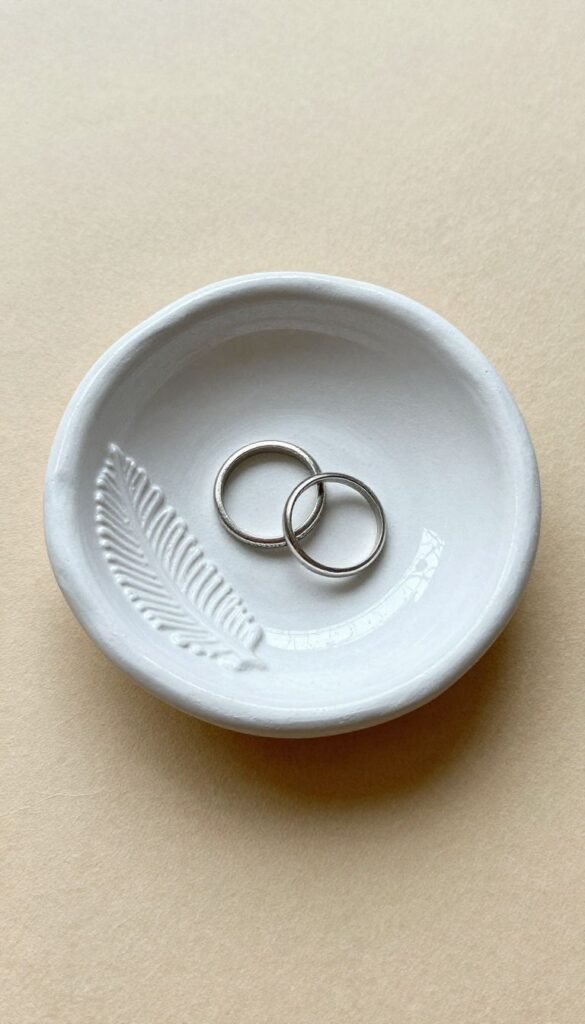
- Use a bowl as a mold for even curves.
- Paint with acrylics and seal with a water-based varnish.
- Gold-rim the edges for instant fancy.
Pro tip: Sand lightly after drying for a clean, ceramic look. This works because the simple form plus shiny edge equals classy with minimal effort.
2. Plant Pots and Mini Planters
Make tiny homes for succulents that are way harder to kill. Roll out a slab and wrap around a cup, or coil-build for a quirky vibe.
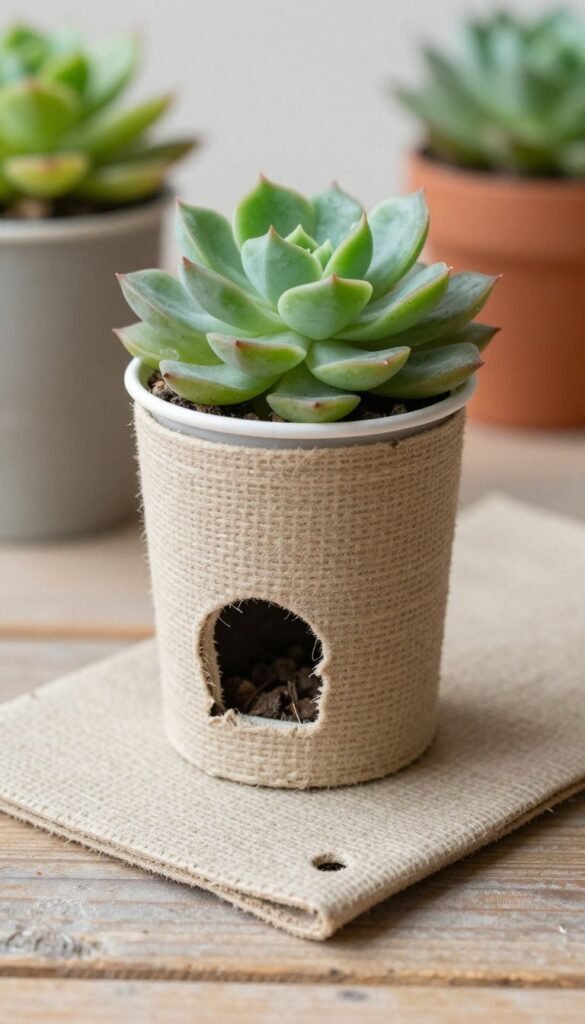
- Line the inside with a plastic nursery pot to avoid moisture drama.
- Add drainage holes only if using a liner.
- Texture with a fork or stamp patterns.
Pro tip: Seal inside with waterproof sealant if you skip a liner. It works because plants look cuter in handmade outfits.
3. Incense Holders
Zen meets cute. Make a moon dish or a simple bar with a hole for stick incense.
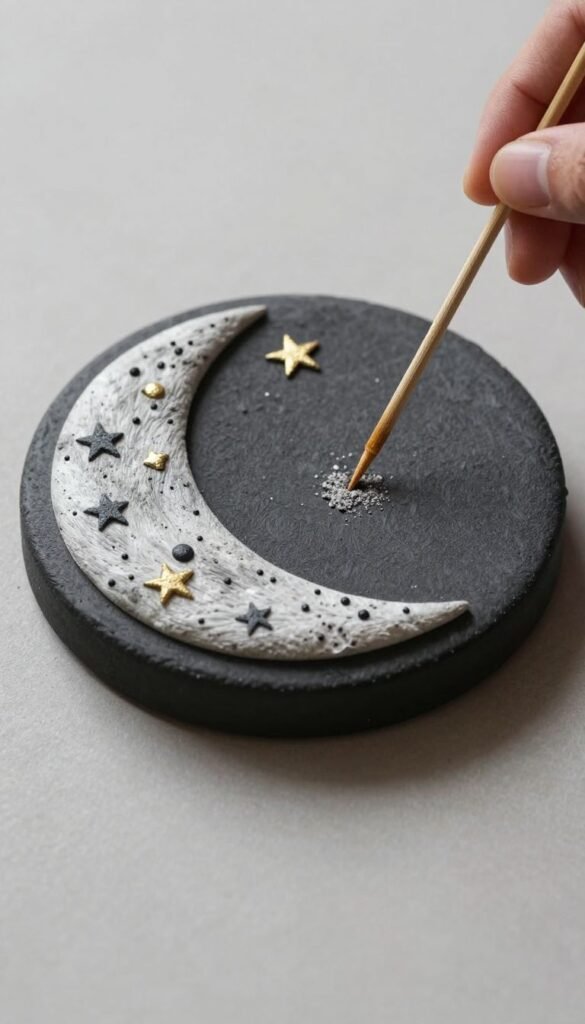
- Use a skewer to poke a slanted hole so ash falls neatly.
- Press stars, dots, or carve lines before it dries.
- Paint matte for calm vibes, metallic for drama.
Pro tip: Test the hole size while the clay is soft using the actual stick. It works because tidy ash equals less chaos.
4. Personalized Name Tags and Gift Tags
Goodbye boring tags, hello reusable cuties. Roll thin, cut shapes with cookie cutters, and stamp names.

- Punch a clean hole with a straw.
- Use alphabet stamps or a toothpick for hand-lettering.
- Finish with twine or ribbon.
Pro tip: Keep thickness even to prevent warping. It works because personalized touches make even store-bought gifts feel custom.
5. Keychains and Bag Charms
Make your keys findable and your bag extra. Shapes, initials, or tiny fruits are a win.
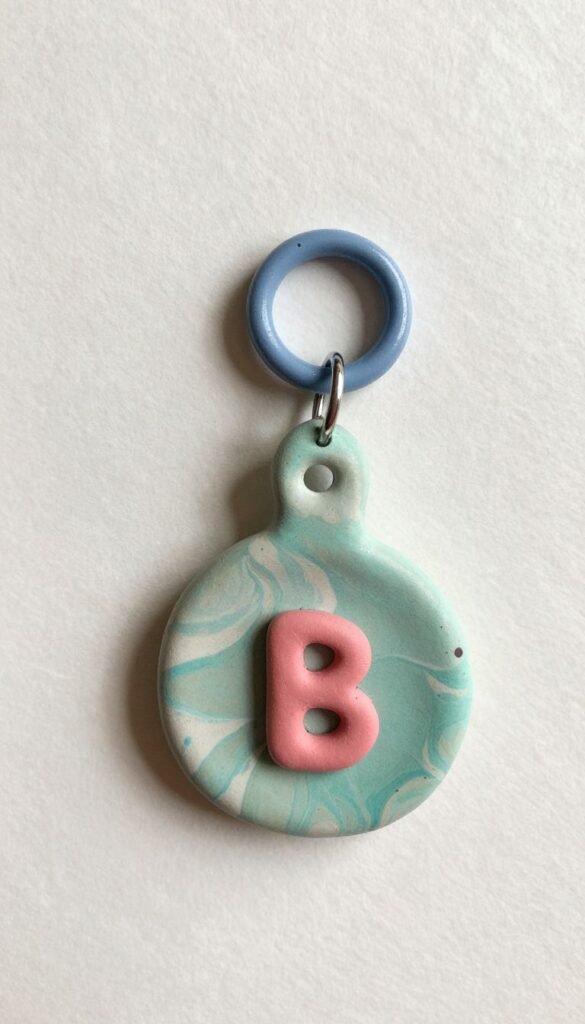
- Embed a jump ring while soft or drill a hole after drying.
- Seal edges to prevent scuffs.
- Mix colors by marbling clay pieces before shaping.
Pro tip: Bake nothing. Just let fully dry before attaching hardware. It works because small details travel everywhere with you.
6. Wall Hanging Tiles
Decor that doesn’t require power tools. Make a set of tiles with patterns or symbols and string them vertically.
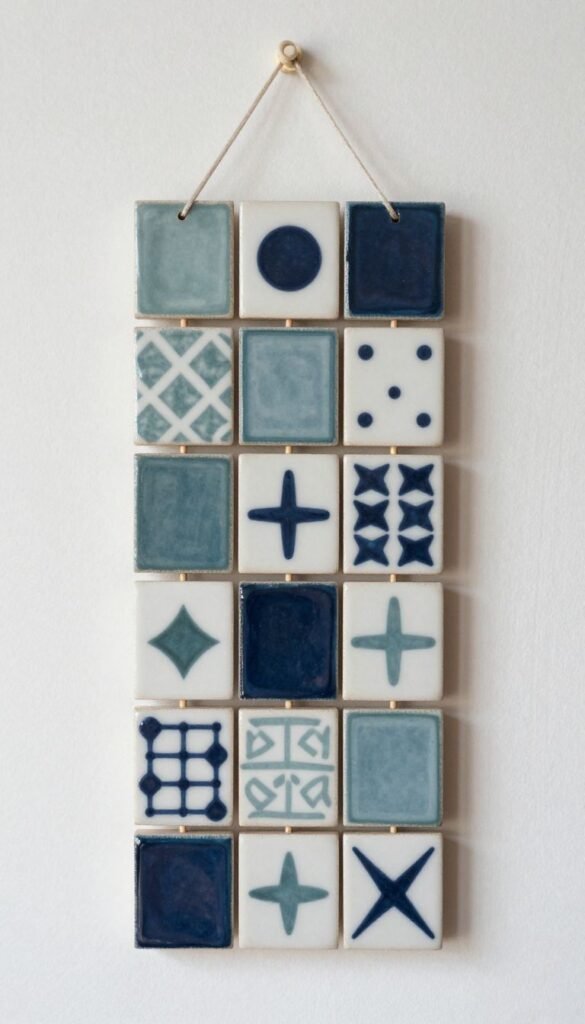
- Keep tiles 3–5 mm thick to stay lightweight.
- Use a skewer for hanging holes.
- Mix matte paint with a gloss detail for contrast.
Pro tip: Dry tiles flat under a book once they’re leather-hard to avoid curl. It works because repetition looks intentional and artsy.
7. Candle Snuffers and Match Holders
Set a cozy mood like a pro. Form a tiny cone for a snuffer and a cup with a strike strip for matches.
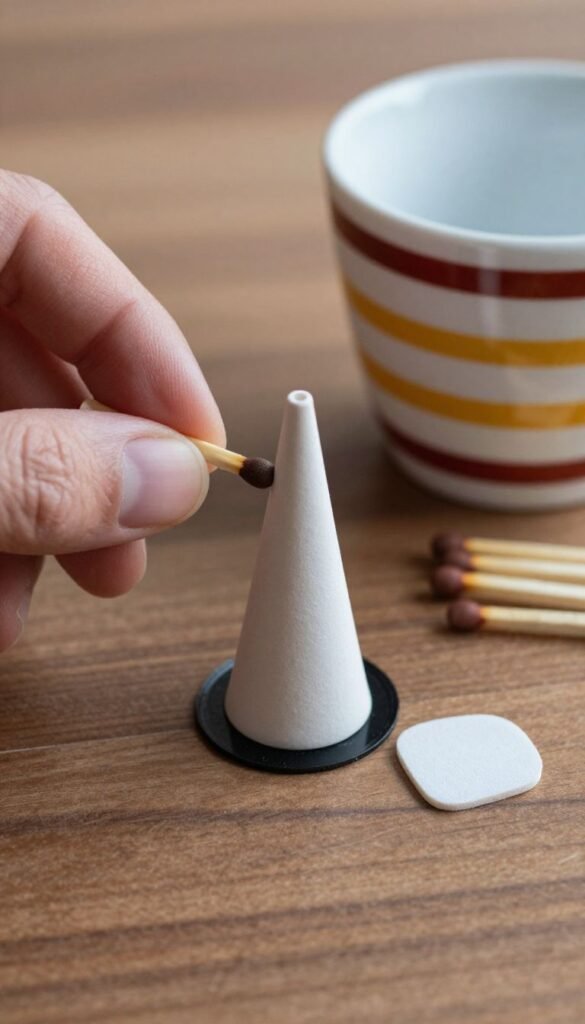
- Attach pieces with slip for a strong bond.
- Glue a match strike pad to the base after sealing.
- Keep snuffer walls thick so they don’t chip.
Pro tip: Sand the rim smooth so it sits flat. It works because chic tools make candle time feel fancy.
8. Phone Stands
Hands-free scrolling, achieved. Make a simple wedge with a groove or a sculpted critter holding your phone.
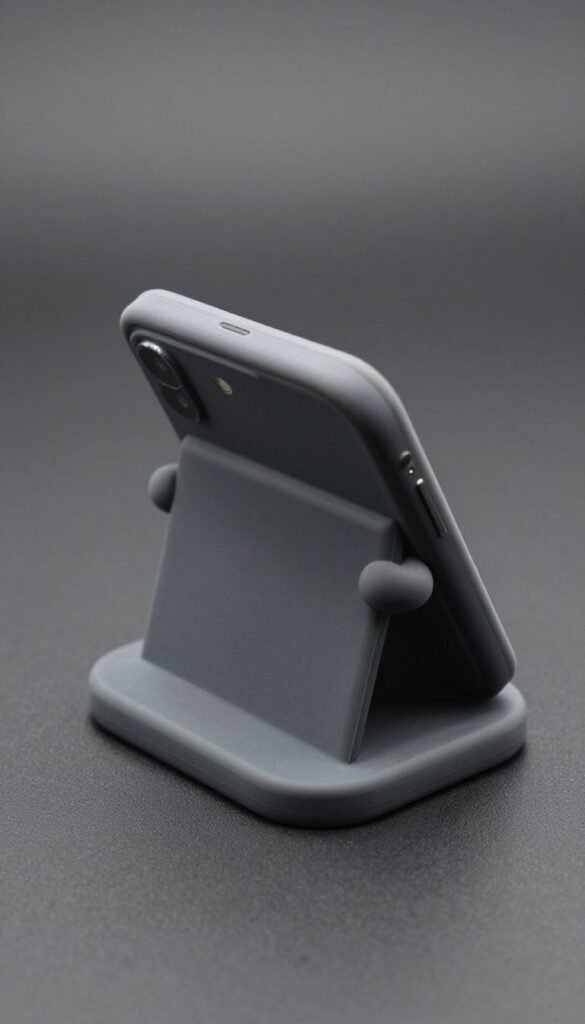
- Test the groove angle with your phone while shaping.
- Add silicone pads underneath to prevent slipping.
- Keep base wide for stability.
Pro tip: Reinforce the groove edges so they don’t crumble. It works because utility + cute = daily use.
9. Textured Coasters
Protect tables and flex your style. Cut circles or hexagons and stamp with leaves, rope, or bubble wrap.
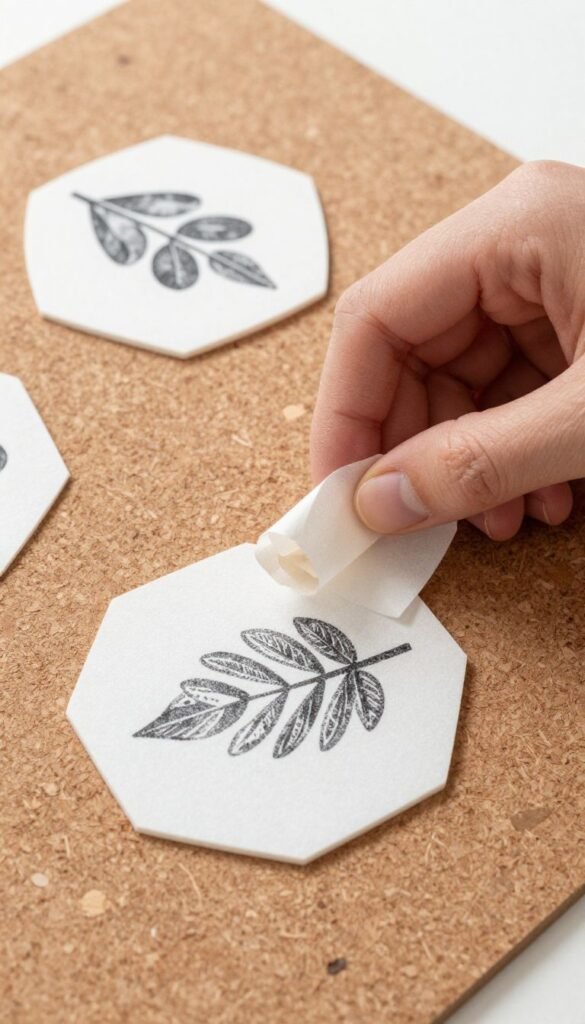
- Roll to an even 5–6 mm thickness.
- Seal with heat-resistant varnish.
- Add cork backing with craft glue.
Pro tip: Round edges with a damp finger for a polished finish. It works because function disguised as art always wins.
10. Minimalist Jewelry
Make studs, hoops, and pendants that look boutique. Cut tiny shapes or roll beads and poke clean holes.
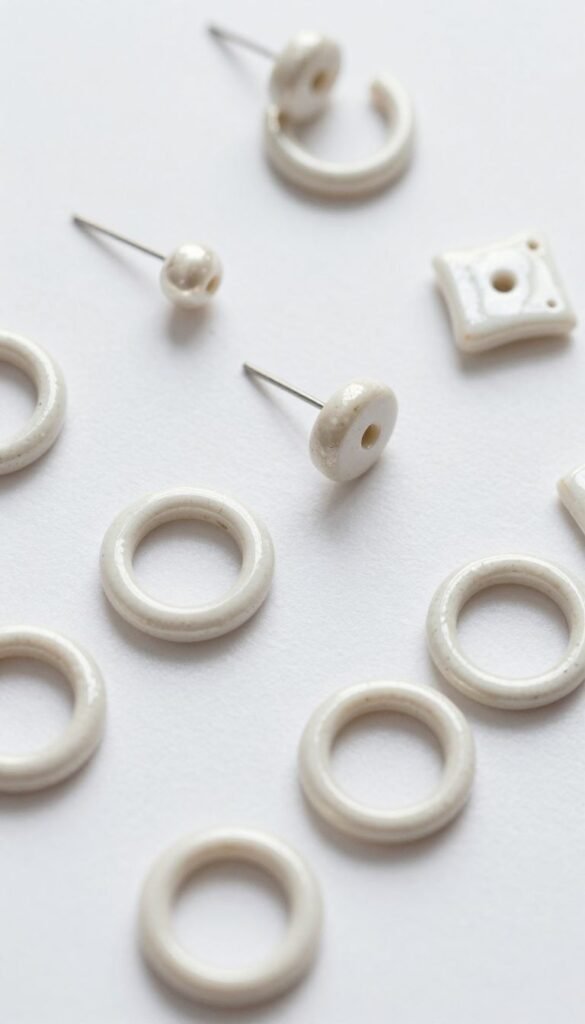
- Use hypoallergenic findings and strong glue for studs.
- Sand edges for a sleek profile.
- Finish with pearly or speckled paint for a ceramic effect.
Pro tip: Bake-on looks without the oven by sealing with a glossy varnish. It works because lightweight pieces are comfy and chic.
Conclusion
Air dry clay turns a quiet afternoon into a mini design studio. With simple tools and a dash of chaos, you’ll make pieces that look pricey and feel personal. Start small, seal well, and let your inner artisan take the wheel. Your shelves are about to get interesting.