✨ 14 Junk Journal Pockets And Tucks
& CRAFT IDEAS
Beginner-friendly tutorials, creative projects,
and weekly inspiration in your inbox.
🛠️ The Ultimate Maker's Toolkit
I've tested thousands of craft tools over the years. Whether you are quilting, crafting, or building mixed-media art, these are the top 5 absolute non-negotiable tools I personally recommend to guarantee professional results.
🪡 SINGER Heavy Duty 4452 Sewing Machine
The sewing community highly recommends this as the ultimate "bulletproof" entry-level machine. Its heavy metal frame powerfully pushes through thick denim and heavy quilt layers that would instantly jam a standard plastic machine.
✂️ Fiskars 8" Orange-Handled Scissors
Never settle for dull dollar-store blades. Wirecutter repeatedly names Fiskars the absolute best all-purpose craft scissor due to its legendary precision-ground blades and an ergonomic grip that prevents hand-cramping.
🔥 Gorilla Dual Temp Hot Glue Gun
Named Wirecutter's top choice because it literally does the work of two tools. It features dual-temperature settings offering low heat for delicate florals and blistering high heat for heavy wood adhesion repairs.
🖌️ Mod Podge Waterbase Gloss Sealer
The absolute undisputed champion of decoupage and paper crafts. Experts rely exclusively on this exact water-based formula because it glues, seals, and finishes beautifully without yellowing or flaking over time.
🎨 Apple Barrel Acrylic Paint (2 oz)
The quintessential, incredibly inexpensive craft paint. Woodworkers and hobby painters swear by its smooth flow and matte finish, providing massive value and remarkably thick color coverage on rough surfaces.
Ready to give your junk journal a glow-up? Pockets and tucks are basically secret hideouts for your ephemera. They add texture, storage, and a little drama. Let’s make your pages do more than just look cute—they’ll work overtime.
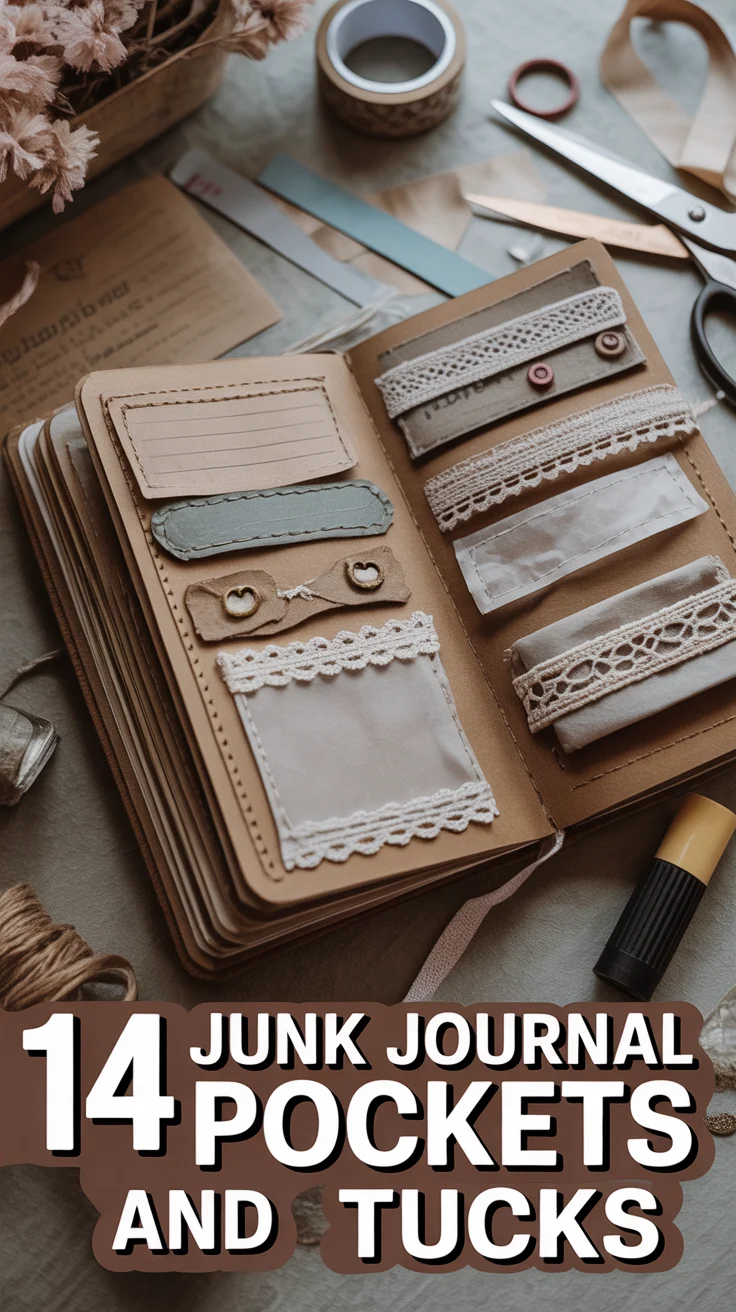
1. Side Slit Pocket
Sleek, sneaky, and ridiculously useful. Slice a vertical slit along the page edge and slide in tags like it’s a spy mission.
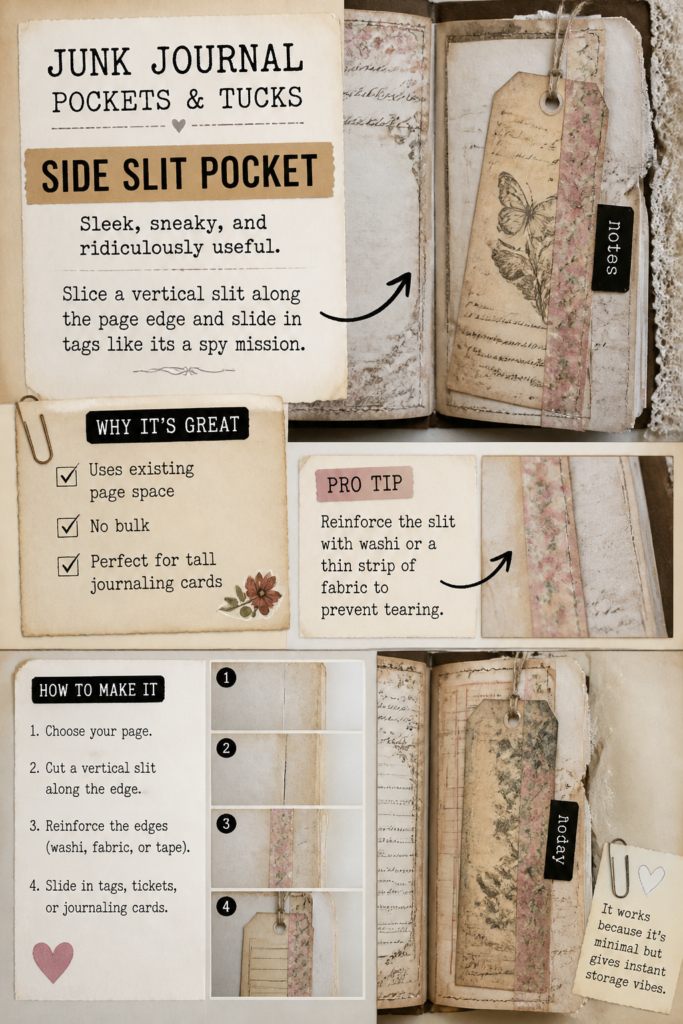
Why it’s great: Uses existing page space, no bulk, and perfect for tall journaling cards.
Pro tip: Reinforce the slit with washi or a thin strip of fabric to prevent tearing.
It works because it’s minimal but gives instant storage vibes.
2. Corner Tuck Duo
Two corners, double the stash. Glue triangles on opposite corners to tuck in tickets, stamps, and mini photos.
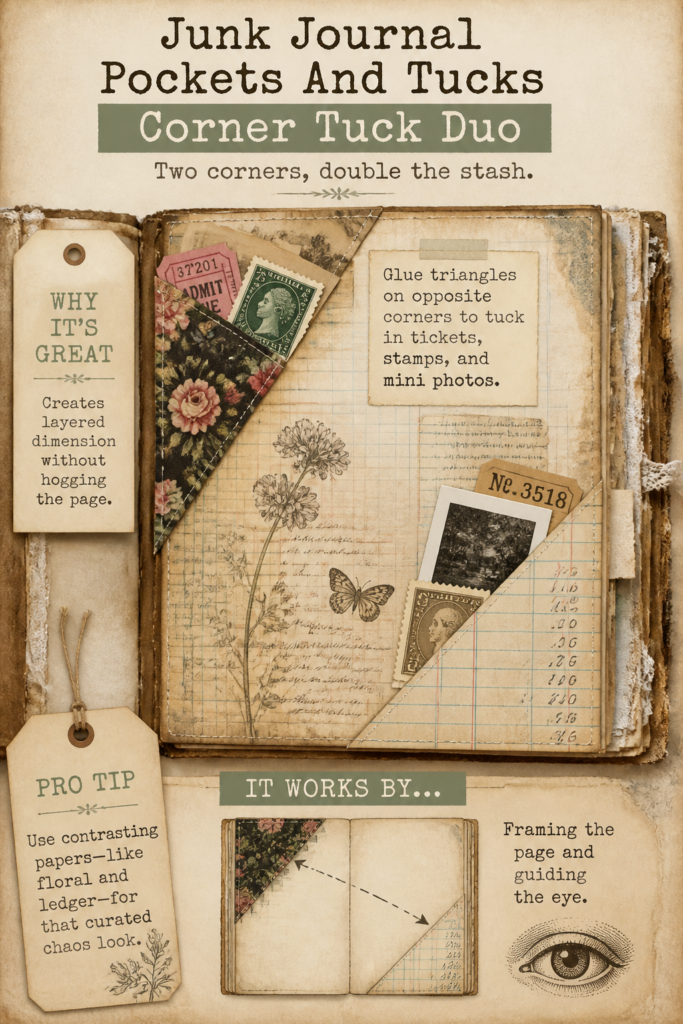
Why it’s great: Creates layered dimension without hogging the page.
Pro tip: Use contrasting papers—like floral and ledger—for that “ curated chaos” look.
It works by framing the page and guiding the eye.
3. Belly Band Wrap
A slim strip across the page holds all your bits snug like a paper hug. Slide in postcards or folded notes.
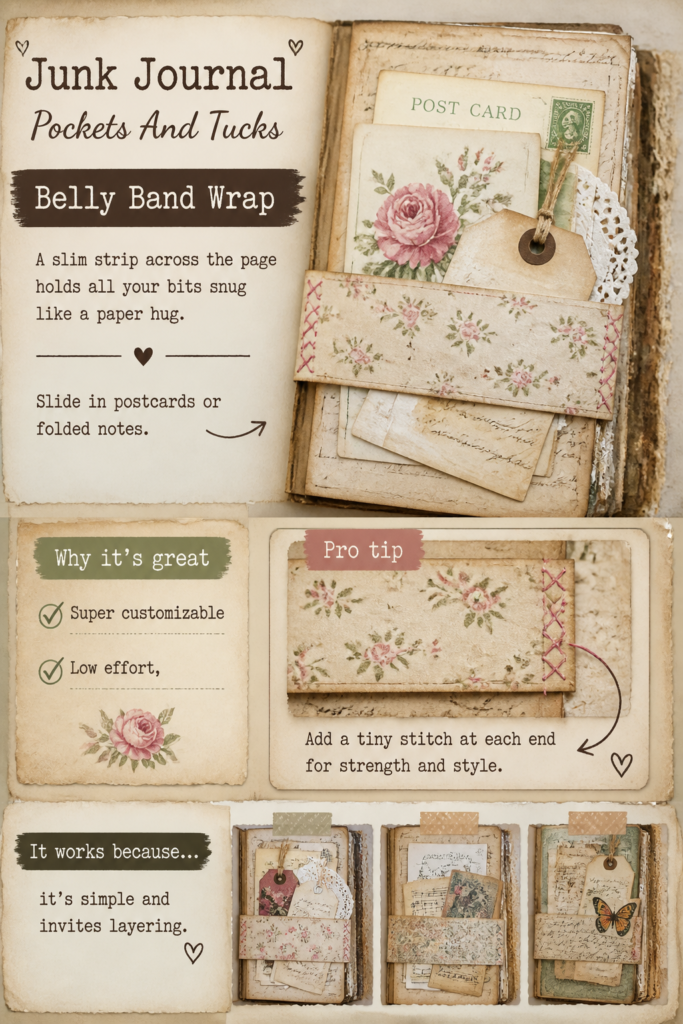
Why it’s great: Super customizable and low effort.
Pro tip: Add a tiny stitch at each end for strength and style.
It works because it’s simple and invites layering.
4. Envelope Flip Pocket
Attach a small envelope that flips out. Hide the juicy stuff inside; decorate the flap for flair.
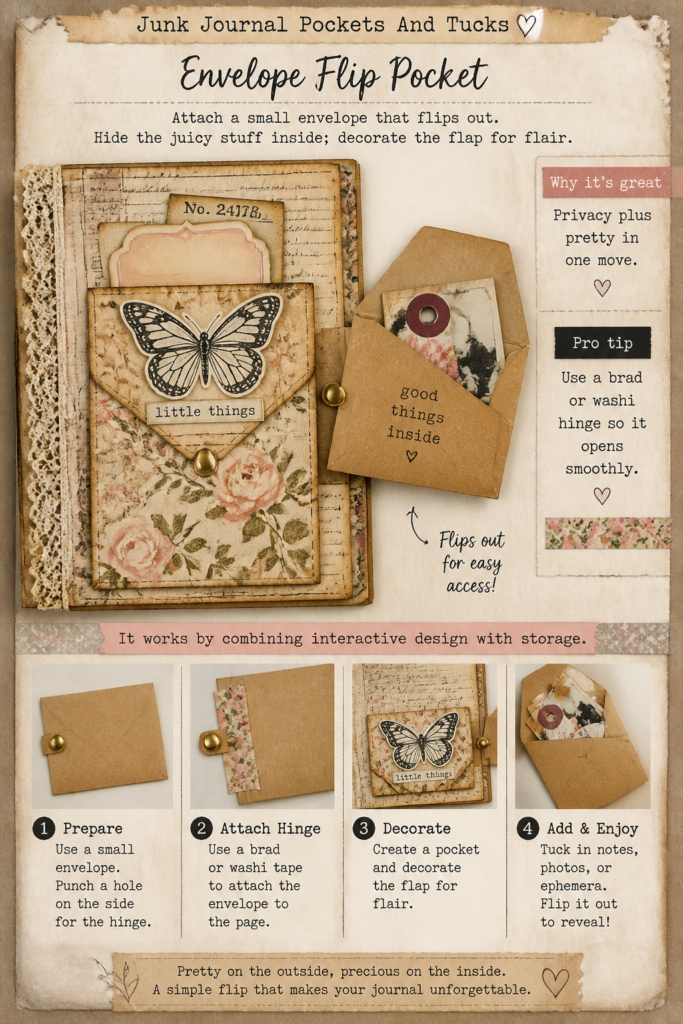
Why it’s great: Privacy plus pretty in one move.
Pro tip: Use a brad or washi hinge so it opens smoothly.
It works by combining interactive design with storage.
5. Book Page Side Pocket
Fold a vintage book page in half and glue three sides. Instant side pocket with charm.
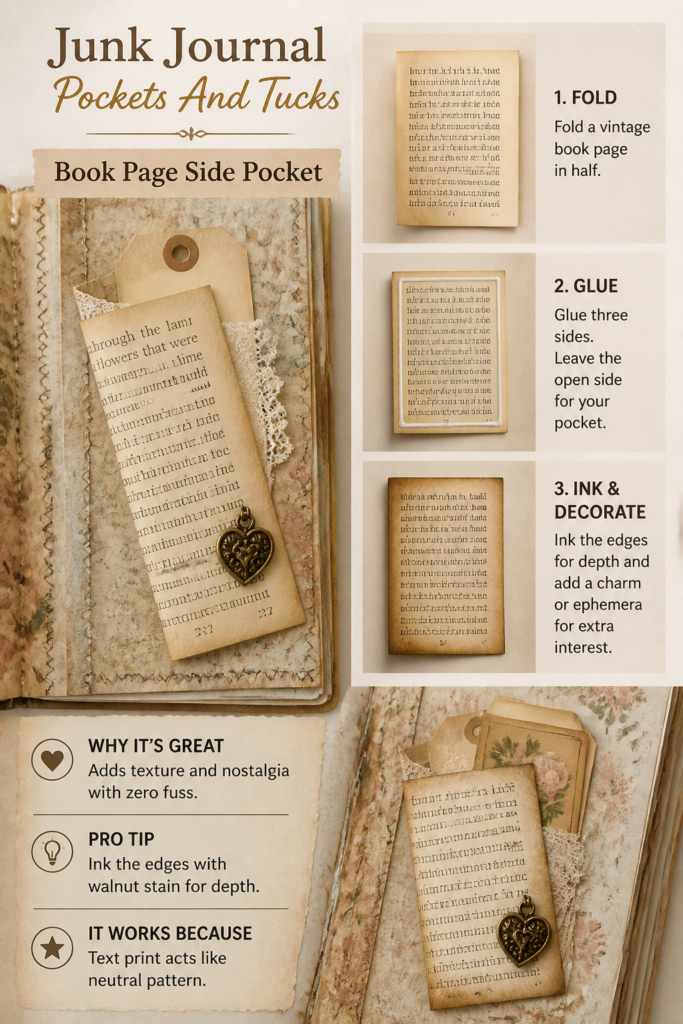
Why it’s great: Adds texture and nostalgia with zero fuss.
Pro tip: Ink the edges with walnut stain for depth.
It works because text print acts like neutral pattern.
6. Tag-as-Pocket
Turn a large tag into a pocket by stitching or gluing a smaller tag on top. Meta, but make it cute.
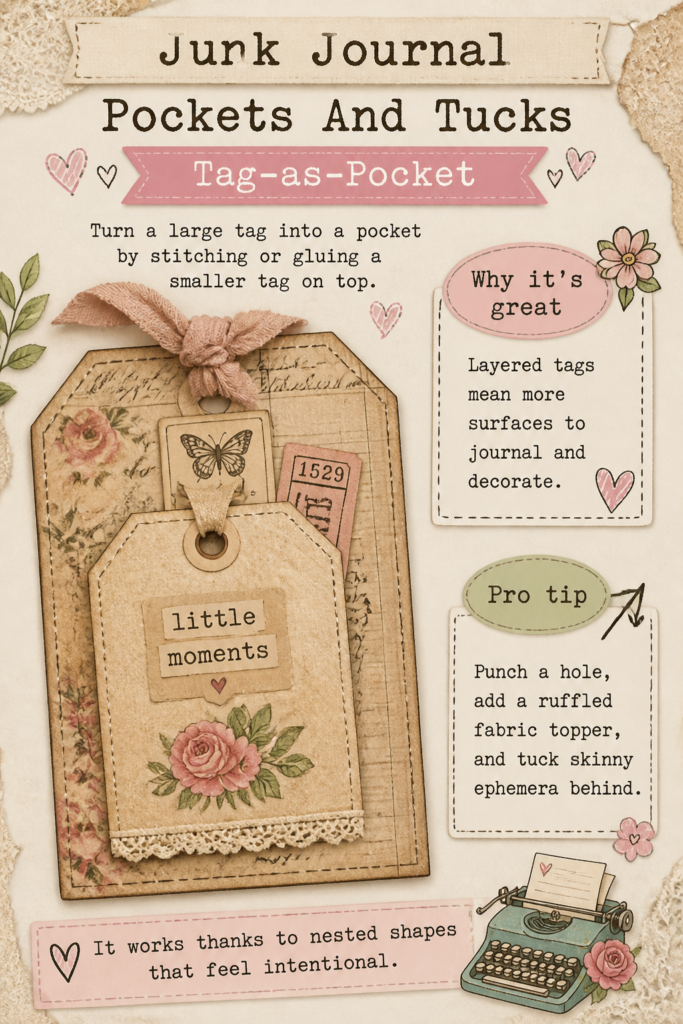
Why it’s great: Layered tags mean more surfaces to journal and decorate.
Pro tip: Punch a hole, add a ruffled fabric topper, and tuck skinny ephemera behind.
It works thanks to nested shapes that feel intentional.
7. Lace Edge Tuck
Glue a strip of lace along one edge and tuck behind it. Soft, romantic, and sneaky.
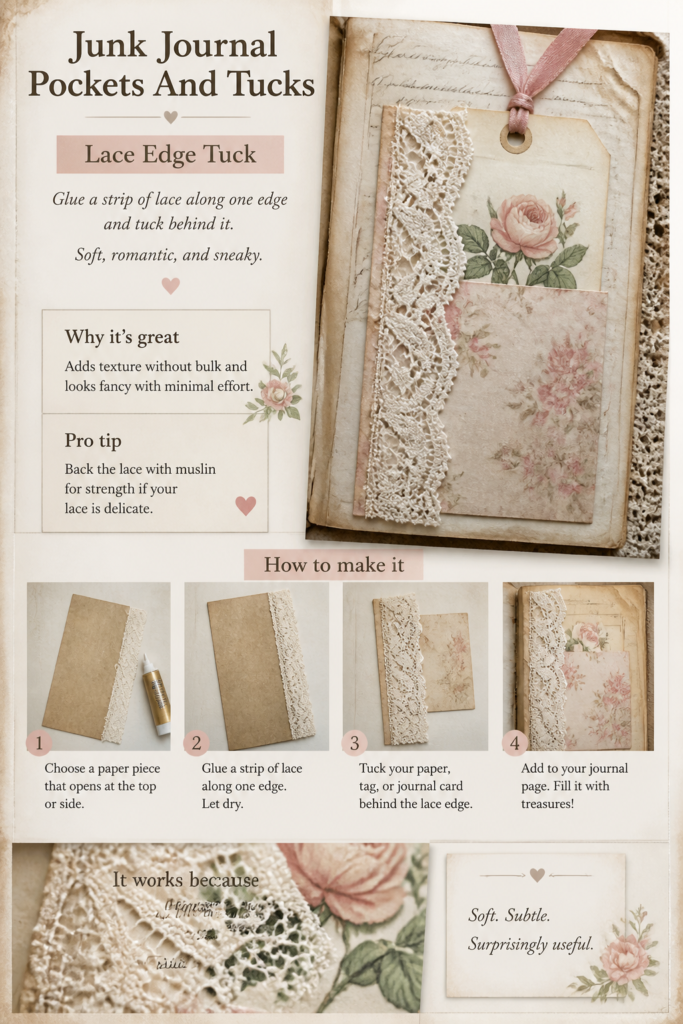
Why it’s great: Adds texture without bulk and looks fancy with minimal effort.
Pro tip: Back the lace with muslin for strength if your lace is delicate.
It works because the transparency teases what’s inside.
8. Window Pocket with Vellum
Cut a window and back it with vellum. You get a peekaboo pocket that whispers, not shouts.
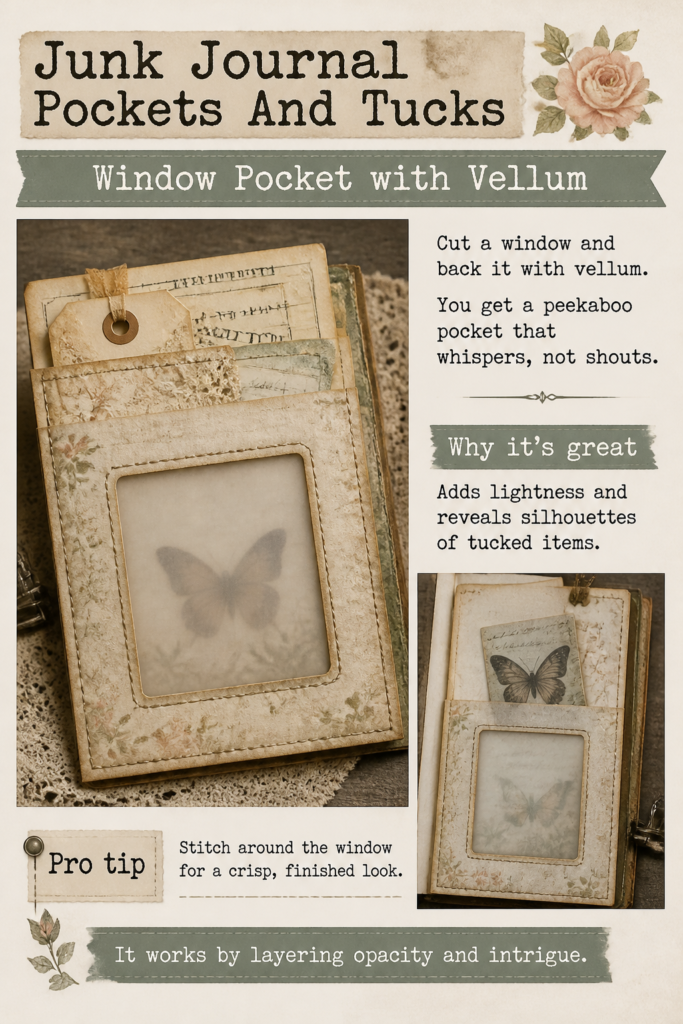
Why it’s great: Adds lightness and reveals silhouettes of tucked items.
Pro tip: Stitch around the window for a crisp, finished look.
It works by layering opacity and intrigue.
9. Floating Pocket Insert
Create a stand-alone pocket and clip it in with a paperclip. Move it wherever you need it.
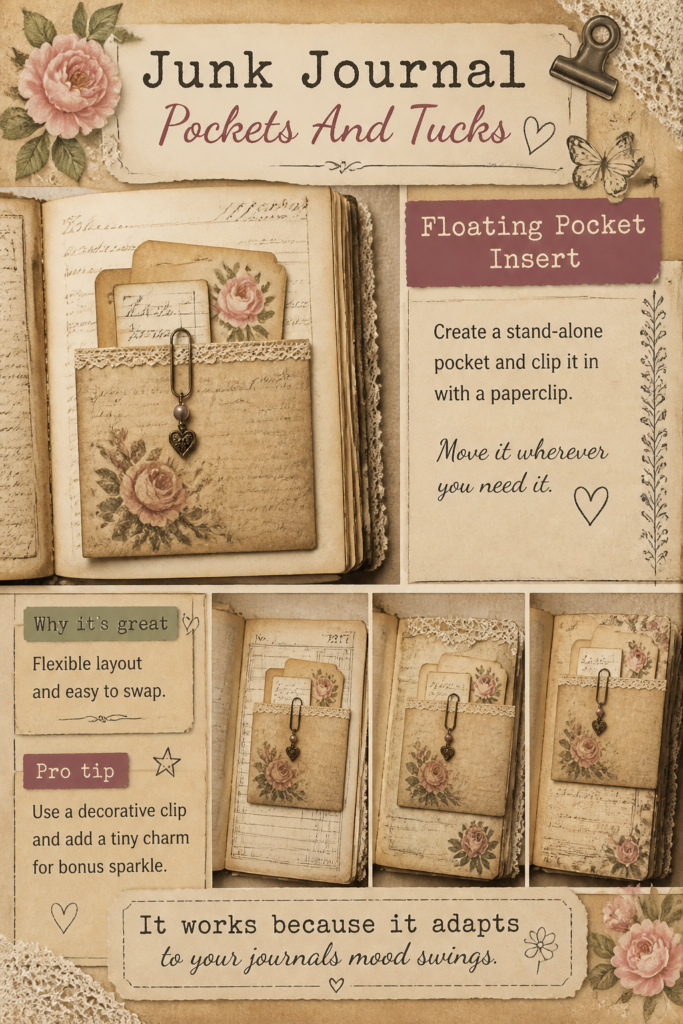
Why it’s great: Flexible layout and easy to swap.
Pro tip: Use a decorative clip and add a tiny charm for bonus sparkle.
It works because it adapts to your journal’s mood swings.
10. Flip-Up Tuck Spot
Attach a mini card along the top edge so it flips up. Tuck items under the flap, then journal inside.
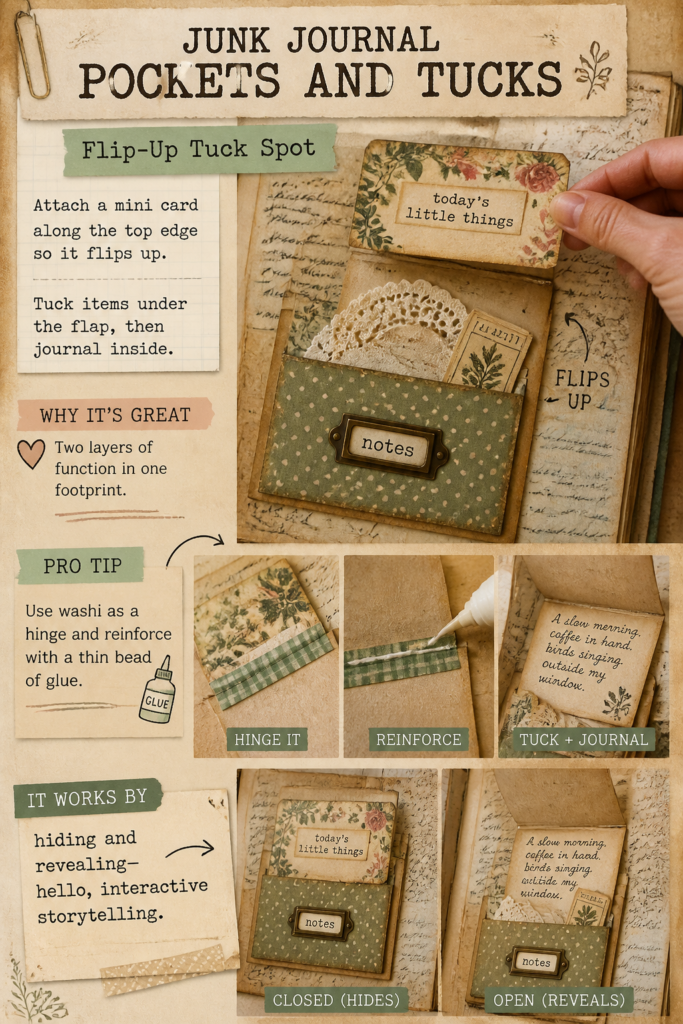
Why it’s great: Two layers of function in one footprint.
Pro tip: Use washi as a hinge and reinforce with a thin bead of glue.
It works by hiding and revealing—hello, interactive storytelling.
11. Fabric Pocket with Snaps
A soft pocket made from fabric scraps, closed with a tiny snap. Practical and tactile.
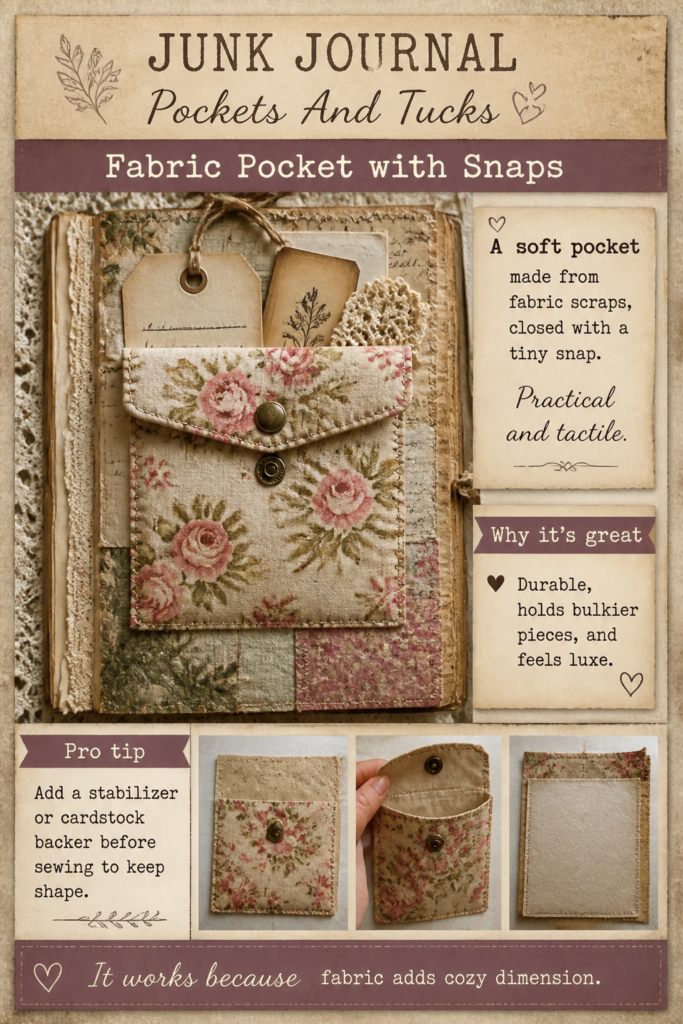
Why it’s great: Durable, holds bulkier pieces, and feels luxe.
Pro tip: Add a stabilizer or cardstock backer before sewing to keep shape.
It works because fabric adds cozy dimension.
12. Diagonal Slash Pocket
Cut a paper panel diagonally and glue the two edges to form a slanted pocket. Modern and graphic.
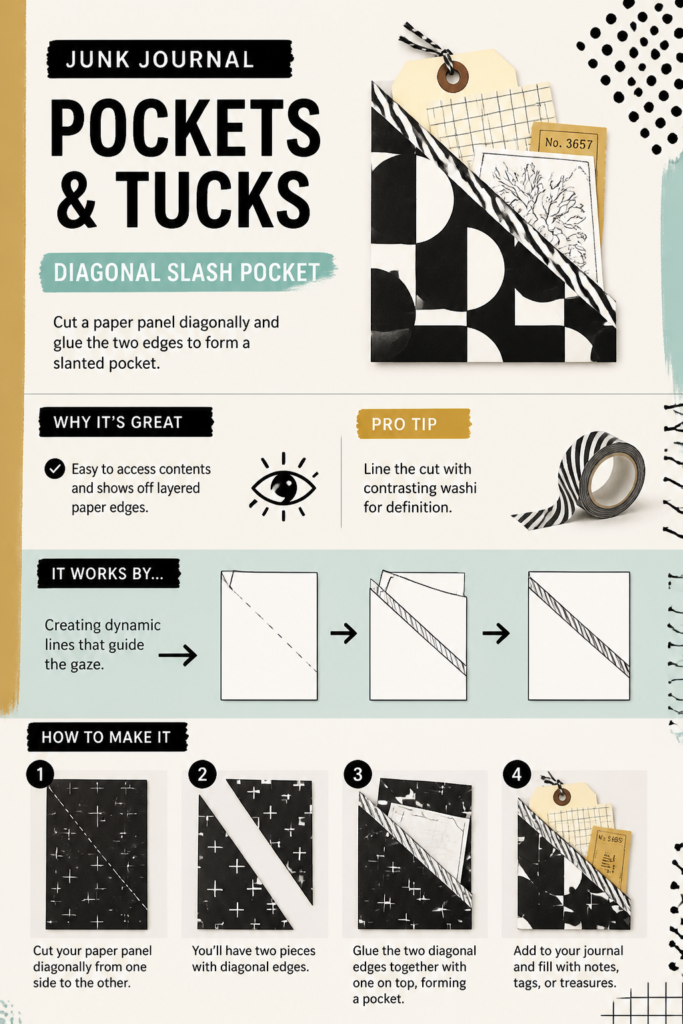
Why it’s great: Easy to access contents and shows off layered paper edges.
Pro tip: Line the cut with contrasting washi for definition.
It works by creating dynamic lines that guide the gaze.
13. Hidden Spine Tuck
Tuck a folded strip under the page near the spine and glue only the outer edge. Slide in skinny notes like a secret stash.
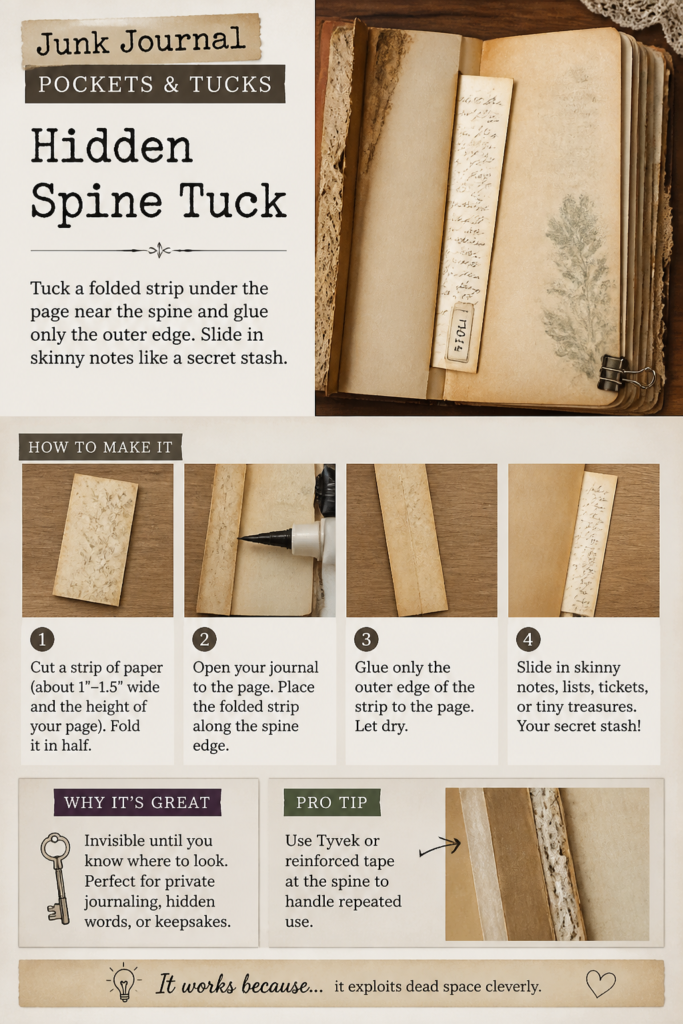
Why it’s great: Invisible until you know where to look.
Pro tip: Use tyvek or reinforced tape at the spine to handle repeated use.
It works because it exploits dead space cleverly.
14. Accordion Pocket Stack
Build a mini accordion with pockets on each fold. It expands to hold your hoard, then folds flat-ish.
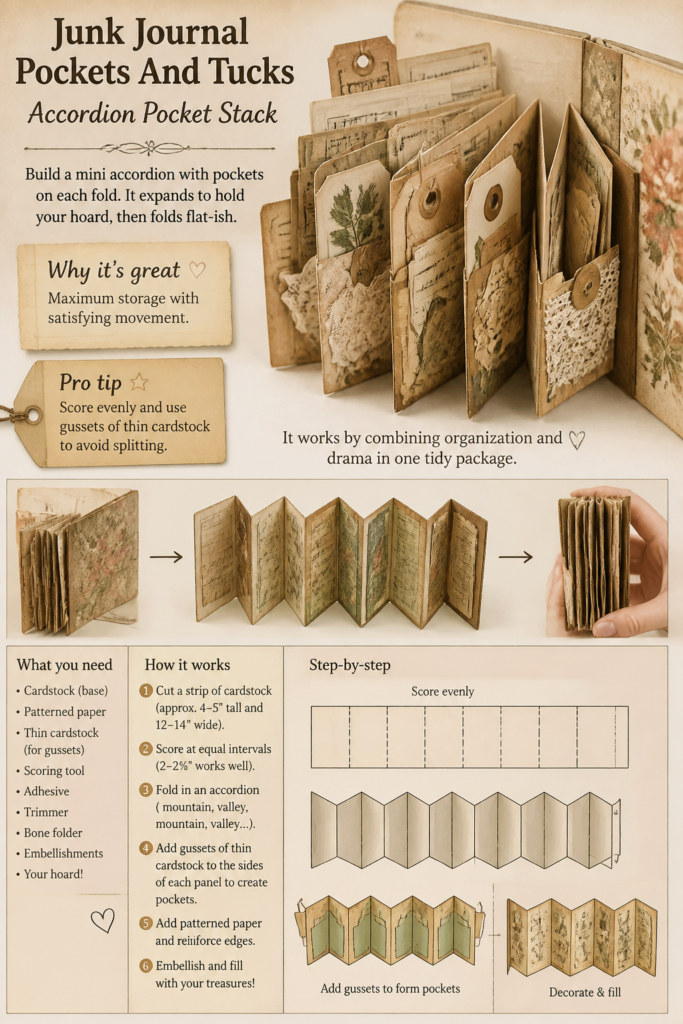
Why it’s great: Maximum storage with satisfying movement.
Pro tip: Score evenly and use gussets of thin cardstock to avoid splitting.
It works by combining organization and drama in one tidy package.
Conclusion
Pockets and tucks turn a cute journal into a treasure map. They add depth, surprise, and space for all the bits you can’t throw away. Mix textures, play with layers, and let form flirt with function. Your pages won’t just look good—they’ll actually do something.
& CRAFT IDEAS
Beginner-friendly tutorials, creative projects,
and weekly inspiration in your inbox.