🧵 How To Sew A Dress
& CRAFT IDEAS
Beginner-friendly tutorials, creative projects,
and weekly inspiration in your inbox.
🛠️ The Ultimate Maker's Toolkit
I've tested thousands of craft tools over the years. Whether you are quilting, crafting, or building mixed-media art, these are the top 5 absolute non-negotiable tools I personally recommend to guarantee professional results.
🪡 SINGER Heavy Duty 4452 Sewing Machine
The sewing community highly recommends this as the ultimate "bulletproof" entry-level machine. Its heavy metal frame powerfully pushes through thick denim and heavy quilt layers that would instantly jam a standard plastic machine.
✂️ Fiskars 8" Orange-Handled Scissors
Never settle for dull dollar-store blades. Wirecutter repeatedly names Fiskars the absolute best all-purpose craft scissor due to its legendary precision-ground blades and an ergonomic grip that prevents hand-cramping.
🔥 Gorilla Dual Temp Hot Glue Gun
Named Wirecutter's top choice because it literally does the work of two tools. It features dual-temperature settings offering low heat for delicate florals and blistering high heat for heavy wood adhesion repairs.
🖌️ Mod Podge Waterbase Gloss Sealer
The absolute undisputed champion of decoupage and paper crafts. Experts rely exclusively on this exact water-based formula because it glues, seals, and finishes beautifully without yellowing or flaking over time.
🎨 Apple Barrel Acrylic Paint (2 oz)
The quintessential, incredibly inexpensive craft paint. Woodworkers and hobby painters swear by its smooth flow and matte finish, providing massive value and remarkably thick color coverage on rough surfaces.
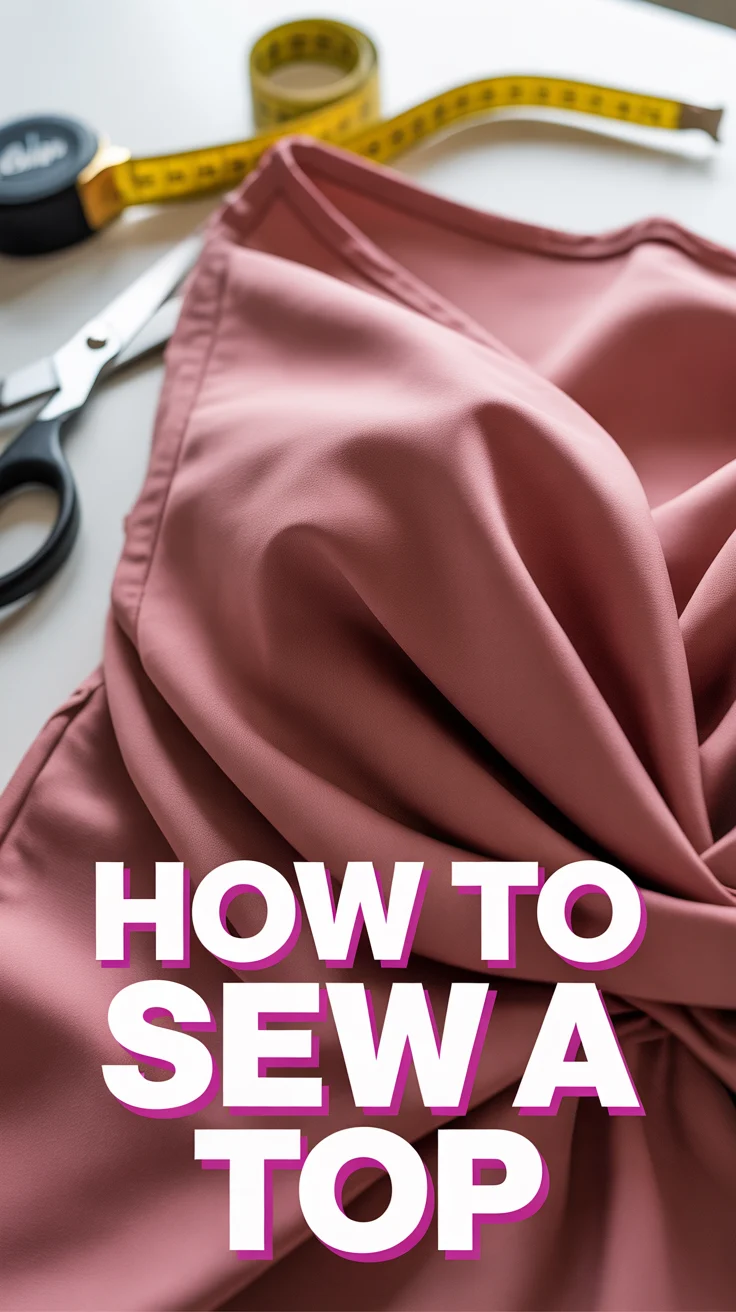
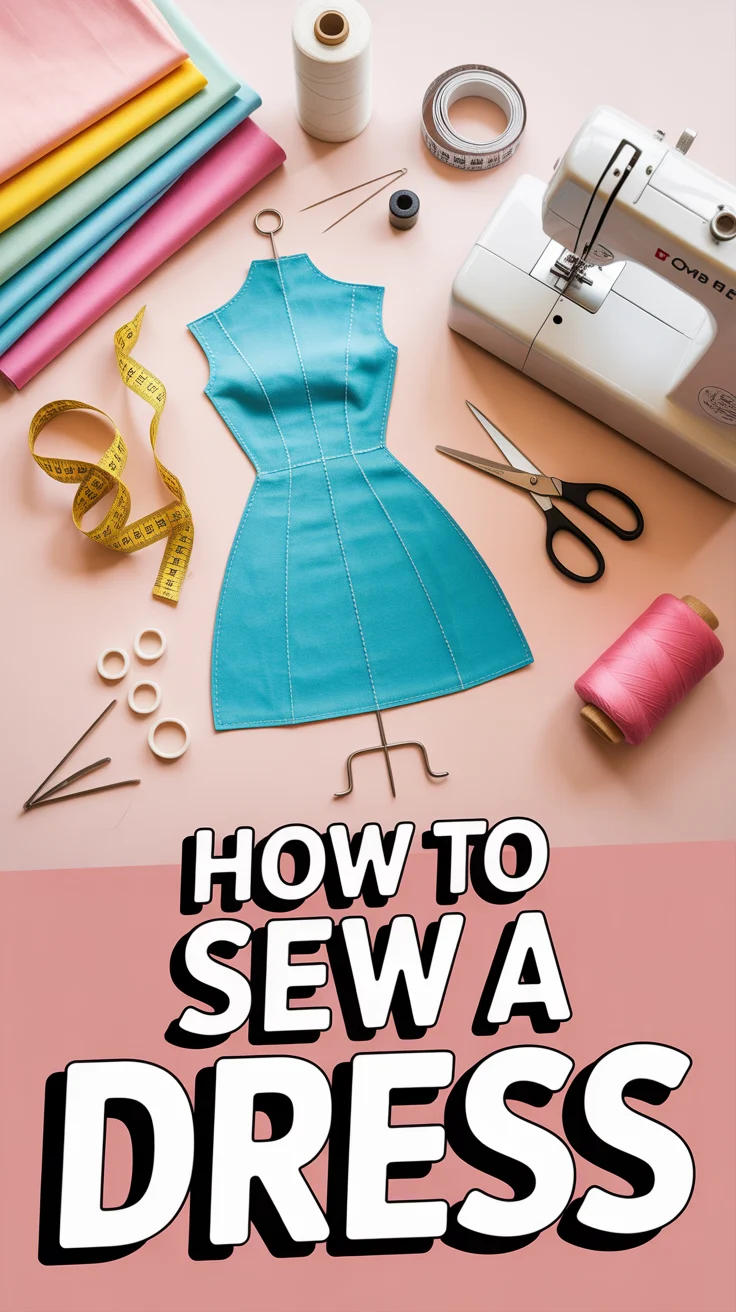
Ready to turn a flat piece of fabric into a wearable compliment magnet? Grab your scissors, cue the dramatic bobbin drop, and let’s stitch up something fabulous. You don’t need a couture atelier—just patience, pins, and a tiny bit of chaos tolerance. We’ll keep it simple, cute, and totally sew-able.
1. Choose Your Pattern
Pick a beginner-friendly pattern so you actually finish before your snacks run out. Look for A-line or shift dress styles with minimal seams. Paper patterns are classic, but PDFs let you reprint if your cat sits on a crucial piece.
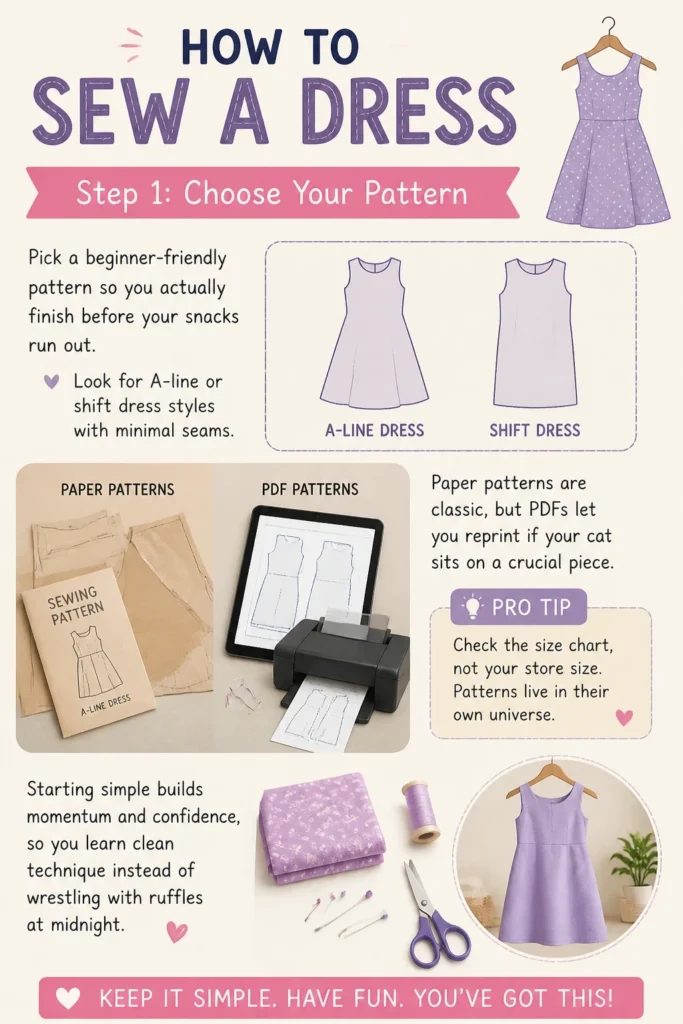
Pro tip: Check the size chart, not your store size. Patterns live in their own universe.
Starting simple builds momentum and confidence, so you learn clean technique instead of wrestling with ruffles at midnight.
2. Pick the Right Fabric
Your fabric decides the vibe. Cotton and linen behave; silky satins are drama queens. Choose something with stable weave and light-to-medium weight for easy cutting and sewing.
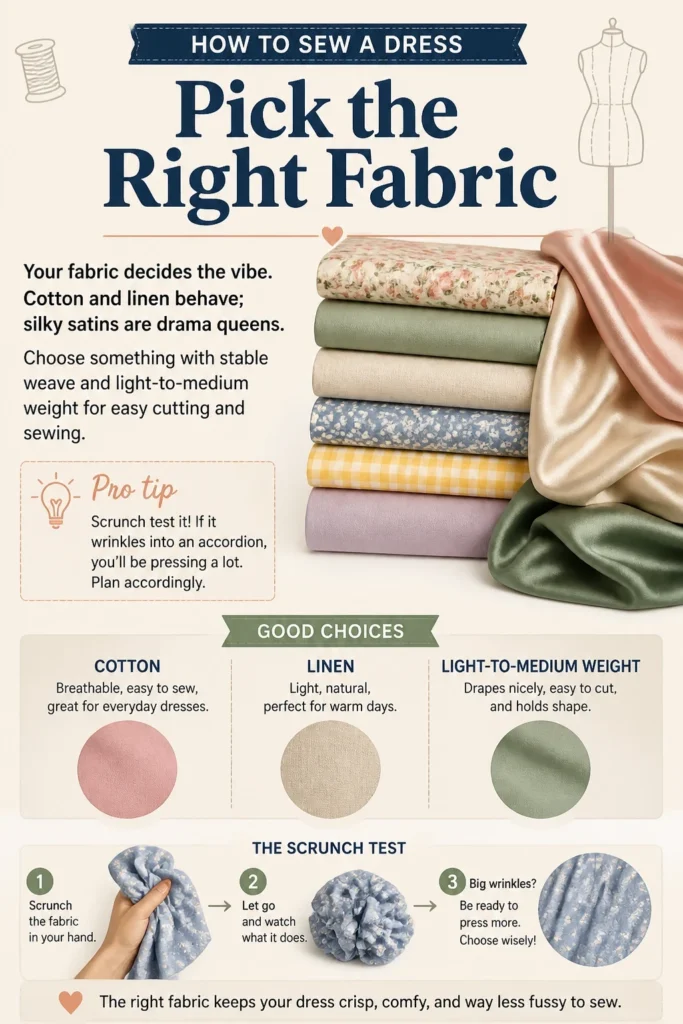
Pro tip: Scrunch test it: if it wrinkles into an accordion, you’ll be pressing a lot. Plan accordingly.
The right fabric keeps your dress crisp, comfy, and way less fussy to sew.
3. Gather Your Tools
Don’t MacGyver this with kitchen scissors. You need fabric shears, pins or clips, measuring tape, seam ripper, and iron. Bonus: a chalk pen and a fresh needle.
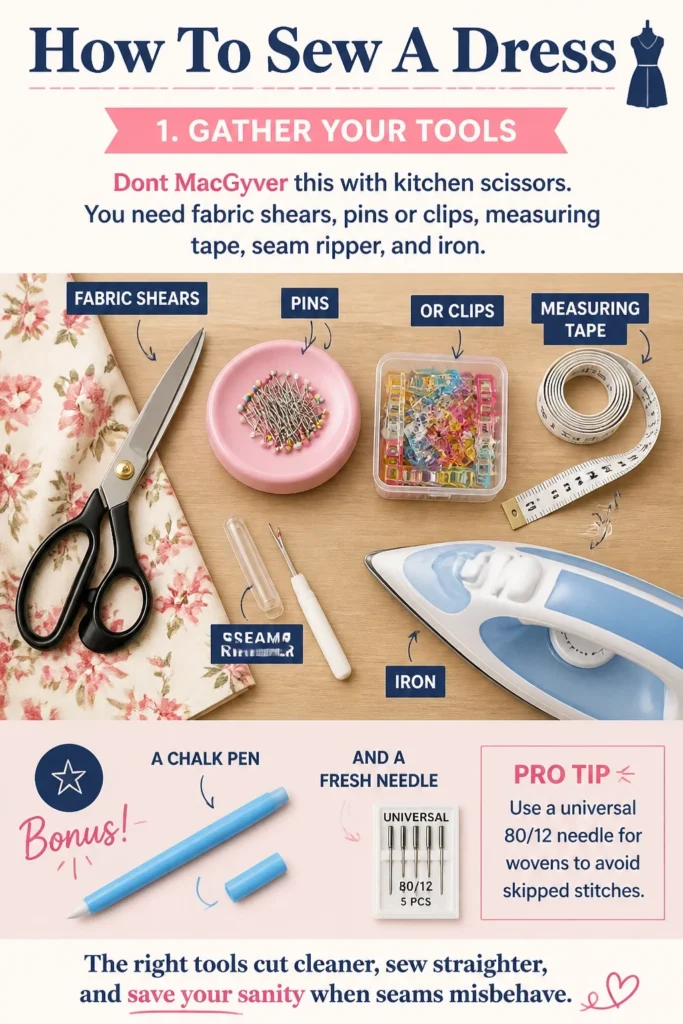
Pro tip: Use a universal 80/12 needle for wovens to avoid skipped stitches.
The right tools cut cleaner, sew straighter, and save your sanity when seams misbehave.
4. Prewash and Press
Wash your fabric before you commit. Shrink it now, not after your first selfie. Press it flat so your pieces aren’t lying to you.
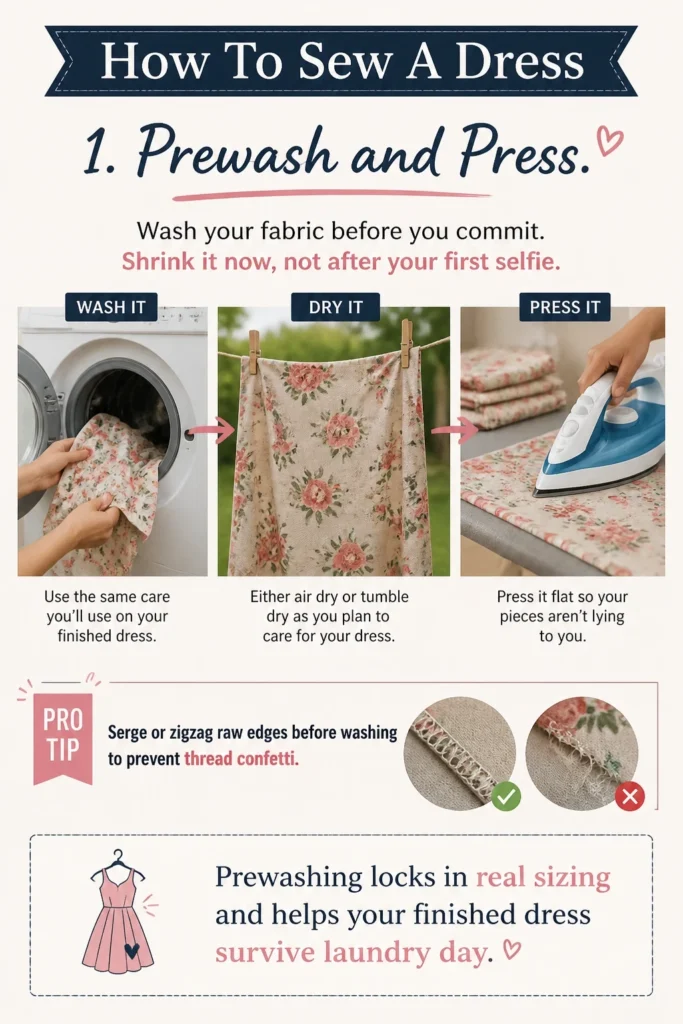
Pro tip: Serge or zigzag raw edges before washing to prevent thread confetti.
Prewashing locks in real sizing and helps your finished dress survive laundry day.
5. Measure Yourself Honestly
Tape measure > pride. Measure bust, waist, hips, and back length. Compare to the pattern’s body chart and finished garment measurements.
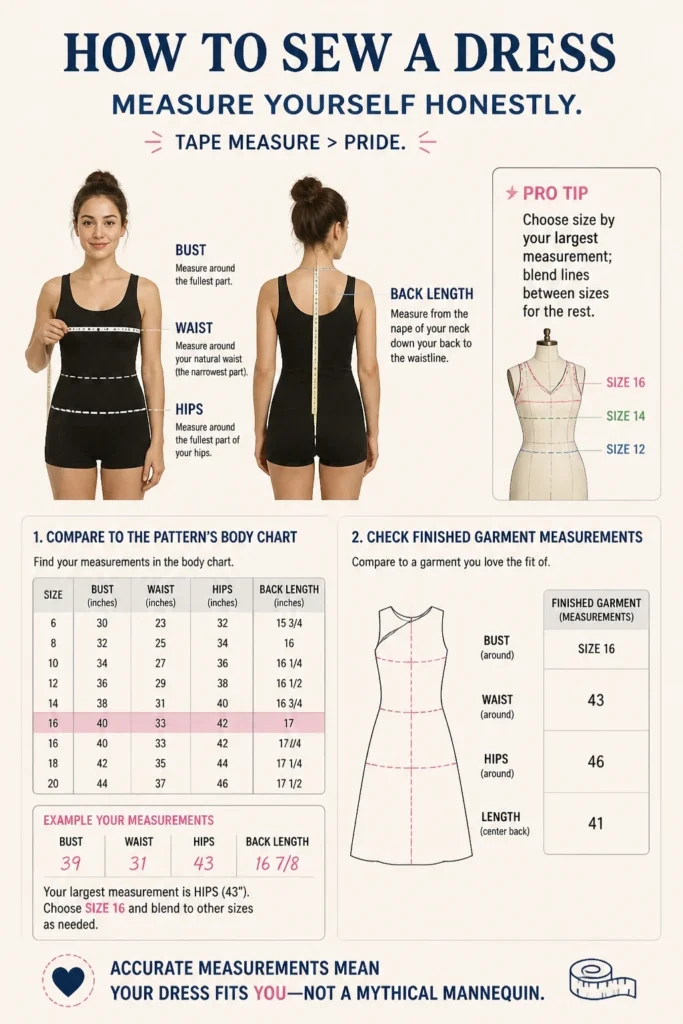
Pro tip: Choose size by your largest measurement; blend lines between sizes for the rest.
Accurate measurements mean your dress fits you—not a mythical mannequin.
6. Cut On Grain
Lay fabric flat, align the grainline arrows, and pin. Cutting on grain keeps your dress from twisting like a soft-serve cone. Use pattern weights if pins annoy you.
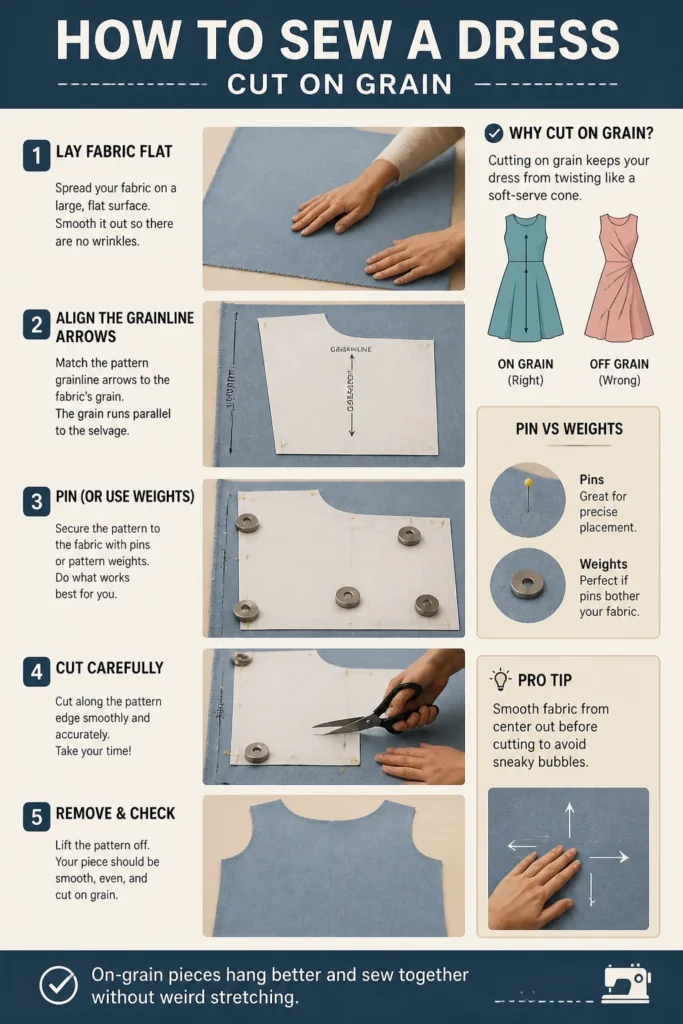
Pro tip: Smooth fabric from center out before cutting to avoid sneaky bubbles.
On-grain pieces hang better and sew together without weird stretching.
7. Transfer Markings
Dots, notches, darts—yes, they matter. Use tailor’s chalk or washable pen to mark what the pattern tells you. Future-you will thank you when seams line up like best friends.
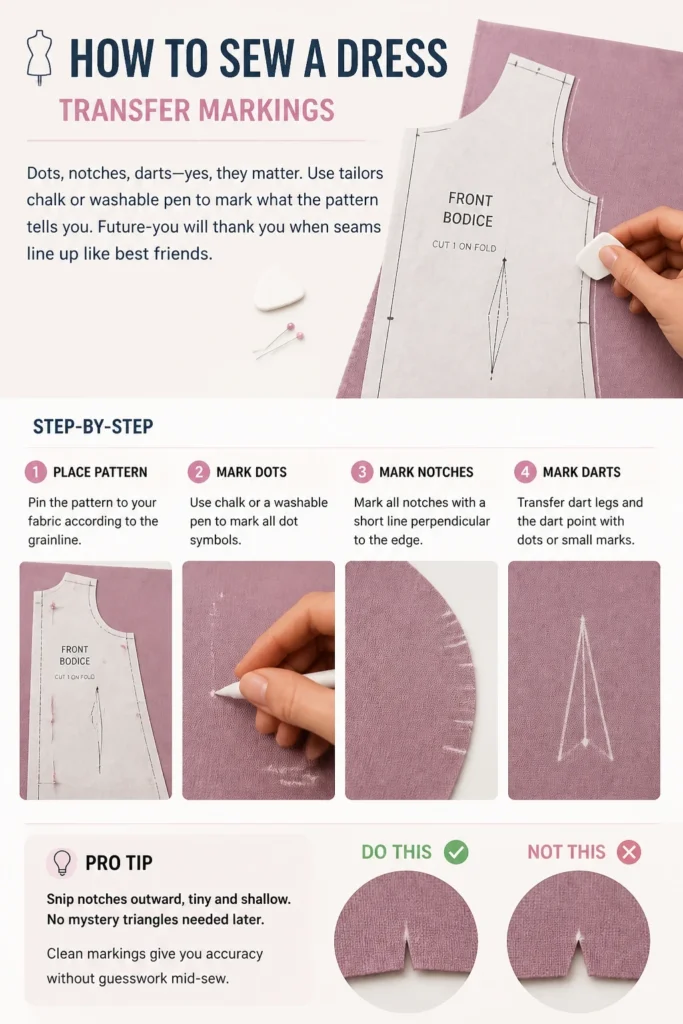
Pro tip: Snip notches outward, tiny and shallow. No mystery triangles needed later.
Clean markings give you accuracy without guesswork mid-sew.
8. Sew the Darts and Seams
Start with darts and bodice seams. Stitch with a 2.5 mm length, press seams as you go, and don’t rush the pivot. Your dress structure starts here.
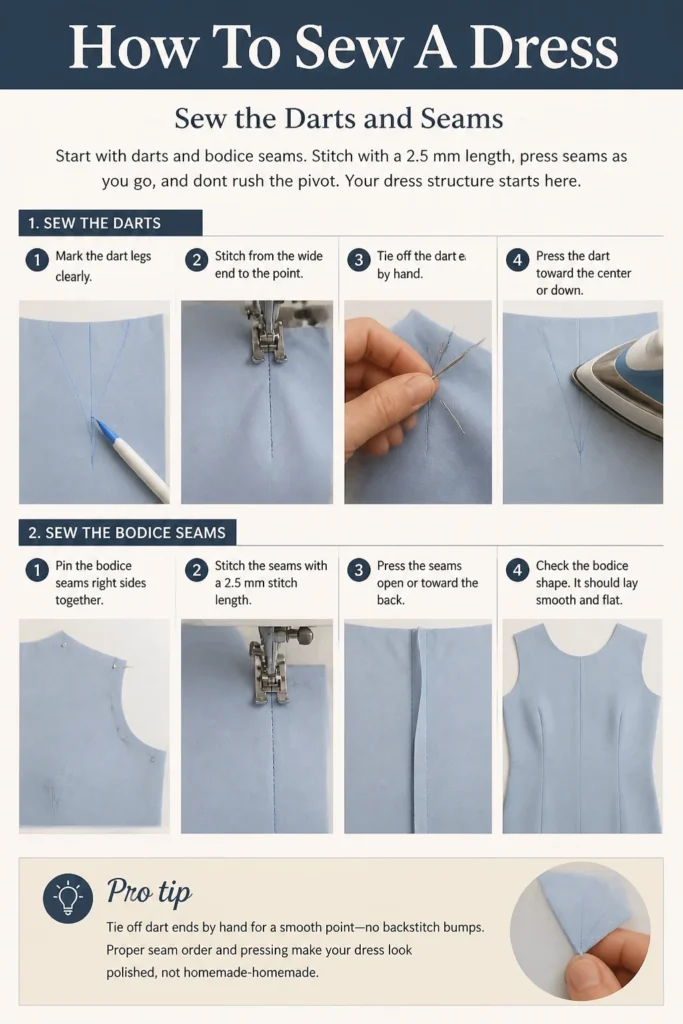
Pro tip: Tie off dart ends by hand for a smooth point—no backstitch bumps.
Proper seam order and pressing make your dress look polished, not homemade-homemade.
9. Add Stabilizers
Necklines and shoulders stretch if you look at them funny. Use staystitching and fusible interfacing where the pattern says. It’s the hidden armor of a clean finish.
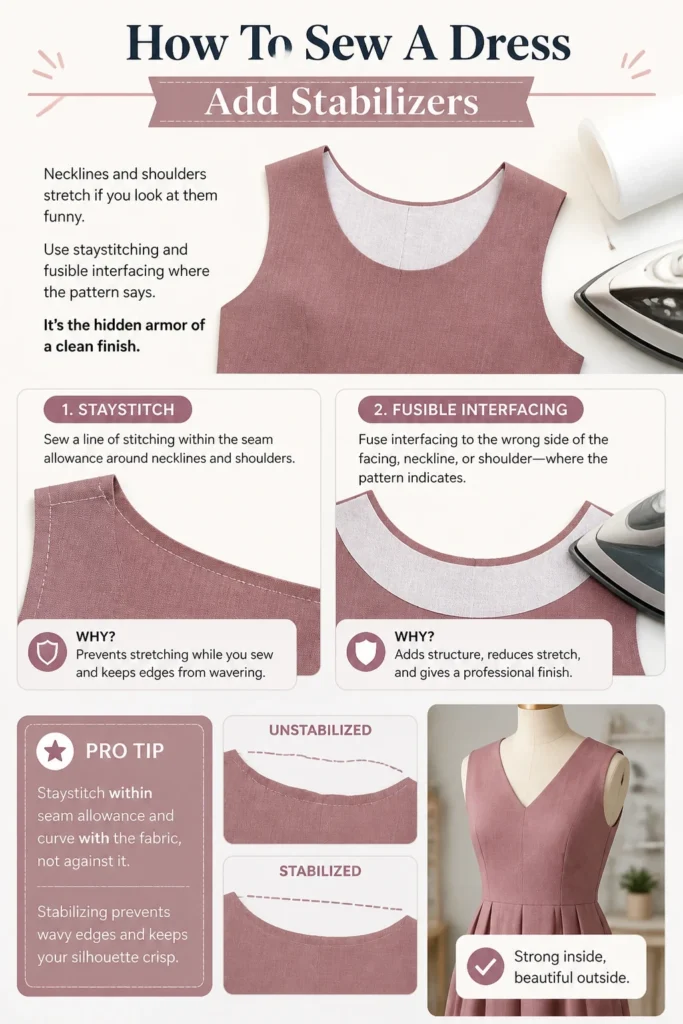
Pro tip: Staystitch within seam allowance and curve with the fabric, not against it.
Stabilizing prevents wavy edges and keeps your silhouette crisp.
10. Insert the Zipper
Zippers aren’t scary—just methodical. Choose centered for classic or invisible for fancy. Baste first, then stitch for keeps.
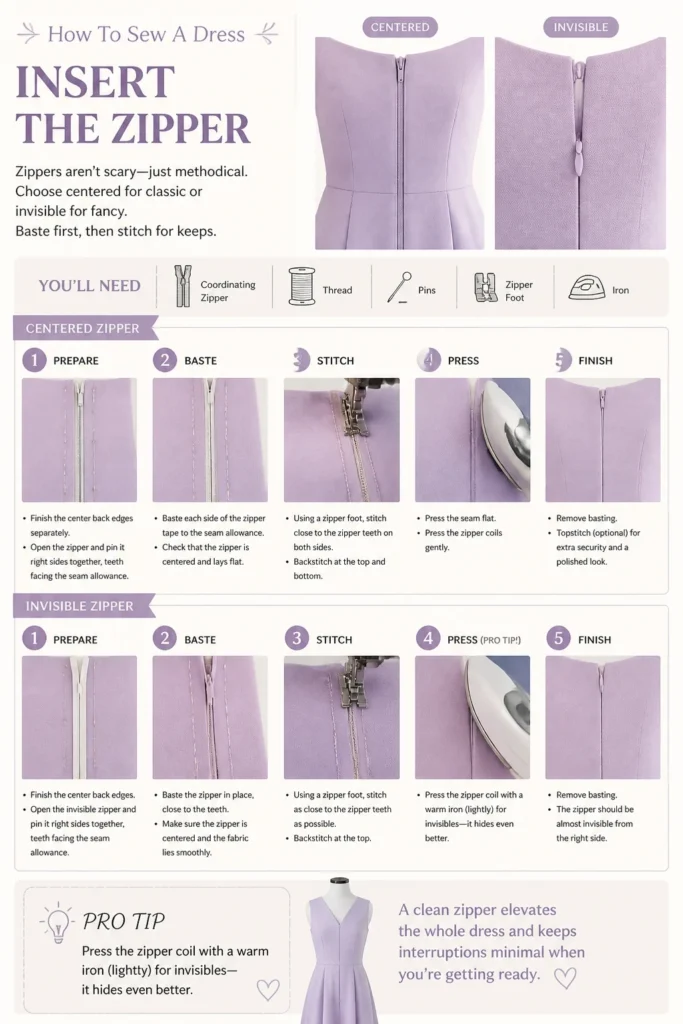
Pro tip: Press the zipper coil with a warm iron (lightly) for invisibles—it hides even better.
A clean zipper elevates the whole dress and keeps interruptions minimal when you’re getting ready.
11. Attach the Facings
Facings finish necklines and armholes like a pro. Interface, stitch, clip curves, and understitch so they roll inside neatly. No peeking allowed.
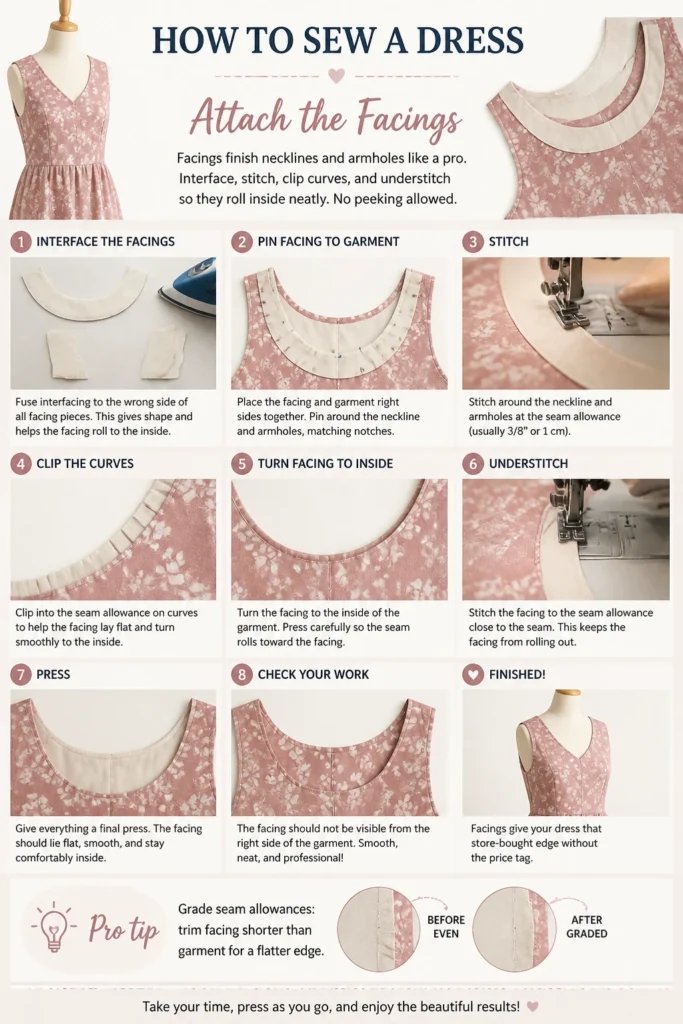
Pro tip: Grade seam allowances: trim facing shorter than garment for a flatter edge.
Facings give your dress that store-bought edge without the price tag.
12. Add Sleeves or Finish Armholes
Sleeves? Go for simple set-in or flutter shapes. No sleeves? Finish with bias binding for a clean, soft edge. Either way, press and ease—don’t force it.
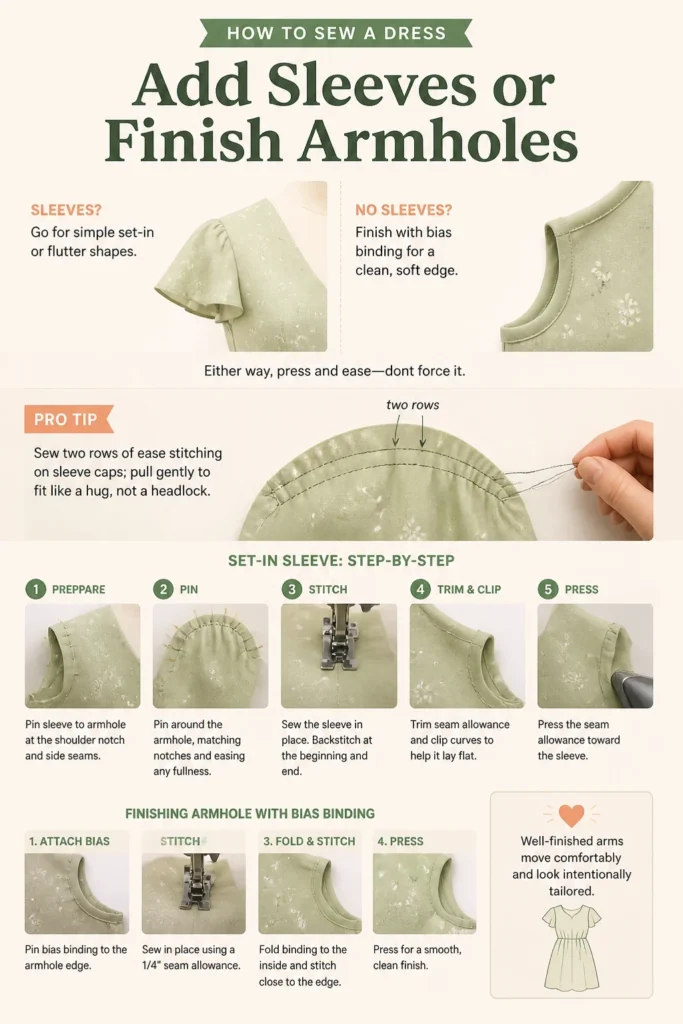
Pro tip: Sew two rows of ease stitching on sleeve caps; pull gently to fit like a hug, not a headlock.
Well-finished arms move comfortably and look intentionally tailored.
13. Sew the Skirt and Join Bodice
Assemble the skirt—side seams first—then attach to the bodice. Match notches and side seams like soulmates. Gathers? Distribute evenly, not lumpy.
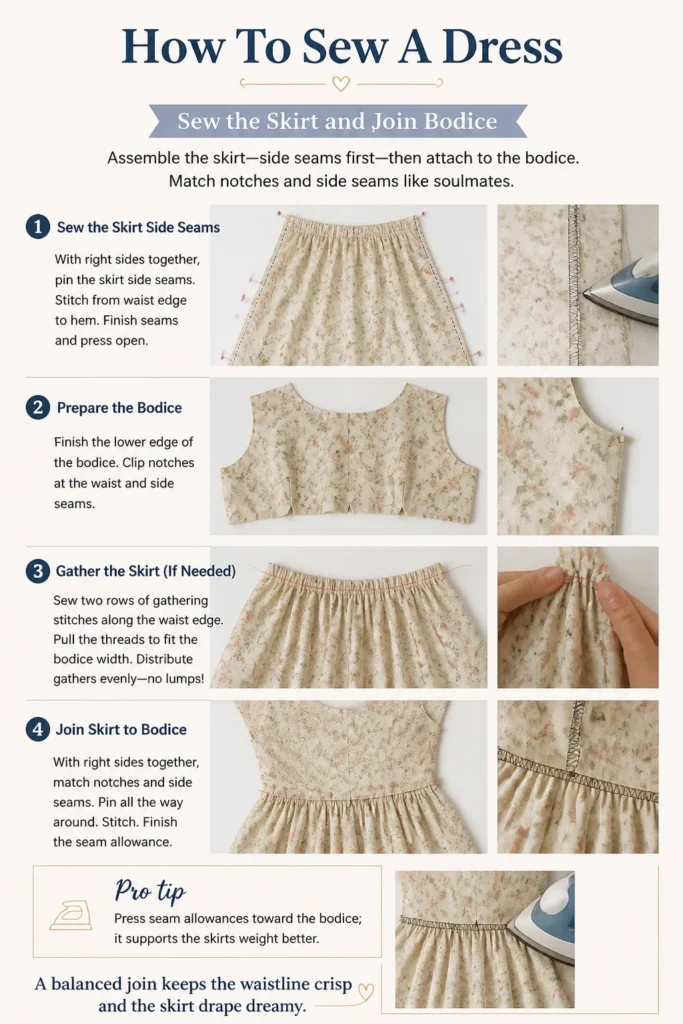
Pro tip: Press seam allowances toward the bodice; it supports the skirt’s weight better.
A balanced join keeps the waistline crisp and the skirt drape dreamy.
14. Hem Like You Mean It
Try it on, mark hem evenly, then commit. For light fabrics, use a narrow hem; for heavier, go 1–2 inch turn-up. Press first, stitch second.
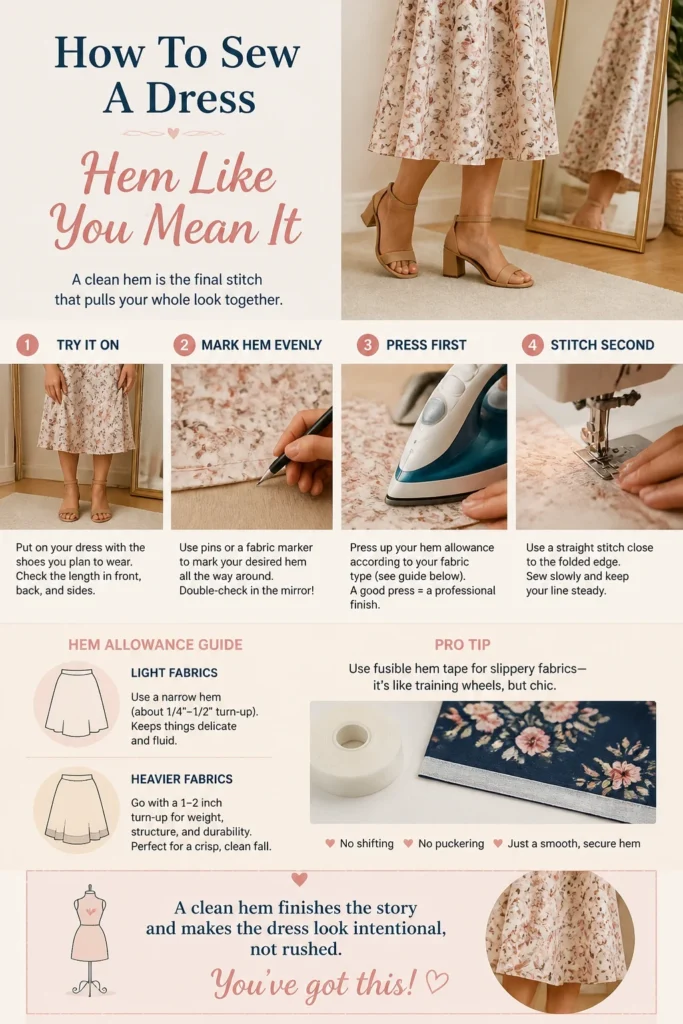
Pro tip: Use fusible hem tape for slippery fabrics—it’s like training wheels, but chic.
A clean hem finishes the story and makes the dress look intentional, not rushed.
15. Final Press and Fit Check
Steam is your bestie. Press seams, smooth hems, and check movement—sit, walk, twirl test. Make tiny tweaks if needed.
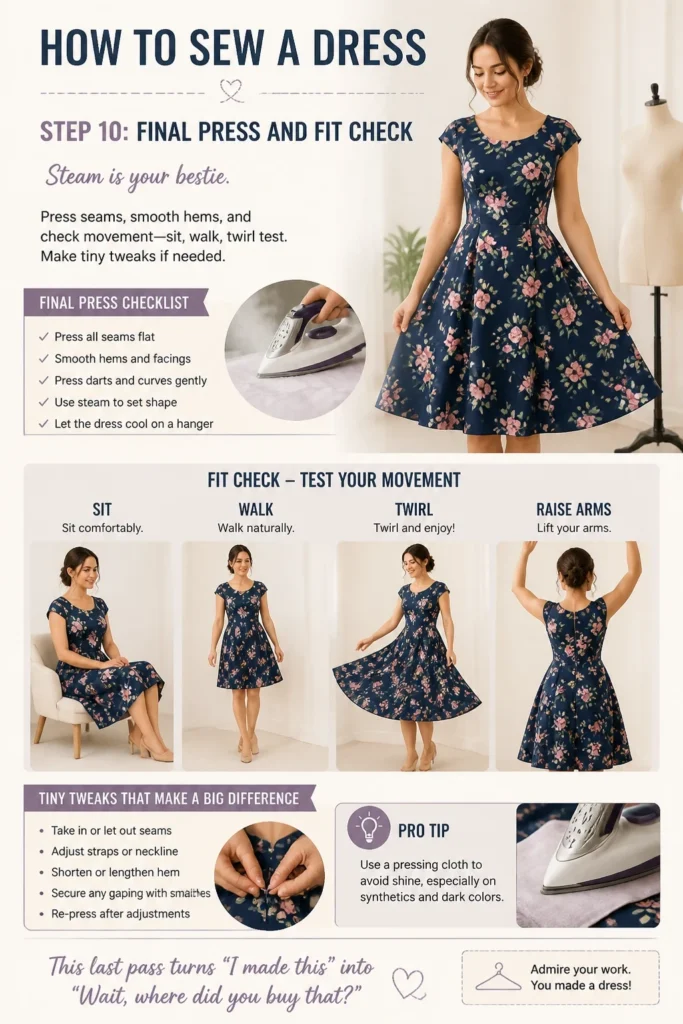
Pro tip: Use a pressing cloth to avoid shine, especially on synthetics and dark colors.
This last pass turns “I made this” into “Wait, where did you buy that?”
Conclusion
You just turned fabric into a dress—aka wizardry with thread. With smart prep, simple techniques, and a little steam-fueled patience, you can sew pieces you’ll actually wear. Keep your scraps, save your pattern, and get ready to make the next one even snappier.
& CRAFT IDEAS
Beginner-friendly tutorials, creative projects,
and weekly inspiration in your inbox.