🧶 How To Make Friendship Bracelets
& CRAFT IDEAS
Beginner-friendly tutorials, creative projects,
and weekly inspiration in your inbox.
🛠️ The Ultimate Maker's Toolkit
I've tested thousands of craft tools over the years. Whether you are quilting, crafting, or building mixed-media art, these are the top 5 absolute non-negotiable tools I personally recommend to guarantee professional results.
🪡 SINGER Heavy Duty 4452 Sewing Machine
The sewing community highly recommends this as the ultimate "bulletproof" entry-level machine. Its heavy metal frame powerfully pushes through thick denim and heavy quilt layers that would instantly jam a standard plastic machine.
✂️ Fiskars 8" Orange-Handled Scissors
Never settle for dull dollar-store blades. Wirecutter repeatedly names Fiskars the absolute best all-purpose craft scissor due to its legendary precision-ground blades and an ergonomic grip that prevents hand-cramping.
🔥 Gorilla Dual Temp Hot Glue Gun
Named Wirecutter's top choice because it literally does the work of two tools. It features dual-temperature settings offering low heat for delicate florals and blistering high heat for heavy wood adhesion repairs.
🖌️ Mod Podge Waterbase Gloss Sealer
The absolute undisputed champion of decoupage and paper crafts. Experts rely exclusively on this exact water-based formula because it glues, seals, and finishes beautifully without yellowing or flaking over time.
🎨 Apple Barrel Acrylic Paint (2 oz)
The quintessential, incredibly inexpensive craft paint. Woodworkers and hobby painters swear by its smooth flow and matte finish, providing massive value and remarkably thick color coverage on rough surfaces.
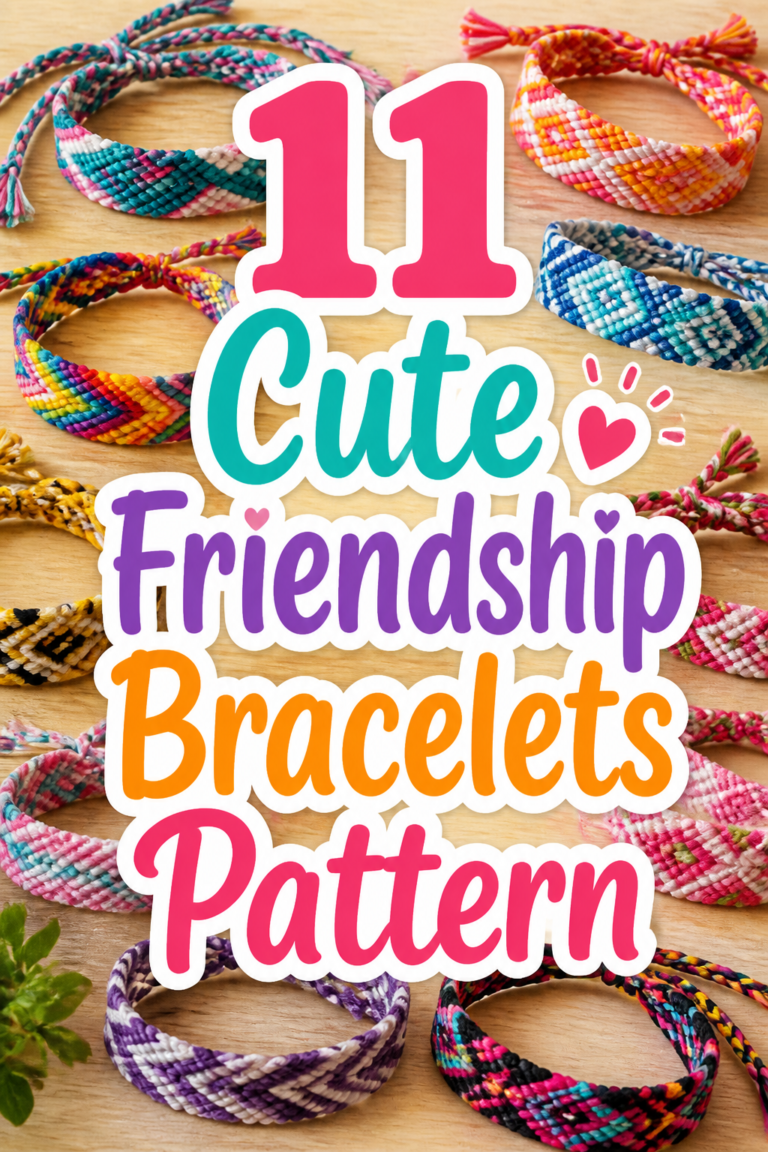
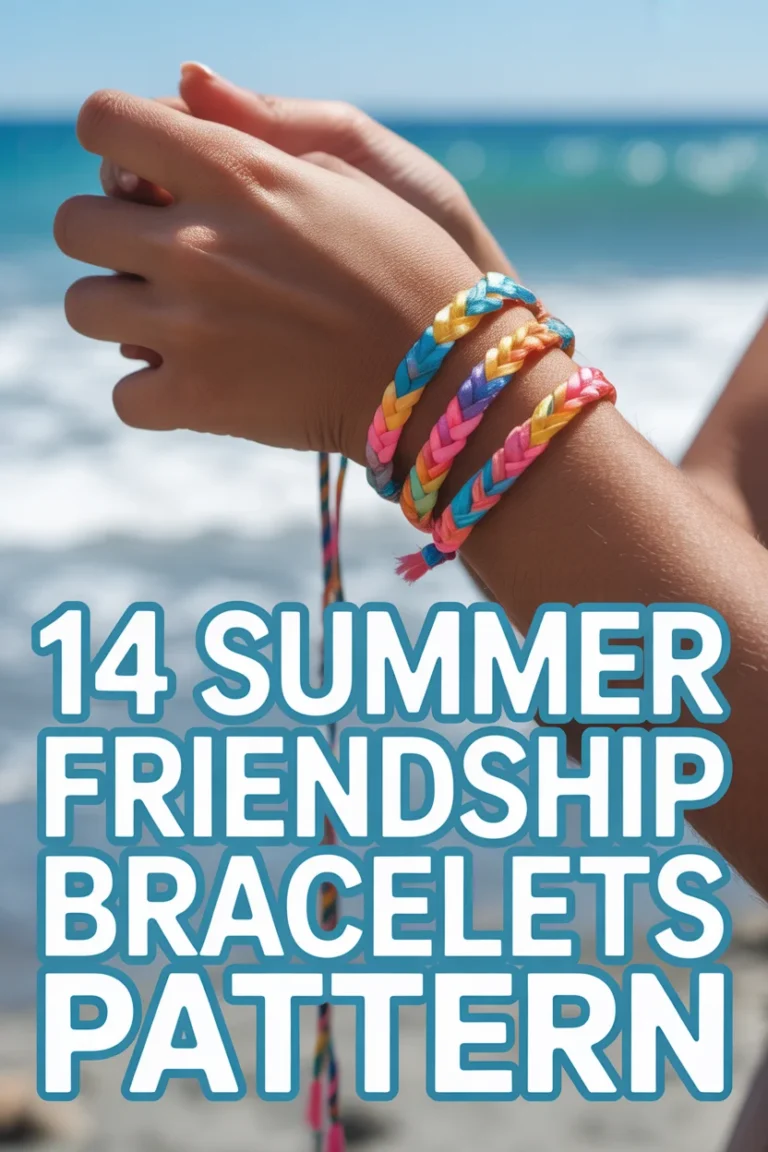
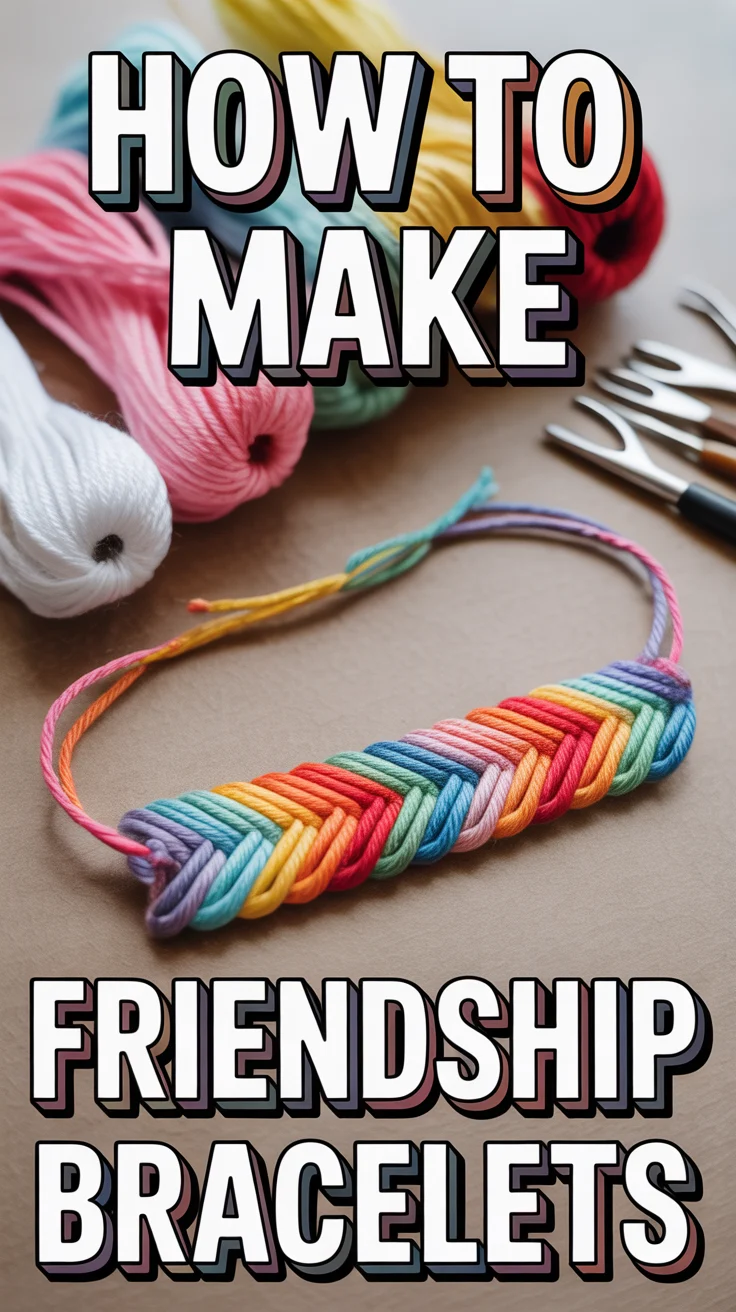
Let’s turn string into wearable bragging rights. Friendship bracelets are tiny, colorful receipts that say “I like you enough to knot 200 times.” Grab some floss, a snack, and your favorite playlist—your wrists are about to get cute.
1. Starter Kit Basics
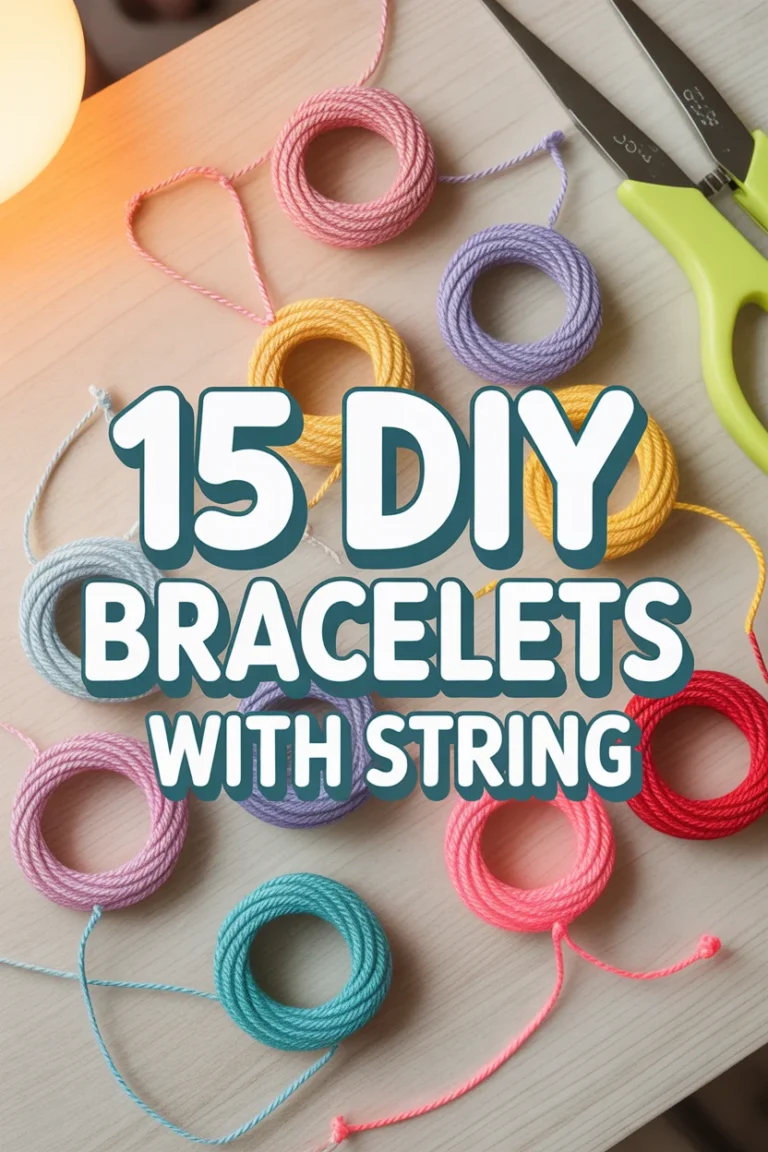
Begin with supplies that won’t fight you. You’ll need embroidery floss, tape or a clipboard, scissors, and optionally beads and charms. Pick colors that fit a vibe—two to four for beginner patterns, more if you like chaos.
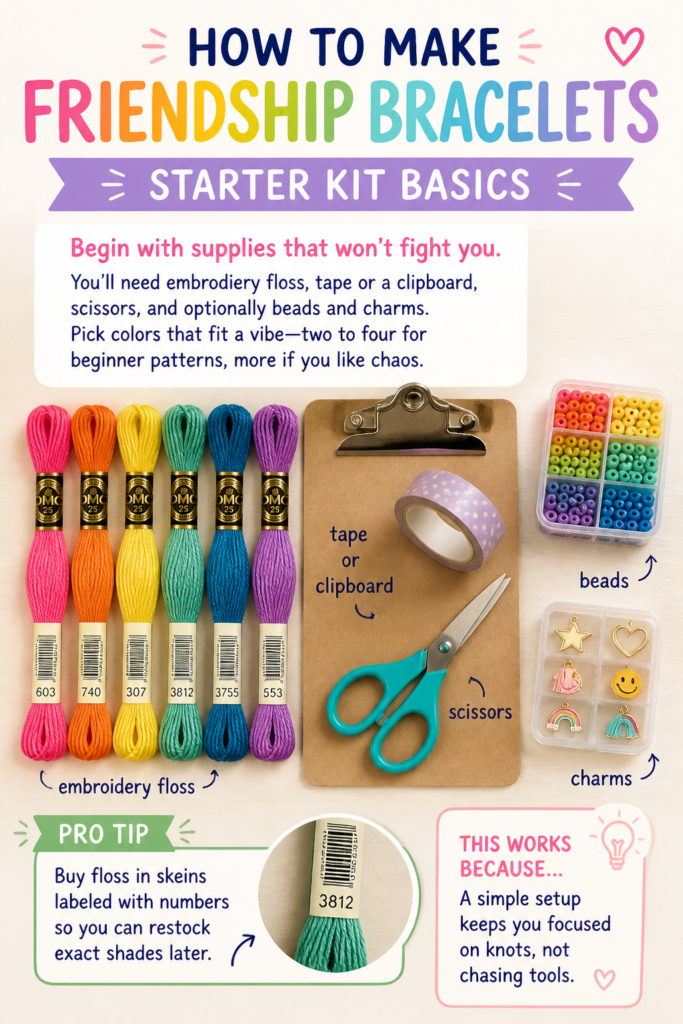
Pro tip: Buy floss in skeins labeled with numbers so you can restock exact shades later.
This works because a simple setup keeps you focused on knots, not chasing tools.
2. Master the Two Knots
Friendship bracelets run on two moves: the forward knot (makes left-to-right chevrons) and the backward knot (right-to-left). Each knot is basically two half-hitches. Memorize the feel, not just the look.
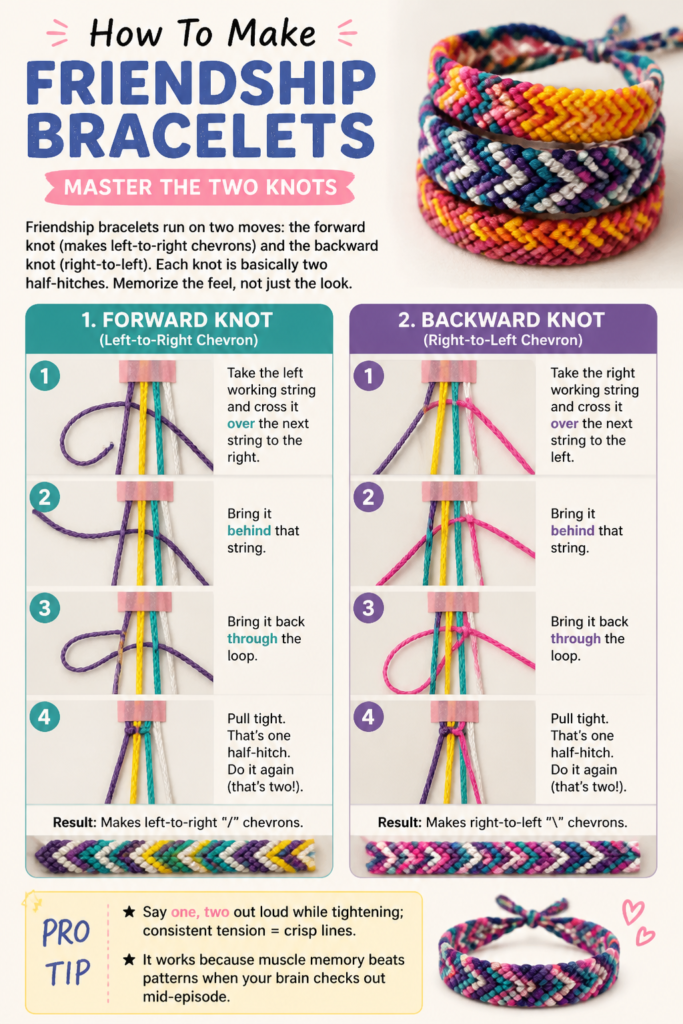
Pro tip: Say “one, two” out loud while tightening; consistent tension = crisp lines.
It works because muscle memory beats patterns when your brain checks out mid-episode.
3. The Candy Stripe
The classic starter—clean diagonal lines that look polished with very little stress. Line up 4–6 strands; keep knotting forward down the row, repeat, and watch the slant grow.
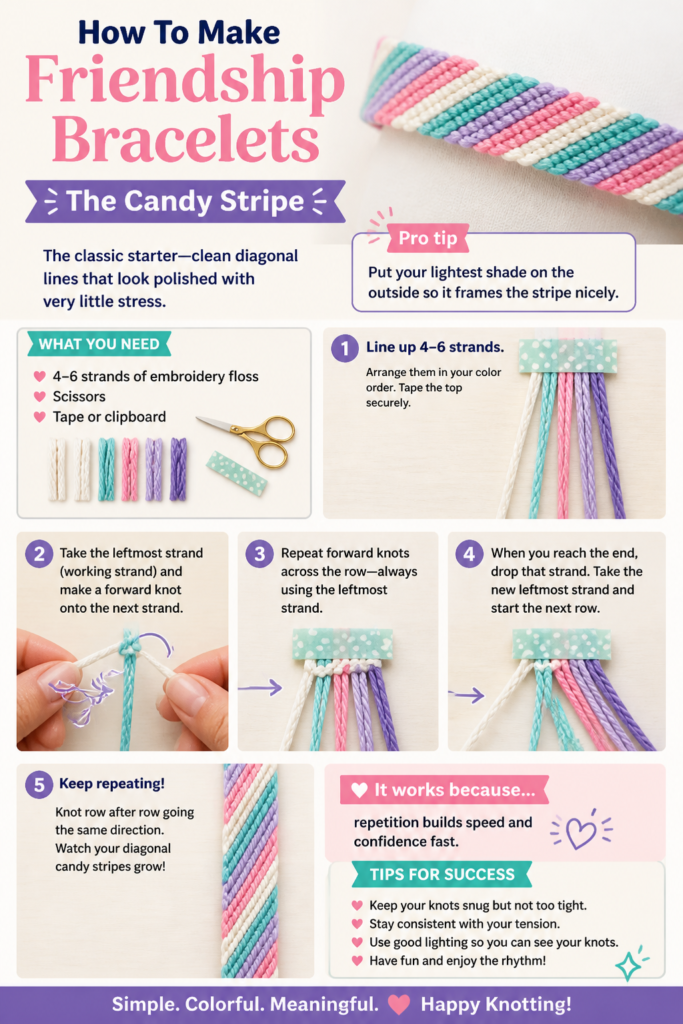
Pro tip: Put your lightest shade on the outside so it frames the stripe nicely.
It works because repetition builds speed and confidence fast.
4. The Chevron
V-shaped drama with minimal brain strain. Mirror your colors on both sides, knot inward with forward knots on the left and backward knots on the right, then tie the center strands together.
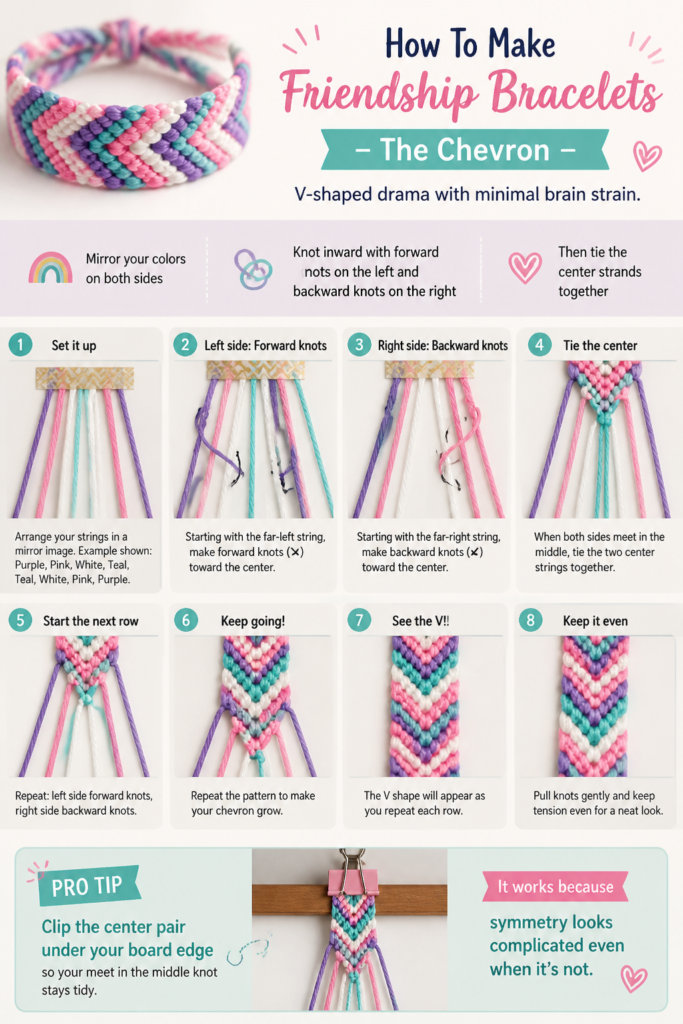
Pro tip: Clip the center pair under your board edge so your “meet in the middle” knot stays tidy.
It works because symmetry looks complicated even when it’s not.
5. The Chinese Staircase
Spiral city. Wrap one working strand around the whole bundle repeatedly to create a twist; switch colors for candy-cane vibes. Great for thick, grippy bracelets.
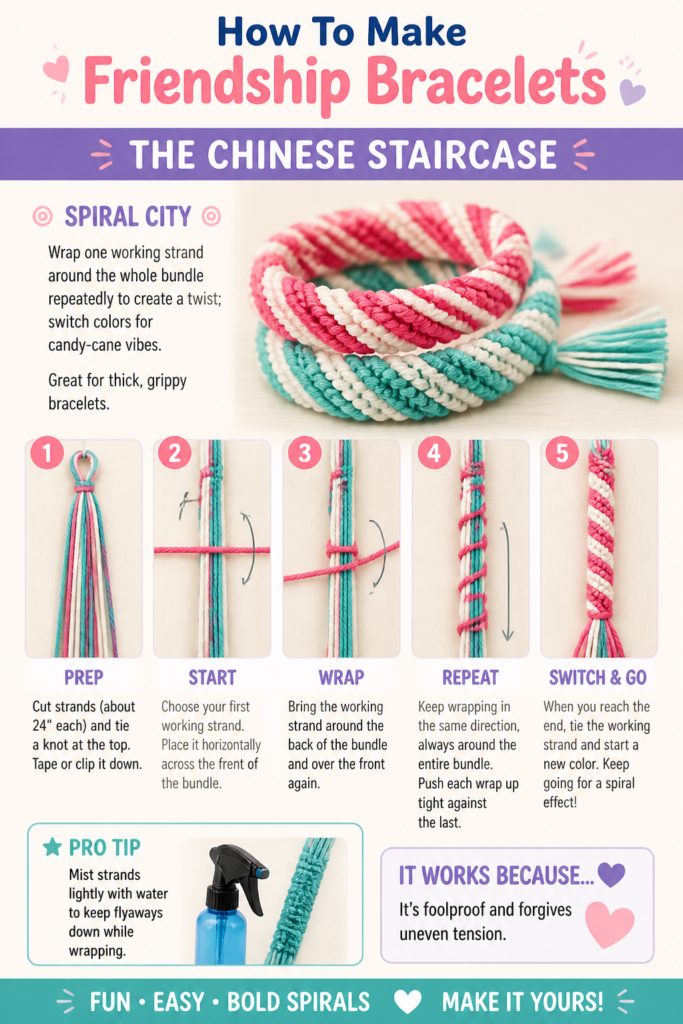
Pro tip: Mist strands lightly with water to keep flyaways down while wrapping.
It works because it’s foolproof and forgives uneven tension.
6. The Braided Stack
Need a quick win? Go with 3-strand or 4-strand braids and stack multiples. Add a bead here and there so it looks intentional—not “I gave up.”
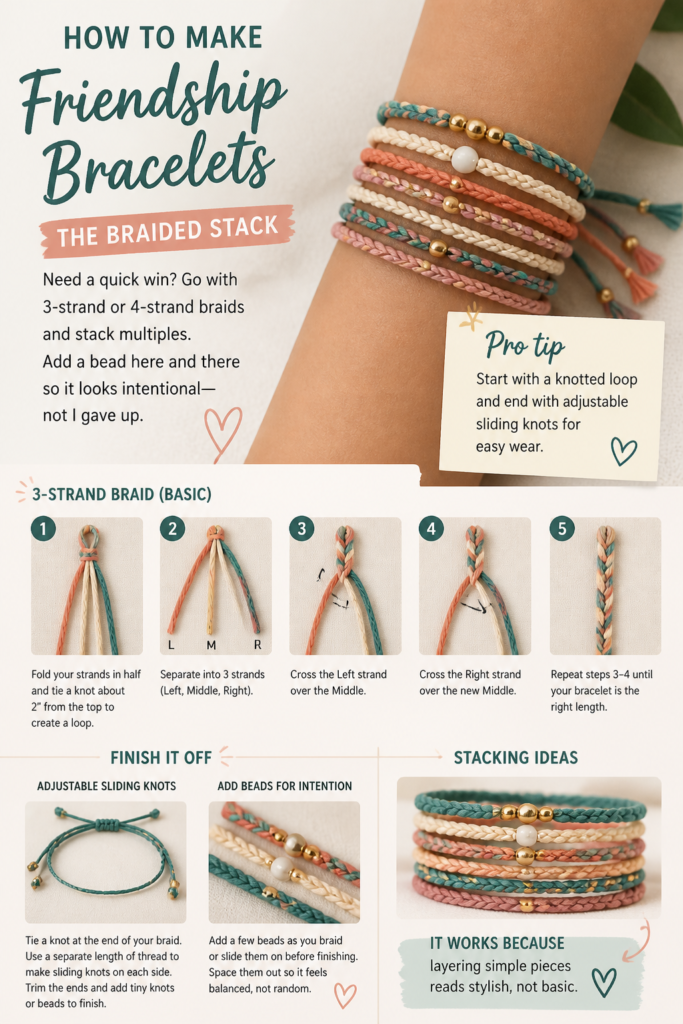
Pro tip: Start with a knotted loop and end with adjustable sliding knots for easy wear.
It works because layering simple pieces reads stylish, not basic.
7. Alpha Patterns 101
Think tiny pixel art. Use one base color and knot contrasting design colors across to form letters, hearts, or your friend’s initials. Follow a grid like cross-stitch.
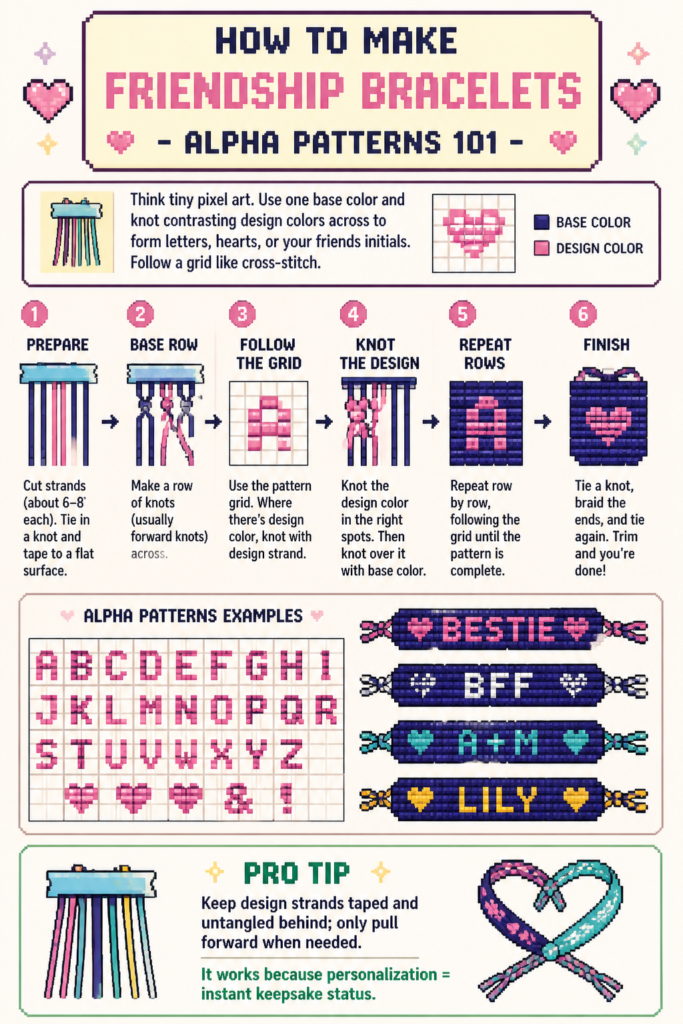
Pro tip: Keep design strands taped and untangled behind; only pull forward when needed.
It works because personalization = instant keepsake status.
8. Color Theory That Slaps
Pick analogous colors for soft fades or complements for pop. Add a neutral (black, white, beige) to balance busy patterns.
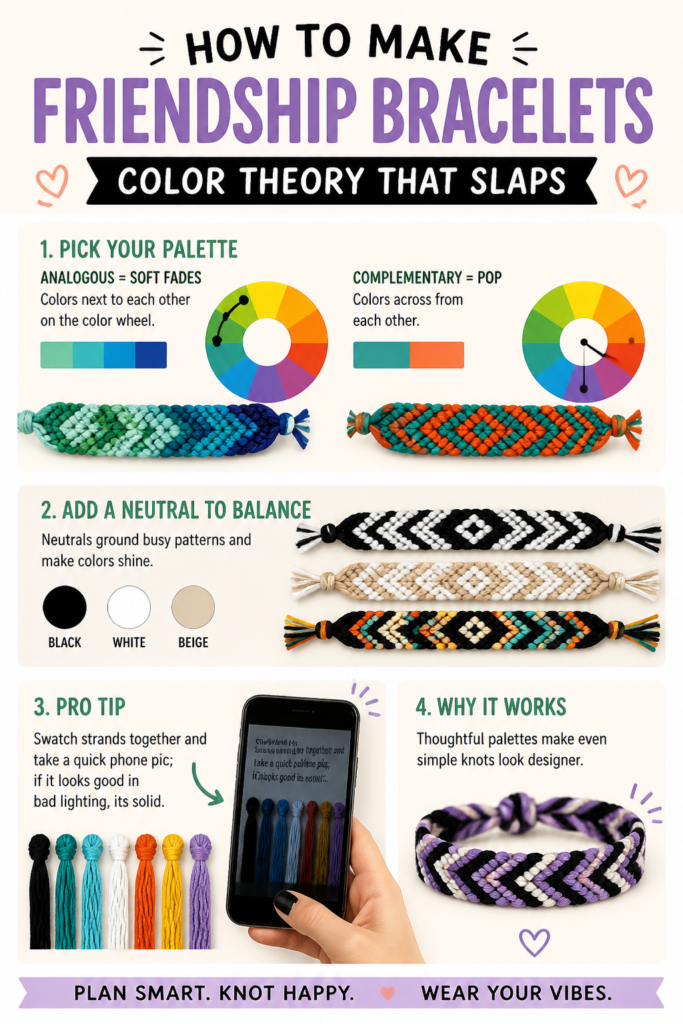
Pro tip: Swatch strands together and take a quick phone pic; if it looks good in bad lighting, it’s solid.
It works because thoughtful palettes make even simple knots look designer.
9. Beads, Charms, And Texture
Elevate the vibe with seed beads, letter cubes, or tiny metal charms. Thread beads onto strands between rows or onto filler cords in staircase styles.
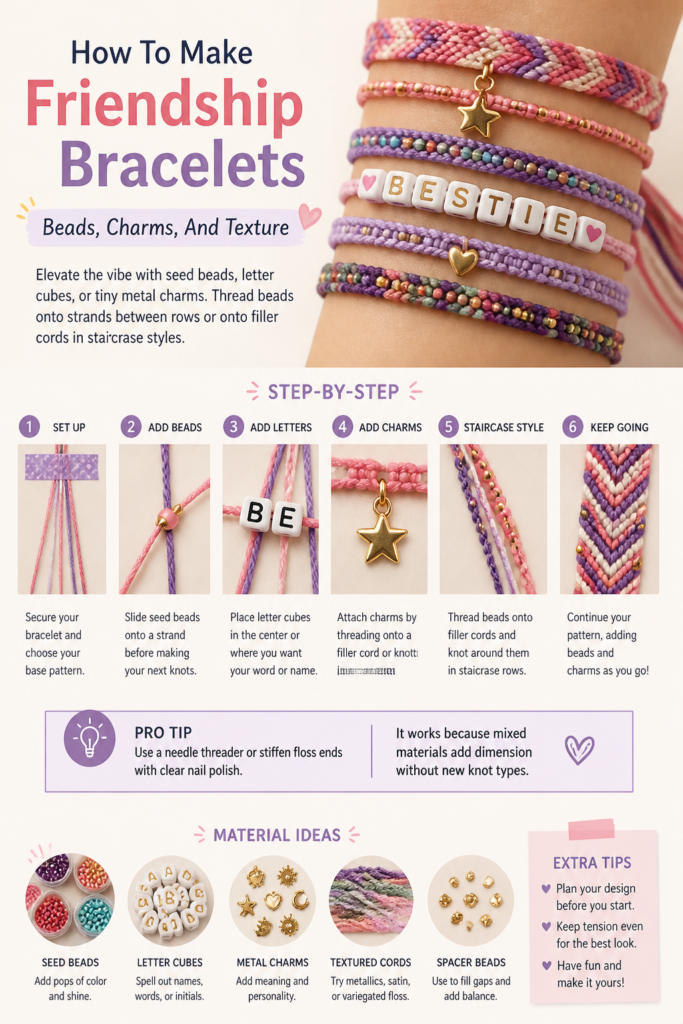
Pro tip: Use a needle threader or stiffen floss ends with clear nail polish.
It works because mixed materials add dimension without new knot types.
10. Finishes And Closures
Endings matter. Try a braided tie, button-and-loop, or sliding macramé closure for adjustable fits. Burnish the ends lightly to prevent fray.
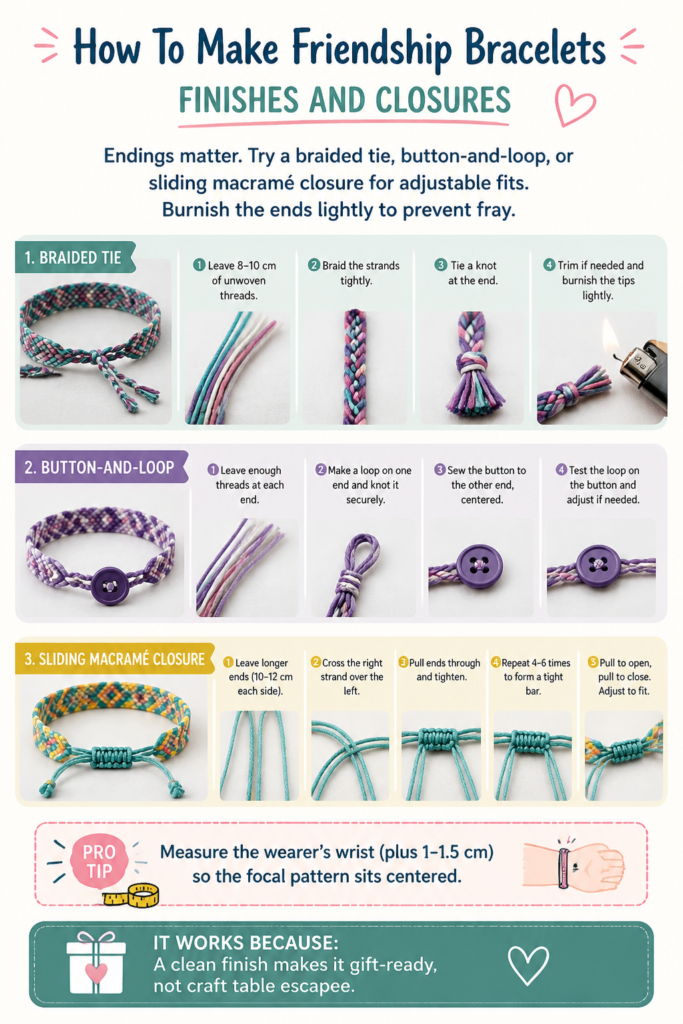
Pro tip: Measure the wearer’s wrist (plus 1–1.5 cm) so the focal pattern sits centered.
It works because a clean finish makes it gift-ready, not “craft table escapee.”
11. Care, Gifting, And Swaps
Bracelets survive showers, but colors last longer if you remove before swimming. Pair with a cute note or host a swap night with a theme palette.
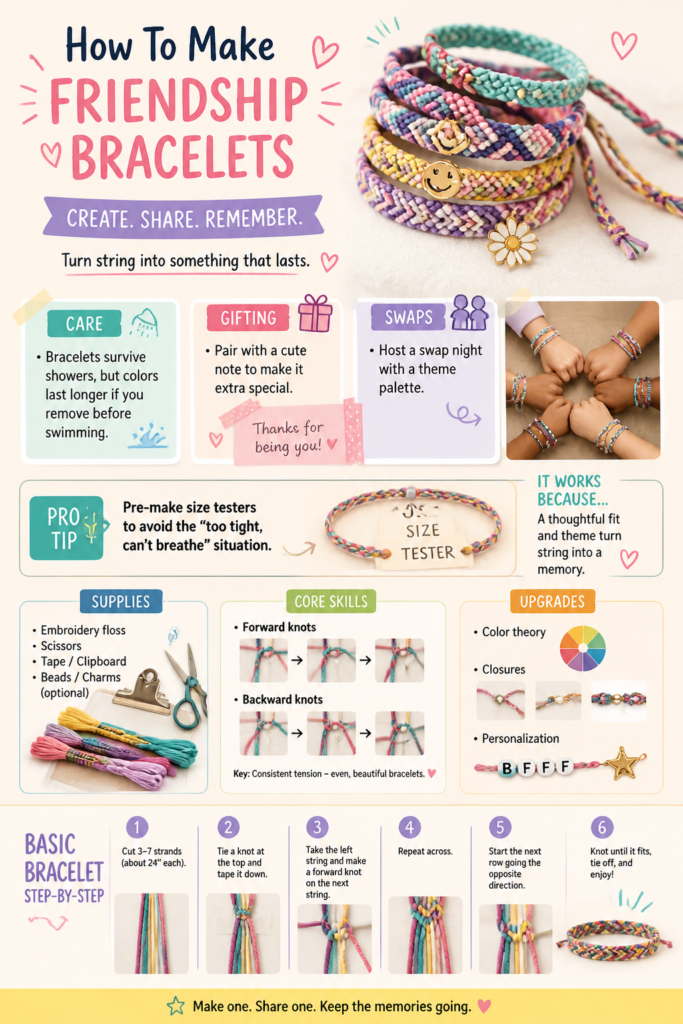
Pro tip: Pre-make size testers to avoid the “too tight, can’t breathe” situation.
It works because a thoughtful fit and theme turn string into a memory.
- Supplies: Embroidery floss, scissors, tape/clipboard, beads/charms optional.
- Core Skills: Forward and backward knots, consistent tension.
- Upgrades: Color theory, closures, personalization.
Conclusion
Friendship bracelets are tiny billboards for big feelings—handmade, wearable, and ridiculously customizable. Learn two knots, pick a color story, finish clean, and you’ve got a gift that sticks around longer than the trend cycle. Now go tie the knot—platonically.
& CRAFT IDEAS
Beginner-friendly tutorials, creative projects,
and weekly inspiration in your inbox.