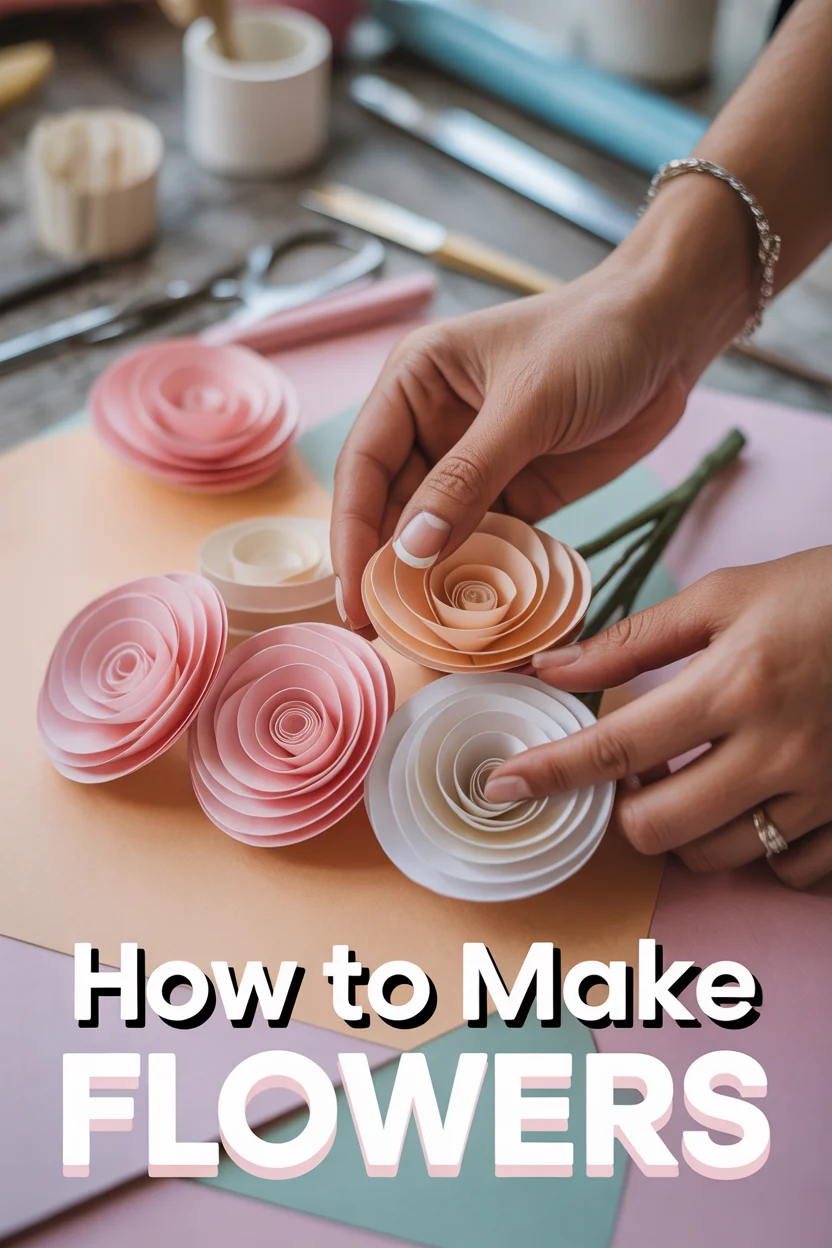
🌸 How To Make Flowers
🛠️ The Ultimate Maker's Toolkit
I've tested thousands of craft tools over the years. Whether you are quilting, crafting, or building mixed-media art, these are the top 5 absolute non-negotiable tools I personally recommend to guarantee professional results.
🪡 SINGER Heavy Duty 4452 Sewing Machine
The sewing community highly recommends this as the ultimate "bulletproof" entry-level machine. Its heavy metal frame powerfully pushes through thick denim and heavy quilt layers that would instantly jam a standard plastic machine.
✂️ Fiskars 8" Orange-Handled Scissors
Never settle for dull dollar-store blades. Wirecutter repeatedly names Fiskars the absolute best all-purpose craft scissor due to its legendary precision-ground blades and an ergonomic grip that prevents hand-cramping.
🔥 Gorilla Dual Temp Hot Glue Gun
Named Wirecutter's top choice because it literally does the work of two tools. It features dual-temperature settings offering low heat for delicate florals and blistering high heat for heavy wood adhesion repairs.
🖌️ Mod Podge Waterbase Gloss Sealer
The absolute undisputed champion of decoupage and paper crafts. Experts rely exclusively on this exact water-based formula because it glues, seals, and finishes beautifully without yellowing or flaking over time.
🎨 Apple Barrel Acrylic Paint (2 oz)
The quintessential, incredibly inexpensive craft paint. Woodworkers and hobby painters swear by its smooth flow and matte finish, providing massive value and remarkably thick color coverage on rough surfaces.
Imagine holding a bouquet of vibrant blooms, crafted with your own hands, each petal a testament to your creativity and patience. Beyond the fleeting beauty of fresh flowers, handmade blossoms offer a lasting charm, a personal touch, and the immense satisfaction of transforming simple materials into something truly magnificent. Get ready to unlock your inner artisan and discover the joy of creating flowers that never wilt.
Quick Overview
This guide will walk you through the enchanting process of crafting beautiful, realistic paper flowers from scratch. You’ll learn essential techniques for cutting, shaping, and assembling petals to create stunning botanical masterpieces that can adorn your home, brighten a gift, or become a cherished keepsake.
- Time needed: 1-3 hours (depending on complexity and number of flowers)
- Difficulty: Beginner-Friendly (with room to grow!)
- What you’ll need: Paper (crepe, cardstock), scissors, craft glue, floral wire, floral tape, ruler, pencil.
Step-by-Step Instructions
Step 1: Gather Your Creative Arsenal
Every great artist starts with their tools. For making paper flowers, a few key items will become your best friends. Don’t worry, most of these are readily available at any craft store or even around your home.
- Paper: Crepe paper (heavyweight is best for stretching and shaping) offers incredible realism due to its stretch and texture. Cardstock (65-80 lb) is great for structured flowers, leaves, and stamens. Experiment with different colors and textures!
- Scissors: A good pair of sharp, comfortable scissors is crucial for clean cuts. Small detail scissors can be handy for intricate work.
- Craft Glue: A quick-drying, strong craft glue (like Tacky Glue or a hot glue gun for faster assembly) is essential. Make sure it dries clear.
- Floral Wire: Green floral wire (18-24 gauge) will form the sturdy stems of your flowers. Thicker gauges for larger flowers, thinner for delicate ones.
- Floral Tape: This slightly adhesive, stretchy tape is used to wrap stems, attach leaves, and secure elements. It comes in various shades of green.
- Ruler & Pencil: For measuring and marking your paper, especially if you’re working without templates.
- Shaping Tools (Optional but Recommended): A wooden dowel, skewer, or even a knitting needle can help curl petals. A bone folder or ball stylus can create intricate curves and veins.
- Templates (Optional): You can find countless free printable flower petal templates online, or you can design your own.
Pro tip: Start with a simple flower like a daisy or a basic rose to get comfortable with the materials and techniques. Don’t invest in every fancy tool until you know you love the craft!
Step 2: Choose Your Bloom & Design Your Petals
Before you cut, decide what kind of flower you want to make. Do you envision a classic rose, a cheerful peony, or a delicate cherry blossom? Each flower has a unique petal shape and arrangement.
- Research: Look at real flowers or photos for inspiration. Pay attention to petal count, size variation, and how petals overlap.
- Sketching: On a scrap piece of paper, sketch out the different petal shapes and sizes you’ll need. Most flowers have smaller, tighter petals for the center and progressively larger, broader petals for the outer layers.
- Templates: If using templates, print and cut them out. If designing your own, draw your petal shapes directly onto your chosen paper or sturdy cardstock to create your own reusable templates.
- Sizes: Typically, you’ll need at least 3-4 different petal sizes for a realistic flower: a small size for the bud, a medium size for the middle layers, and a large size for the outer layers. You might also need a distinct leaf shape.
Pro tip: Don’t aim for perfect symmetry in your petals. Nature is beautifully imperfect, and slight variations will make your flower look more organic and lifelike.
Step 3: Cut, Cut, Cut! Petal Perfection
With your designs in hand, it’s time to bring them to life through cutting. Precision and patience are key here.
- Stacking: For identical petals, stack 2-4 layers of paper (depending on thickness) and cut them simultaneously. Secure with a paperclip if needed.
- Smooth Edges: Use long, confident strokes with your scissors to create smooth, clean edges. Avoid tiny snips, which can result in jagged edges.
- Quantity: Refer to your chosen flower design for the number of petals needed for each size. A typical rose might require 5-7 small petals, 8-10 medium, and 10-12 large. It’s always better to cut a few extra than to run short.
- Grain Direction (for Crepe Paper): Always cut crepe paper with the grain (the lines of the crepe) running vertically down the petal. This allows the paper to stretch horizontally, which is crucial for shaping.
Pro tip: If your hands get tired, take a break! Cutting many petals can be repetitive, but it’s a meditative part of the process. Put on some music or a podcast and enjoy the rhythm.
Step 4: Shape & Sculpt Your Petals to Life
This is where the magic truly happens! Shaping transforms flat paper into soft, dimensional petals, giving your flower its natural form and movement.
- Curling: For the outer edges of petals, gently pull the paper over the edge of a ruler, a skewer, or even the blunt side of your scissor blade. This creates a gentle curl. For crepe paper, you can also stretch the top edge of the petal slightly to create a wavy, natural look.
- Cupping/Stretching: For the center of the petal, especially with crepe paper, gently stretch the paper outwards from the middle. This creates a beautiful, concave cup shape that mimics real petals. Use your thumbs or a ball stylus for this.
- Veins: For more realism, you can add subtle veins. With a bone folder or the back of a knife, gently press lines onto the petal from the base towards the tip. Be gentle not to tear the paper.
- Folding/Ruffling: Some flowers, like carnations, require ruffling. Gently gather the edges of the petals or make small, accordion-like folds to create texture.
Pro tip: Practice shaping on a few scrap petals before committing to your final pieces. Experiment with different levels of curl and stretch to see how it affects the overall look.
Step 5: Construct the Heart: Your Flower’s Core
Every flower needs a heart, whether it’s a tight bud or a cluster of stamens. This core will be the foundation upon which you build your layers of petals.
- Stamen/Pistil:
- For a simple core: Take a small strip of crepe paper, fold it in half lengthwise, and roll it tightly around the top of your floral wire stem. Secure with a tiny dot of glue.
- For realistic stamens: Cut a strip of yellow or contrasting colored paper. Make small fringe cuts along one edge. Roll this fringed strip around the floral wire, securing with glue. You can dab the tips of the fringe with brown paint or a marker for pollen effect.
- For a bud-like center: Use one of your smallest petals, cup it tightly around the top of the floral wire, and secure it with glue to form a closed bud.
- Attaching the First Petals: Once your core is ready, begin attaching the smallest petals around it. Apply a tiny dot of glue to the base of each petal and press it firmly against the core or the previous petal. Ensure the petals are slightly cupped inward around the core.
Pro tip: If using a hot glue gun, work quickly but carefully. The glue sets fast. For craft glue, hold each petal in place for a few seconds until it adheres.
Step 6: Build Layer by Layer: Petal Power
Now you’ll gradually add more petals, building outwards and upwards to create the full, lush shape of your flower. This is where your flower truly takes form.
- Gradual Increase: As you move from the inner to the outer layers, switch to your progressively larger petals. Remember the natural progression of a real flower.
- Overlapping: Overlap each new petal slightly over the previous one, ensuring there are no gaps. The amount of overlap will depend on the fullness you desire. A good rule of thumb is to overlap by about one-third to one-half of the petal’s width.
- Varying Angles: Don’t attach all petals at the same height or angle. Some can be slightly higher, others lower, and their angles can vary to create a more organic, natural look. Imagine how petals unfurl in nature.
- Fullness: Continue adding layers until your flower reaches your desired fullness. Step back occasionally to admire your work and check for balance and shape.
Pro tip: For a truly realistic look, gently push down on the center of your flower as you add the outer petals. This helps create a natural curve and depth, making the flower appear to ‘open up’.
Step 7: The Finishing Touches: Leaves & Stem
No flower is complete without its supporting greenery and a sturdy stem. These details elevate your creation from just petals to a complete botanical specimen.
- Cut & Shape Leaves: Using green cardstock or crepe paper, cut out leaf shapes. You might need a few different sizes. Add a wire spine to larger leaves for shaping by gluing a thin piece of floral wire down the center back of the leaf.
- Attach Leaves: Position your leaves where they would naturally appear on a real flower, typically below the bloom. Secure them to the main floral wire stem with a small dab of glue or by wrapping with floral tape.
- Wrap the Stem: Take your floral tape and starting just below the base of your flower (covering any visible glue or wire ends), begin to wrap it tightly and smoothly down the entire length of the floral wire stem. Stretch the tape slightly as you wrap to activate its adhesive. Overlap each wrap by about half its width. Wrap over the base of your leaves to secure them firmly.
- Calix (Optional): For some flowers (like roses), you might want to add a calix—the green leafy structure at the base of the bloom. Cut a star-like shape from green paper, curl the tips, and glue it to the very base of your flower before wrapping the stem.
Pro tip: Use different shades of green paper for your leaves to add depth and visual interest. A lighter green for younger leaves, a deeper green for mature ones.
Step 8: Flaunt Your Floral Masterpiece!
Congratulations! You’ve transformed simple paper into a stunning, everlasting bloom. Now it’s time to admire your hard work and decide how to showcase it.
- Display: Place your single flower in a slender vase, or make several to create a beautiful bouquet. Arrange them on a shelf, use them as unique gift toppers, or create a stunning floral backdrop for an event.
- Gifting: Handmade flowers make incredibly thoughtful and personal gifts that will be cherished long after fresh flowers fade.
- Photography: Take photos of your creation! Share them with friends and family, or on social media. You’ll be amazed at the positive feedback and inspiration you receive.
Pro tip: To protect your paper flowers from dust, you can gently dust them with a soft brush or use a can of compressed air. Keep them out of direct sunlight to prevent fading.
Common Mistakes to Avoid
Even experienced crafters make mistakes, but knowing what to look out for can save you a lot of frustration!
- Using Too Much Glue:
- Why it’s problematic: Excess glue can make your flower stiff, create visible lumps, and even cause the paper to warp or tear. It also makes the flower look less delicate and refined.
- Correct approach: Use tiny dots or thin lines of glue. Less is often more. If using a hot glue gun, a quick dab is usually sufficient. For craft glue, allow it a moment to get tacky before pressing pieces together.
- Ignoring Petal Shaping:
- Why it’s problematic: Flat, unshaped petals result in a two-dimensional, artificial-looking flower. The magic of paper flowers lies in their ability to mimic the natural curves of real blooms.
- Correct approach: Dedicate time to shaping each petal. Curl the edges, cup the centers, and add subtle folds. This step is non-negotiable for realistic results.
- Inconsistent Petal Sizes/Shapes:
- Why it’s problematic: While natural flowers have slight variations, wildly inconsistent petals can make your flower appear lopsided or messy, detracting from its beauty.
- Correct approach: Use templates for consistent basic shapes. When freehanding, try to maintain a general size progression. Stack and cut multiple petals together for uniformity. Embrace slight, natural variations, but avoid drastic discrepancies.
- Rushing the Process:
- Why it’s problematic: Crafting, especially intricate projects like flower making, requires patience. Rushing leads to frustration, mistakes, and a less satisfying final product.
- Correct approach: Treat flower making as a relaxing, enjoyable activity. Take breaks, listen to music, and savor each step. The journey is as important as the destination.
- Forgetting Stem/Base Planning:
- Why it’s problematic: You’ve made a beautiful flower, but now how do you display it? Without a planned stem or base, your bloom might lack purpose or stability.
- Correct approach: Decide early if your flower needs a stem (for a vase), a flat back (for a wall hanging), or a loop (for an ornament). Incorporate the chosen base from Step 5 onwards.
Troubleshooting
- “My petals look flat and lifeless!”
- Quick Solution: It’s not too late! Gently re-shape them. Use a dowel or skewer to re-curl edges. For crepe paper, carefully stretch the center of the petals to create more cup. Sometimes adding an extra layer of slightly more shaped petals can also help.
- “My flower is falling apart!”
- Quick Solution: Re-secure any loose petals with a small dab of glue. Ensure you’re applying enough glue to the base of each petal to create a strong bond. If using floral tape, make sure it’s wrapped tightly and overlapping to activate its self-adhesive properties.
- “I can’t get the stem to look neat with floral tape.”
- Quick Solution: Floral tape requires a bit of practice. The key is to stretch it slightly as you wrap to activate its stickiness. Wrap at a consistent, slight angle, overlapping each pass by about half the tape’s width. If it looks bumpy, try re-wrapping more tightly, or use a slightly thicker gauge floral wire for a smoother base.
Key Takeaways
- Materials Matter: Choosing the right paper (crepe for stretch, cardstock for structure) and tools makes a huge difference in the final result.
- Shaping is Paramount: The true artistry of paper flowers lies in transforming flat paper into dimensional, lifelike petals through curling, stretching, and cupping.
- Layering Creates Volume: Building your flower layer by layer, from smallest to largest petals, is essential for achieving natural fullness and depth.
- Patience Yields Beauty: Don’t rush! Enjoy the meditative process. Each careful cut and gentle shape contributes to a more beautiful and satisfying outcome.
- Experimentation is Key: Don’t be afraid to try different petal shapes, colors, or assembly methods. Your unique touch is what makes your flowers truly special.
Frequently Asked Questions
- What’s the best paper for making realistic flowers?
For highly realistic, delicate flowers, heavy crepe paper is generally preferred due to its stretch and texture. For more structured or stylized flowers, cardstock (65-80 lb) works wonderfully and offers a wider range of colors and patterns. - Can I use a cutting machine (like a Cricut or Silhouette) for this?
Absolutely! Cutting machines are fantastic for precise and consistent petal cutting, especially if you’re making many flowers. However, you’ll still need to hand-shape and assemble the petals to bring them to life. - How do I make my paper flowers last longer?
To ensure longevity, keep your paper flowers out of direct sunlight (which can fade colors) and away from high humidity (which can cause warping or glue failure). A light dusting with a soft brush or compressed air is usually all that’s needed for cleaning. - Can I make other types of flowers using these techniques?
Yes, definitely! The fundamental principles of cutting, shaping, and layering apply to almost any type of flower. Once you master the basics, you can adapt them to create roses, lilies, peonies, poppies, or even fantastical blooms of your own design. These techniques also translate well to other materials like felt or thin fabric.
What’s Next?
You’ve taken the first exciting step into the world of paper flower crafting, and the possibilities are as endless as a blooming garden! Don’t stop here – let your creativity continue to blossom.
- Explore New Materials: Try making flowers from felt, fabric, foam, or even recycled book pages. Each material offers unique textures and challenges.
- Master New Blooms: Challenge yourself with more complex flowers like orchids, dahlias, or intricate botanical arrangements. There are countless tutorials and patterns available online.
- Create a Full Bouquet: Combine different types of flowers and leaves you’ve made into a stunning, everlasting bouquet for a centerpiece or a special gift.
- Embellish and Customize: Add glitter, paint details, or incorporate small beads and jewels into your flowers for extra sparkle and personalization.
- Share Your Work: Join online crafting communities, share photos of your creations on social media, or even consider selling your handmade flowers at local craft fairs. Inspire others with your beautiful work!
The journey of crafting is one of continuous learning and joyful discovery. So, pick up your scissors, choose your next paper, and let your imagination unfurl. Happy crafting!