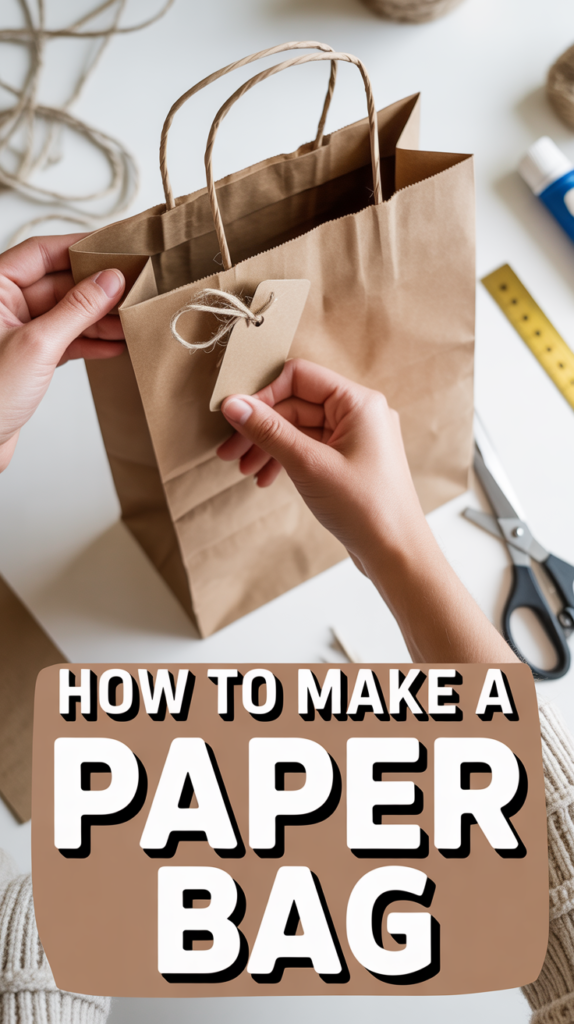
🛍️ How To Make A Paper Bag
Ready to turn flat paper into a cute, sturdy bag and feel wildly capable? Same. Grab some paper, tape, and your inner craft gremlin. We’re folding, creasing, and making something actually useful.
1. Classic Gift Bag
Clean lines, dependable shape, zero drama. This is the go-to bag that makes any gift look like you tried.
- Use kraft paper or thick wrapping paper.
- Form a cylinder, overlap edges, and tape.
- Fold a flat base with two triangles meeting in the center.
Pro tip: Crease every fold with a ruler edge for crisp corners.
It works because the symmetrical base keeps everything stable and cute.
2. Luxe Folded Base
Want that boutique vibe? Upgrade the bottom so it sits flat like a champ.
- Create a deeper gusseted base with extra layers.
- Fold inward triangles, then double-fold the flaps for strength.
- Secure with double-sided tape for a clean finish.
Pro tip: Add a small cardstock rectangle inside the base for reinforcement.
It works because layered paper + hidden tape = sturdy and sleek.
3. No-Tape Origami Bag
No tape? No problem. This bag locks itself using folds like a tiny paper wizard.
- Start with a large rectangle and fold into a tube.
- Tuck one side into the other to interlock.
- Create a base with precise diagonal folds.
Pro tip: Use slightly stiffer paper so the interlock holds without gaps.
It works because friction and tight creases keep everything together.
4. Gusseted Shopper
Need extra room? Add side folds so it expands like a mini tote.
- After forming the tube, press vertical gussets on both sides.
- Fold the base as usual, but tuck gussets neatly.
- Crease the front and back for that boxy shape.
Pro tip: Mark gusset width with light pencil lines for even sides.
It works because gussets let the bag open wide without losing structure.
5. Ribbon Handle Cuties
Make it gift-ready with soft handles that look polished.
- Hole-punch two holes per side at equal heights.
- Thread ribbon or cord and knot inside.
- Reinforce holes with washi tape or paper circles.
Pro tip: Add a small glue dot under each knot to lock it in place.
It works because lightweight handles are comfy and stylish without bulk.
6. Twisted Paper Handles
No ribbon? Twist your own handles and pretend you run a boutique.
- Twist strips of kraft paper into cords.
- Glue ends between inner flaps at the top.
- Cover with a liner strip for clean edges.
Pro tip: Slightly mist the paper before twisting for tighter cords.
It works because the twist adds tensile strength without extra materials.
7. Mini Snack Bag
Teeny, tidy, and perfect for cookies or small favors.
- Use smaller paper and keep the base shallow.
- Skip handles and add a fold-over top.
- Seal with a sticker or clip.
Pro tip: Line with wax paper if snacks are oily.
It works because simple construction keeps it light and food-friendly.
8. Tall Bottle Bag
That fancy drink needs a snug outfit. Enter the tall bag.
- Cut a long rectangle with a narrow width.
- Add deep gussets for expansion.
- Reinforce the base and wrap the neck with a fold-over top.
Pro tip: Add a cardstock base and two pieces stacked for extra support.
It works because the gusset + height combo keeps bottles upright and safe.
9. Patterned Statement Bag
Go bold. Let the paper do the talking so you don’t have to.
- Use double-sided patterned paper for flair.
- Keep seams inside with double-sided tape.
- Add a contrast liner strip along the top edge.
Pro tip: Align patterns before taping so stripes and florals match up.
It works because clean patterns + neat edges = designer energy.
10. Recycled Newspaper Tote
Eco-friendly and charmingly vintage. Headlines, but make it fashion.
- Layer two sheets with glue for strength.
- Seal edges and add cardstock reinforcements at stress points.
- Use twine handles or paper twists.
Pro tip: Brush on a thin layer of Mod Podge to protect and de-wrinkle.
It works because layered paper turns flimsy news into sturdy carry power.
Conclusion
Turns out, making a paper bag is basically origami with benefits: useful, cute, and wildly customizable. Pick a style, crease like you mean it, and add handles that match your vibe. Simple folds, strong bases, big payoff—now go bag it up.