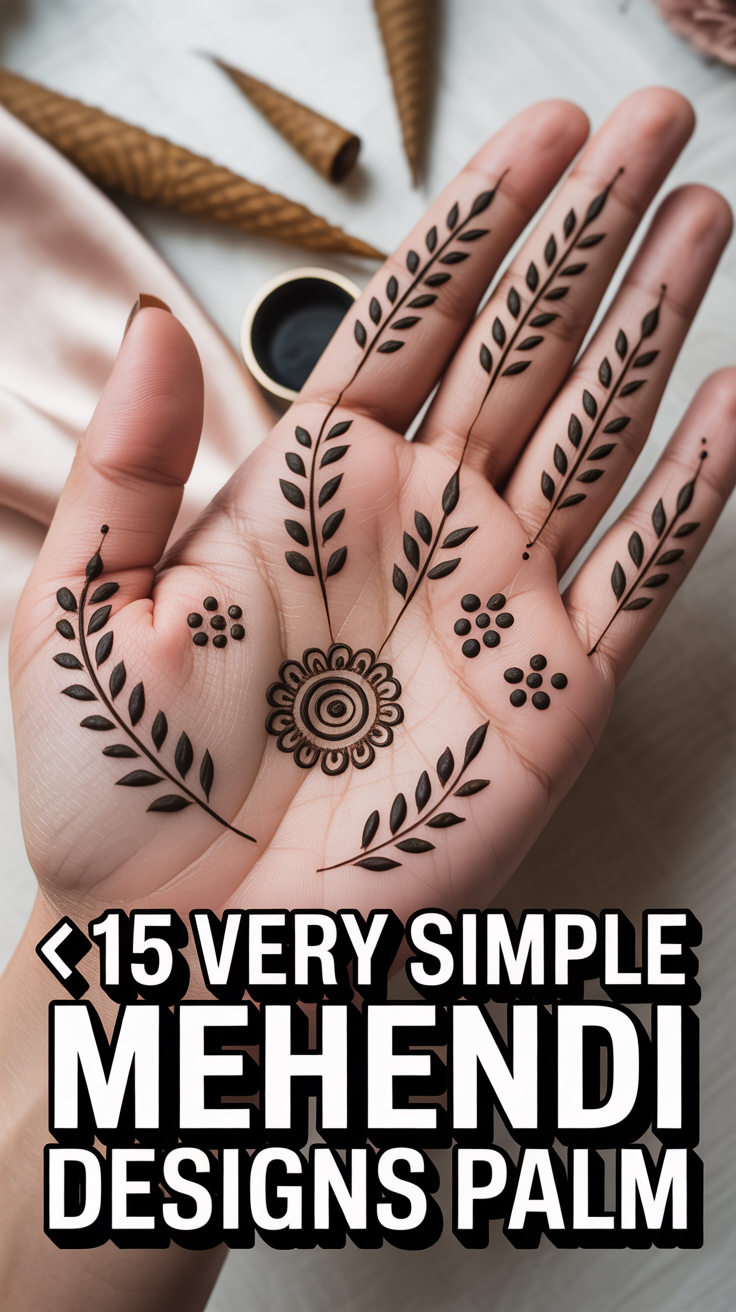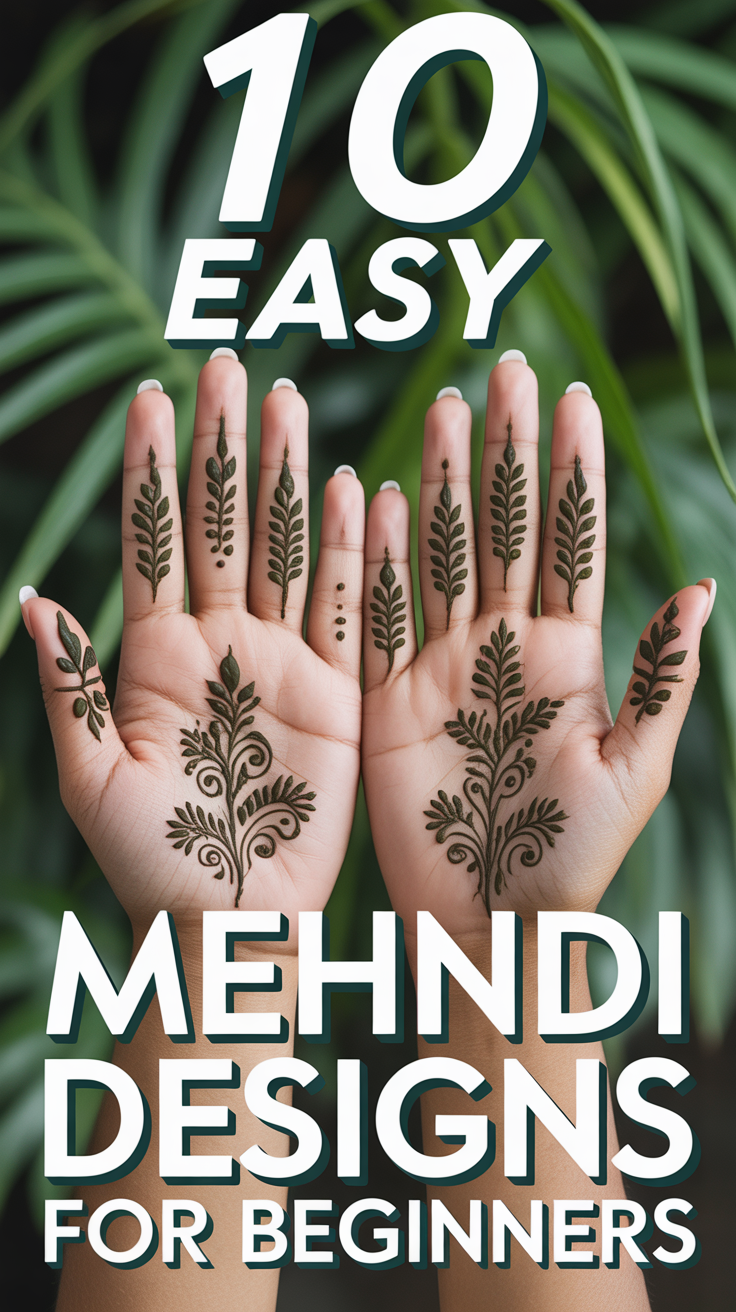
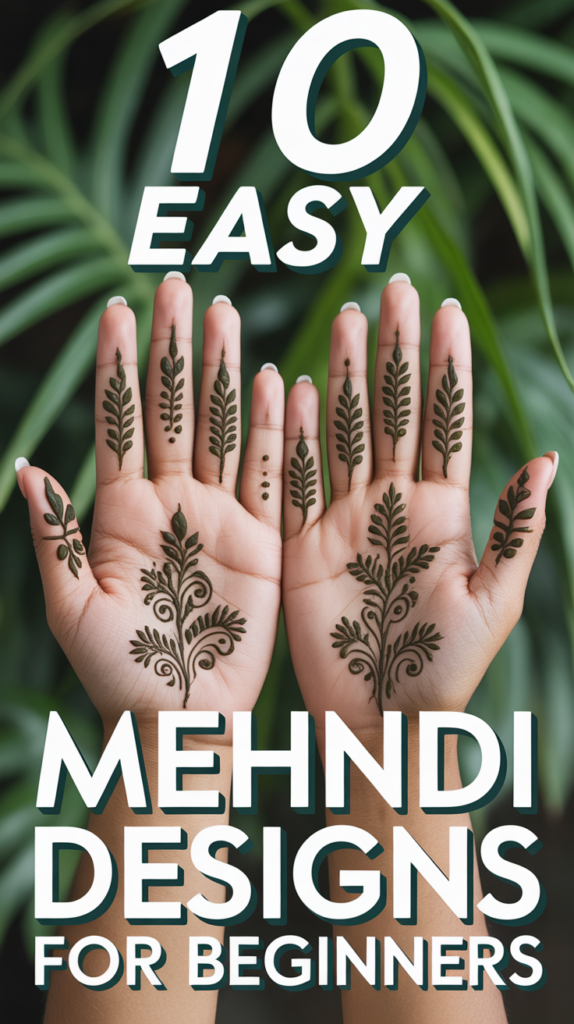
🌿 10 Easy Mehndi Designs For Beginners
New to mehndi and low-key afraid of making your hand look like a maze? Relax. These beginner-friendly designs are simple, cute, and super forgiving. Grab your cone, take a deep breath, and let’s get those hands looking festive without the meltdown.
1. Dot and Line Grid
Minimal, chic, and basically foolproof. You make a simple grid of straight lines and drop neat dots at the intersections. Instant structure with zero drama.
Keep lines thin and evenly spaced. Fill a few squares with diagonal lines for texture. Add a tiny flower in one or two cells for flair.
Pro tip Keep a scrap paper nearby to test flow so your lines don’t blob.
It works because the geometry keeps everything tidy even if your hand shakes a little.
2. Basic Mandala Center
A small mandala on the back of your hand is a classic. Start with a dot, circle it, then add petals in layers.
Build in rounds tiny teardrops, petals, and dots. Keep each layer consistent before moving to the next. Stop when it looks balanced not when it’s crowded.
Pro tip Rotate your hand, not your cone, for smoother arcs.
It works because repetition hides mistakes and looks intentional and elegant.
3. C-Curve Vines
Think flowing vines made from connected C shapes. Super forgiving and very pretty.
Start at the wrist and climb toward the finger. Add tiny leaves on alternating sides. Fill small gaps with dots to make it lush.
Pro tip Vary leaf size slightly to keep it organic, not stiff.
It works because curves flatter the hand and are easy to control.
4. Half-Hand Floral Trail
A diagonal floral trail from the thumb base to the pinky side. Looks fancy, effort is minimal.
Create 3 to 4 simple flowers connected by curvy stems. Add shaded petals with light lines inside. Leave negative space for a clean look.
Pro tip Place the biggest flower at the center of the hand for balance.
It works because asymmetry looks modern and hides uneven spacing.
5. Finger Tip Rings
No full-hand commitment. Just decorate the fingertips with ring bands and mini motifs.
Draw 2 to 3 thin bands per finger, add tiny dots, chevrons, or triangles between the bands. Leave a small gap near the nail for a neat finish.
Pro tip Keep band thickness consistent so it reads as jewelry.
It works because it’s quick, stylish, and looks intentional with minimal effort.
6. Paisley Pair
The classic beginner’s bestie. Two paisleys mirrored on the back of the hand.
Start with a big paisley, tuck a smaller one beside it. Fill with parallel lines, dots, and mini petals. Outline once more for crisp edges.
Pro tip Draw the outer paisley lightly first, then commit to the thickness.
It works because paisleys are simple shapes that look rich with minimal fills.
7. Minimal Wrist Cuff
Make a faux bracelet that screams chic. Easy lines, big payoff.
Create two parallel bands around the wrist. Fill the gap with diamonds, dots, or a tiny leaf chain. Add a dangling charm motif in the center.
Pro tip Use light guide dots to keep the cuff straight.
It works because symmetry plus negative space looks polished on anyone.
8. Spiral Galaxy
Spirals for days. Start from a small center and swirl outwards.
Make a tight spiral, then echo it with 2 to 3 concentric outlines. Add dots along the outer curve and tuck in tiny leaves in the gaps.
Pro tip Lift the cone slightly on curves for smoother lines.
It works because spirals are naturally eye-catching and easy to scale up or down.
9. Negative Space Checker
Bold and graphic without fuss. Let the skin do half the work.
Draw a tilted diamond grid. Fill alternating diamonds with diagonal hatching and leave others empty. Add dots on the grid intersections for finish.
Pro tip Keep spacing even by marking the first row before committing.
It works because contrast pops, even if your lines aren’t perfect.
10. Simple Sunburst
A tiny sunburst near the thumb base or center of the hand. Cute and quick.
Start with a small circle, add straight rays around it. Thicken every second ray and sprinkle dots between rays. Add a subtle halo ring for drama.
Pro tip Use shorter rays near edges so the shape looks round, not spiky chaos.
It works because symmetry plus dots equals instant neatness.
Conclusion
See Not scary at all. With simple shapes like dots, lines, curves, and petals, you can build designs that look pro without the panic.
Start small, keep spacing clean, and embrace negative space. Your hands are about to be the main character, minus the stress.