🏠 14 DIY Dollhouse Furniture Easy
& CRAFT IDEAS
Beginner-friendly tutorials, creative projects,
and weekly inspiration in your inbox.
🛠️ The Ultimate Maker's Toolkit
I've tested thousands of craft tools over the years. Whether you are quilting, crafting, or building mixed-media art, these are the top 5 absolute non-negotiable tools I personally recommend to guarantee professional results.
🪡 SINGER Heavy Duty 4452 Sewing Machine
The sewing community highly recommends this as the ultimate "bulletproof" entry-level machine. Its heavy metal frame powerfully pushes through thick denim and heavy quilt layers that would instantly jam a standard plastic machine.
✂️ Fiskars 8" Orange-Handled Scissors
Never settle for dull dollar-store blades. Wirecutter repeatedly names Fiskars the absolute best all-purpose craft scissor due to its legendary precision-ground blades and an ergonomic grip that prevents hand-cramping.
🔥 Gorilla Dual Temp Hot Glue Gun
Named Wirecutter's top choice because it literally does the work of two tools. It features dual-temperature settings offering low heat for delicate florals and blistering high heat for heavy wood adhesion repairs.
🖌️ Mod Podge Waterbase Gloss Sealer
The absolute undisputed champion of decoupage and paper crafts. Experts rely exclusively on this exact water-based formula because it glues, seals, and finishes beautifully without yellowing or flaking over time.
🎨 Apple Barrel Acrylic Paint (2 oz)
The quintessential, incredibly inexpensive craft paint. Woodworkers and hobby painters swear by its smooth flow and matte finish, providing massive value and remarkably thick color coverage on rough surfaces.
Alright, tiny home decorators and miniature moguls! Ever gazed at your dollhouse and thought, “This place needs a serious glow-up, but, like, without breaking the bank or my crafting spirit?” You are in the right spot. We are ditching the overpriced miniature boutiques and embracing our inner DIY genius. Get ready to transform everyday bits and bobs into chic dollhouse essentials. Your dolls are about to live their best, most stylish tiny lives, thanks to your crafty brilliance. Let’s get this miniature party started.
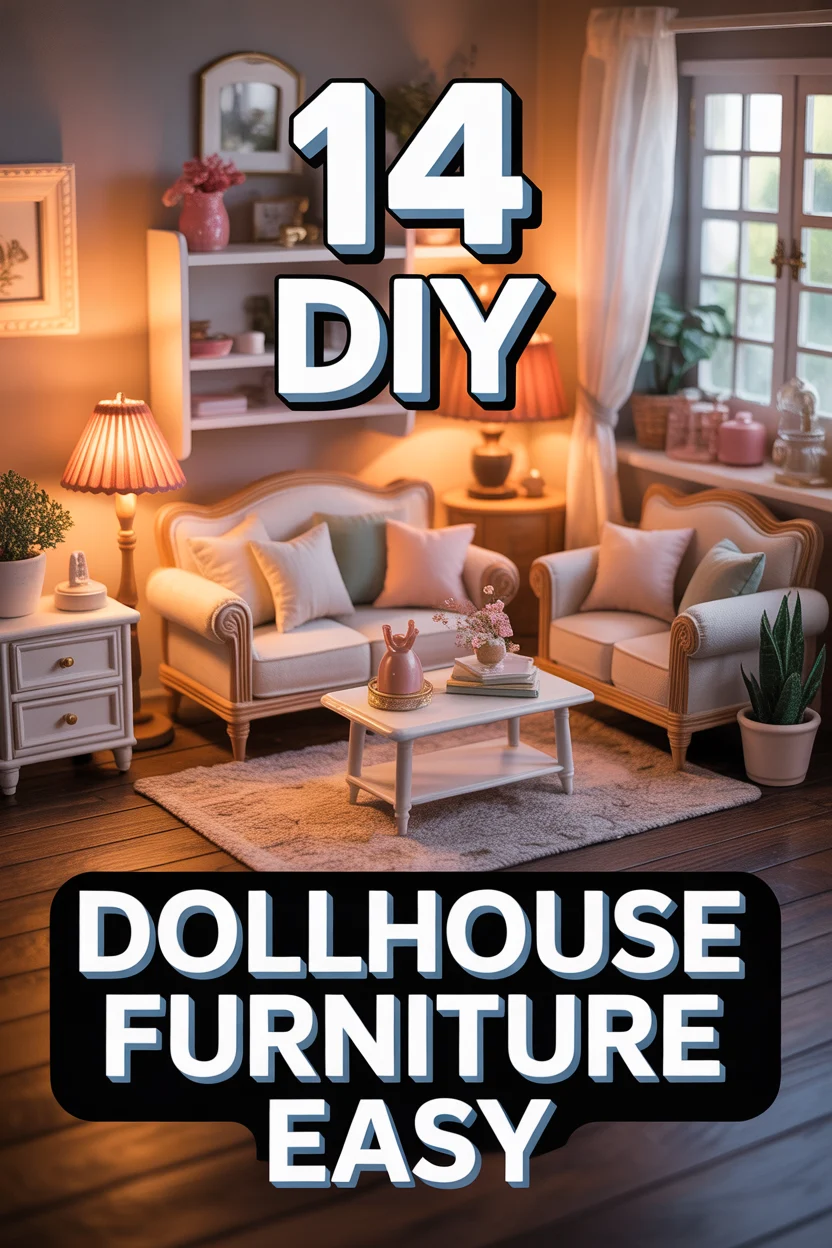
1. Cardboard Bed Base
Who needs a fancy frame when a sturdy cardboard piece does the trick? Grab a shoe box lid or a sturdy piece of cardboard cut to size for your doll’s mattress. Cover it with some cute fabric, or just paint it a dreamy color.
Pro tip: Glue a thin layer of cotton batting on top before the fabric for extra plushness. Your doll will sleep like, well, a baby doll. It’s simple, effective, and totally customizable.
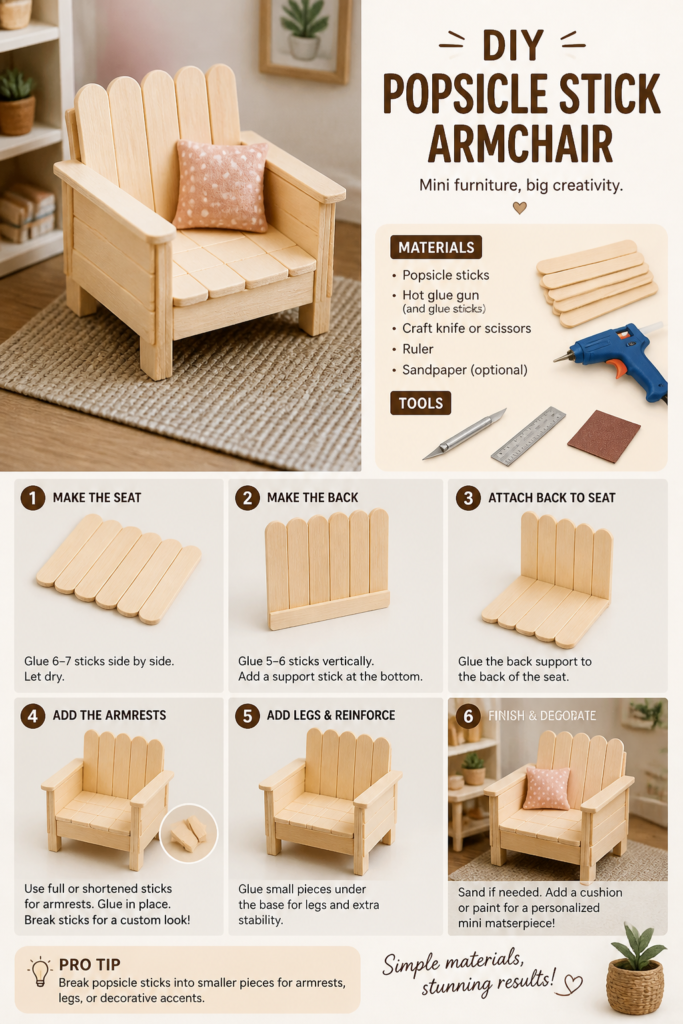
2. Popsicle Stick Armchair
Yes, those childhood favorites are back, but with a grown-up (tiny) purpose. Glue popsicle sticks together to form the seat, back, and arms of a surprisingly chic armchair. Think minimalist design, but for dolls.
Pro tip: Break sticks into smaller pieces for armrests or decorative accents. This piece works because it uses readily available materials for a solid structure.
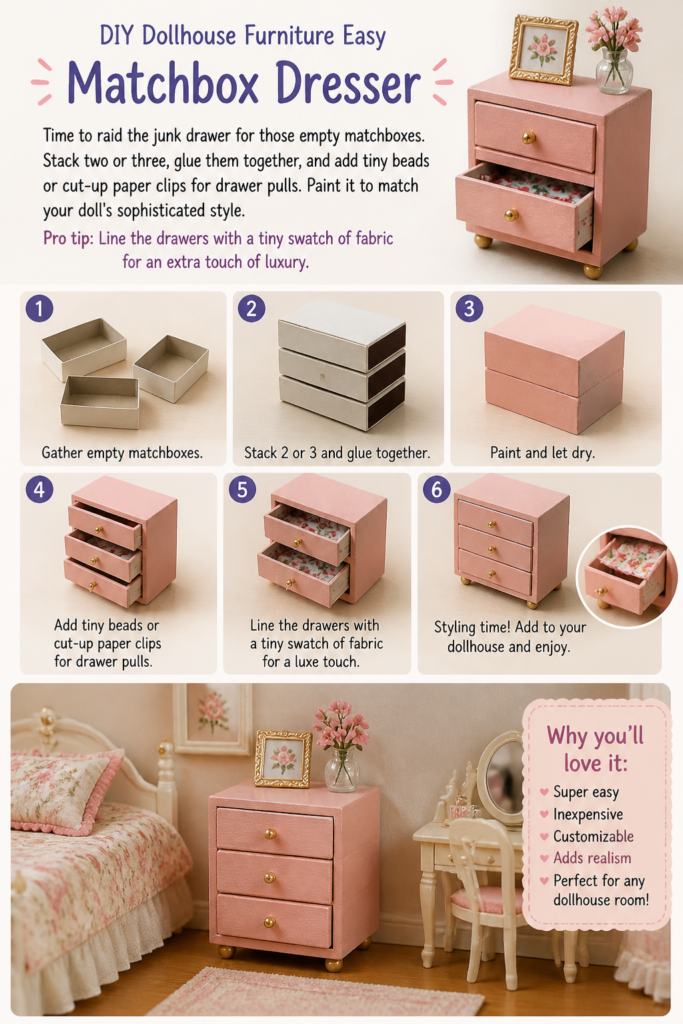
3. Matchbox Dresser
Time to raid the junk drawer for those empty matchboxes. Stack two or three, glue them together, and add tiny beads or cut-up paper clips for drawer pulls. Paint it to match your doll’s sophisticated style.
Pro tip: Line the “drawers” with a tiny swatch of fabric for an extra touch of luxury. This dresser adds storage and a touch of realism to any dollhouse bedroom.
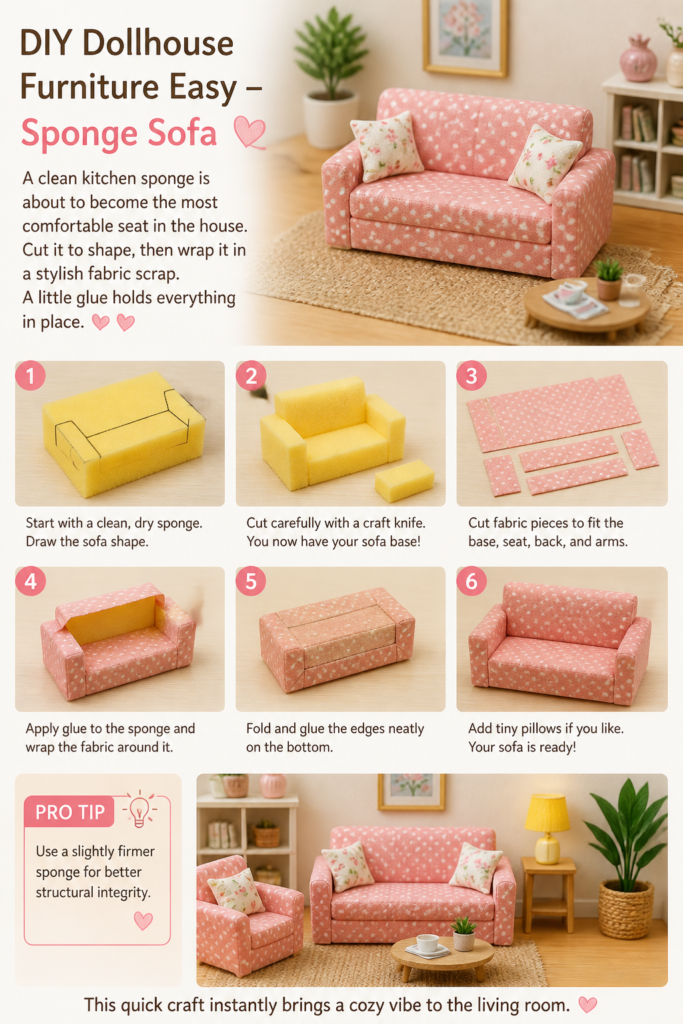
4. Sponge Sofa
A clean kitchen sponge is about to become the most comfortable seat in the house. Cut it to shape, then wrap it in a stylish fabric scrap. A little glue holds everything in place.
Pro tip: Use a slightly firmer sponge for better structural integrity. This quick craft instantly brings a cozy vibe to the living room.
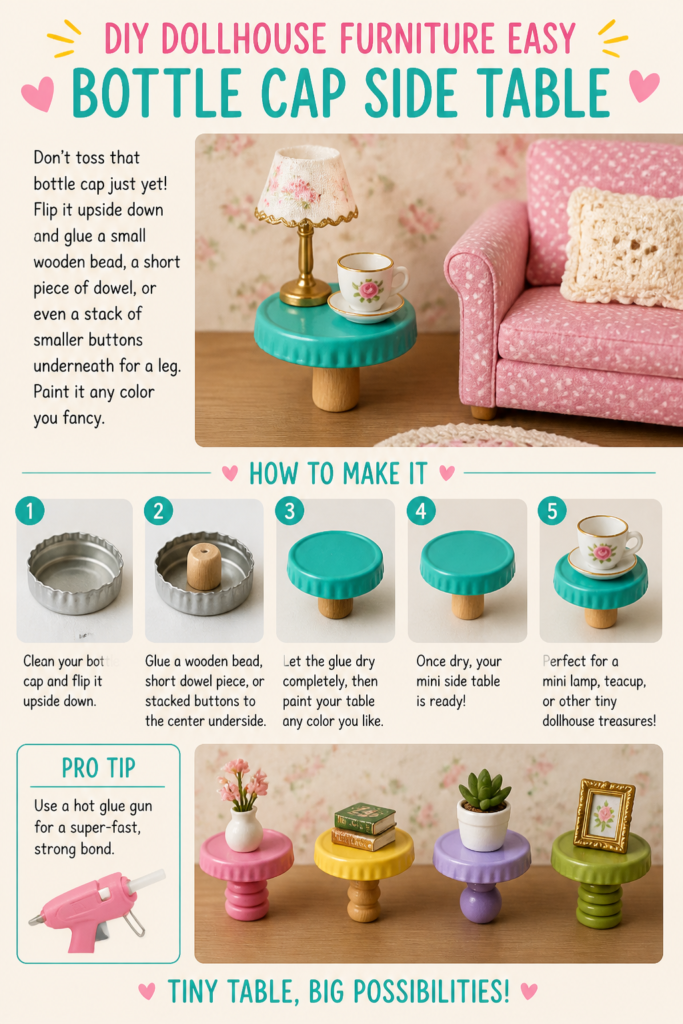
5. Bottle Cap Side Table
Don’t toss that bottle cap just yet! Flip it upside down and glue a small wooden bead, a short piece of dowel, or even a stack of smaller buttons underneath for a leg. Paint it any color you fancy.
Pro tip: Use a hot glue gun for a super-fast, strong bond. This tiny table is perfect for holding a miniature lamp or a doll’s teacup.
6. Fabric Scrap Rug
Give those tiny dollhouse floors some personality with a mini rug. Find a cool fabric scrap, cut it to size, and maybe even fray the edges for a bohemian look. No sewing required, unless you’re feeling extra.
Pro tip: For a more substantial rug, glue the fabric onto a thin piece of cardboard. It adds texture and warmth without any fuss.
7. Toilet Paper Roll Fireplace
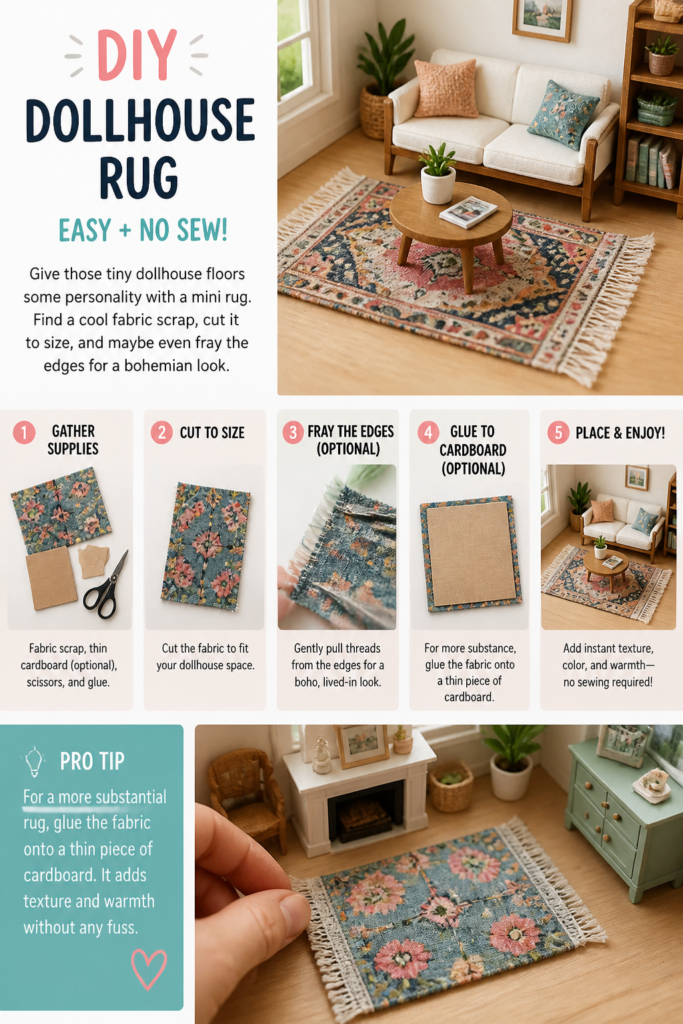
Who knew a humble toilet paper roll could be so grand? Cut and fold it, then glue on small cardboard ‘bricks’ or paint it to mimic stone or wood. Add a tiny twig for a log.
Pro tip: Cut a small arch for the firebox opening before painting. This feature instantly elevates the living room’s ambiance.
8. Wine Cork Stools
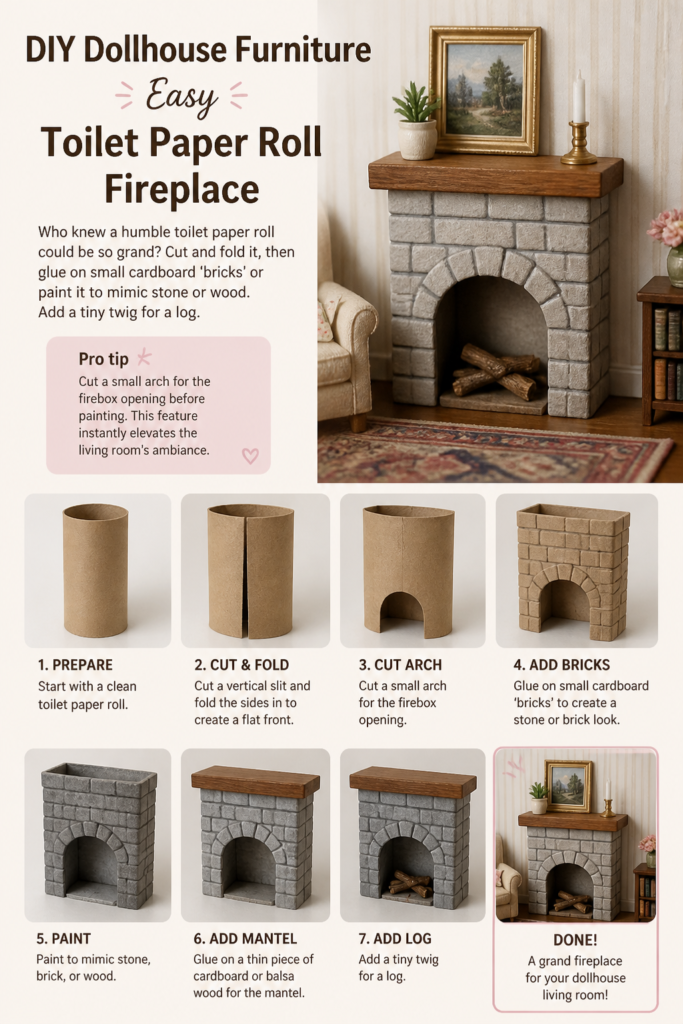
Cheers to easy furniture! Slice a wine cork horizontally for a short, chunky stool, or use it whole for a taller bar stool. Top it with a small felt circle for a comfy seat.
Pro tip: Glue a tiny button to the top for a tufted look. These stools are surprisingly sturdy and add a rustic charm.
9. Clothespin Desk
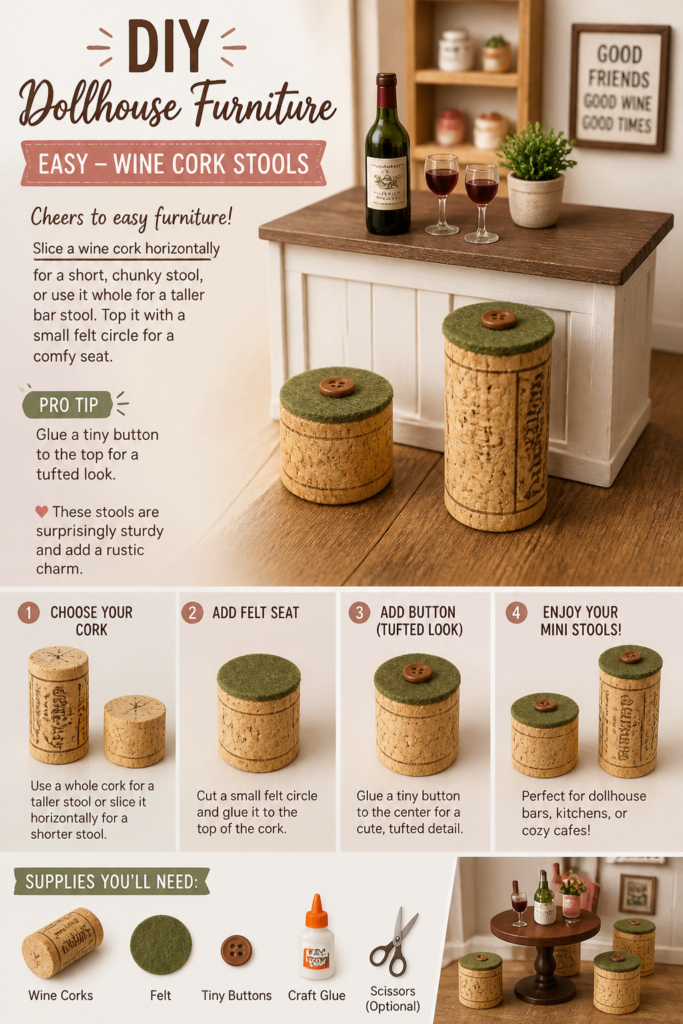
A flat piece of cardboard or thin wood for the desktop, supported by two wooden clothespins (the old-fashioned kind) acting as legs. It’s minimalist, functional, and adorable.
Pro tip: Use strong craft glue to ensure the legs stay put. Your doll can now get some serious miniature work done.
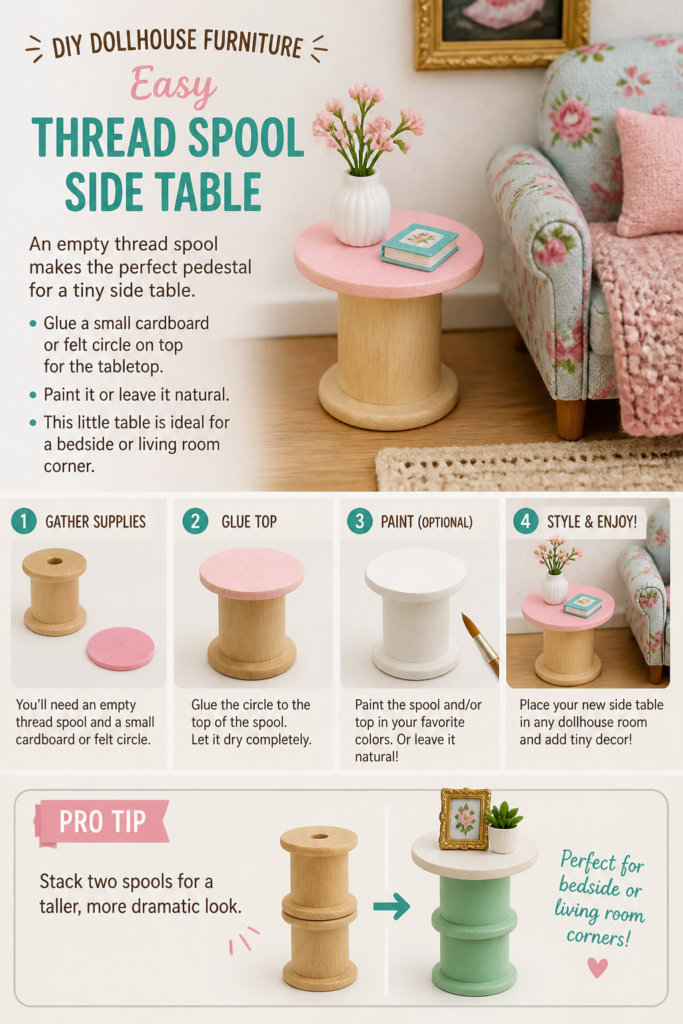
10. Thread Spool Side Table
An empty thread spool makes the perfect pedestal for a tiny side table. Glue a small cardboard or felt circle on top for the tabletop. Paint it or leave it natural.
Pro tip: Stack two spools for a taller, more dramatic look. This little table is ideal for a bedside or living room corner.
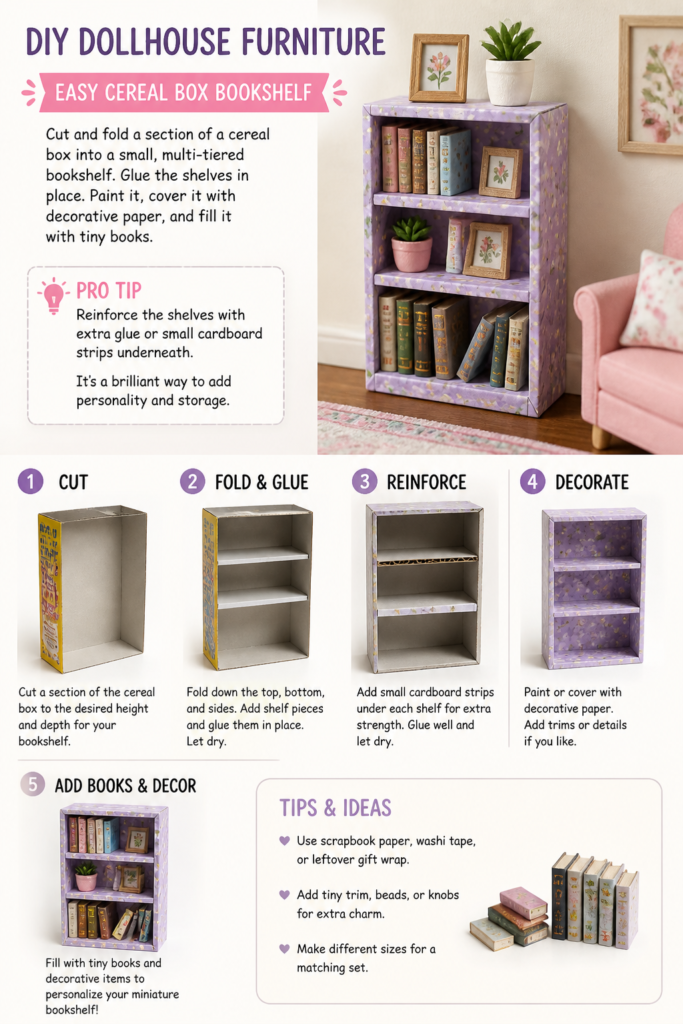
11. Cereal Box Bookshelf
Cut and fold a section of a cereal box into a small, multi-tiered bookshelf. Glue the shelves in place. Paint it, cover it with decorative paper, and fill it with tiny books.
Pro tip: Reinforce the shelves with extra glue or small cardboard strips underneath. It’s a brilliant way to add personality and storage.
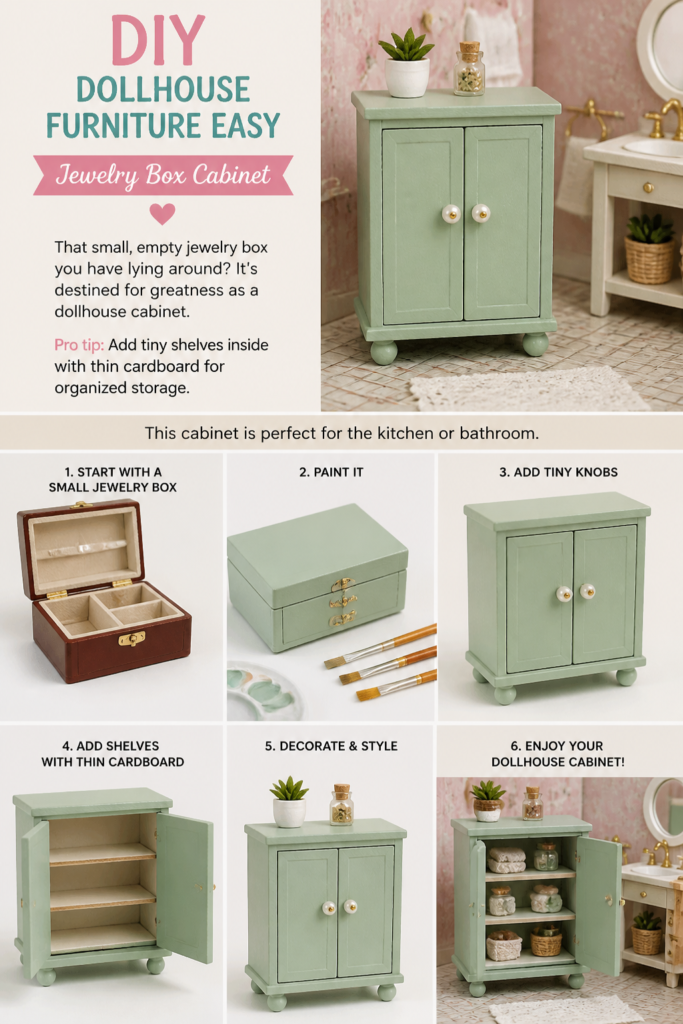
12. Jewelry Box Cabinet
That small, empty jewelry box you have lying around? It’s destined for greatness as a dollhouse cabinet. Paint it, add tiny knobs made from beads, and you’ve got instant storage.
Pro tip: Add tiny shelves inside with thin cardboard for organized storage. This cabinet is perfect for the kitchen or bathroom.
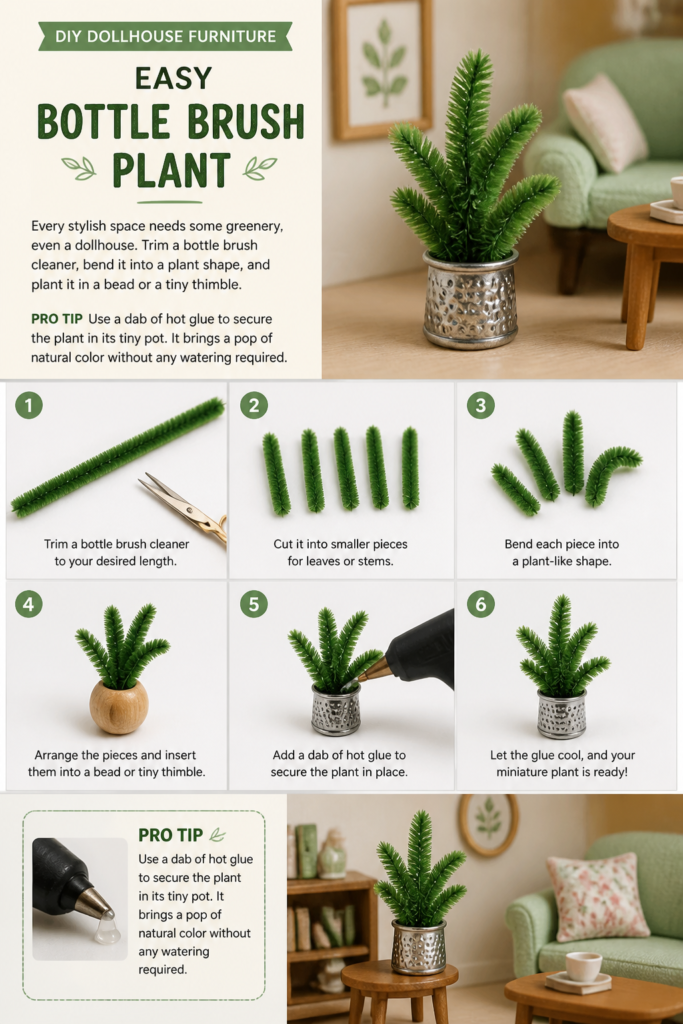
13. Bottle Brush Plant
Every stylish space needs some greenery, even a dollhouse. Trim a bottle brush cleaner, bend it into a plant shape, and “plant” it in a bead or a tiny thimble.
Pro tip: Use a dab of hot glue to secure the plant in its tiny pot. It brings a pop of natural color without any watering required.
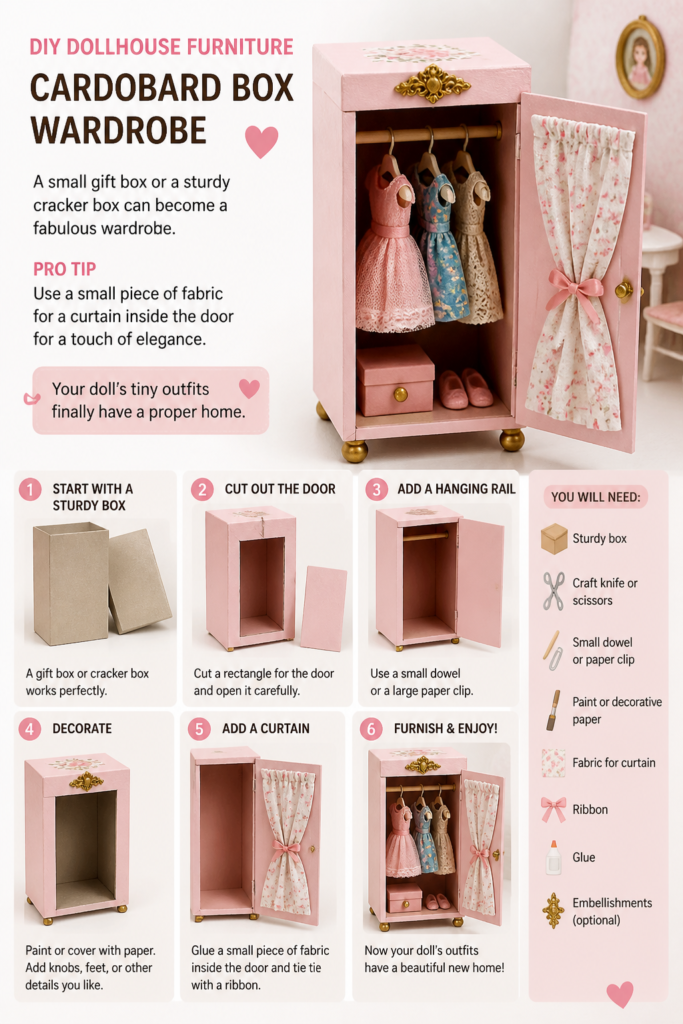
14. Cardboard Box Wardrobe
A small gift box or a sturdy cracker box can become a fabulous wardrobe. Cut out a door, add a tiny dowel or paper clip for a hanging rail, and paint or decorate it.
Pro tip: Use a small piece of fabric for a curtain inside the door for a touch of elegance. Your doll’s tiny outfits finally have a proper home.
Conclusion
See? Who needs a trust fund for dollhouse decor when you have a glue gun and a can-do attitude? You just transformed everyday items into miniature masterpieces, proving that creativity is truly limitless. Your dollhouse is now officially the chicest tiny abode on the block, and you, my friend, are a crafting legend. Now go forth and enjoy your perfectly furnished, pint-sized paradise!
& CRAFT IDEAS
Beginner-friendly tutorials, creative projects,
and weekly inspiration in your inbox.