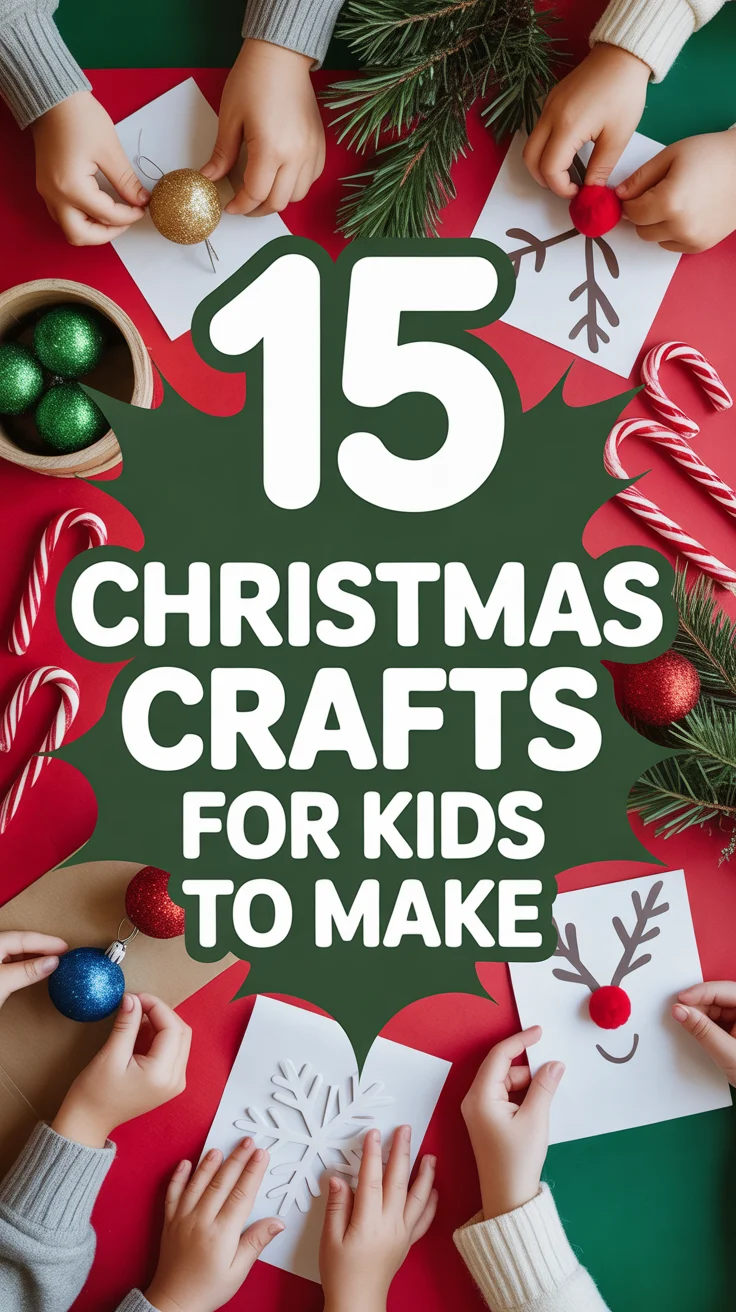
🎄 15 Christmas Card Ideas Handmade
🛠️ The Ultimate Maker's Toolkit
I've tested thousands of craft tools over the years. Whether you are quilting, crafting, or building mixed-media art, these are the top 5 absolute non-negotiable tools I personally recommend to guarantee professional results.
🪡 SINGER Heavy Duty 4452 Sewing Machine
The sewing community highly recommends this as the ultimate "bulletproof" entry-level machine. Its heavy metal frame powerfully pushes through thick denim and heavy quilt layers that would instantly jam a standard plastic machine.
✂️ Fiskars 8" Orange-Handled Scissors
Never settle for dull dollar-store blades. Wirecutter repeatedly names Fiskars the absolute best all-purpose craft scissor due to its legendary precision-ground blades and an ergonomic grip that prevents hand-cramping.
🔥 Gorilla Dual Temp Hot Glue Gun
Named Wirecutter's top choice because it literally does the work of two tools. It features dual-temperature settings offering low heat for delicate florals and blistering high heat for heavy wood adhesion repairs.
🖌️ Mod Podge Waterbase Gloss Sealer
The absolute undisputed champion of decoupage and paper crafts. Experts rely exclusively on this exact water-based formula because it glues, seals, and finishes beautifully without yellowing or flaking over time.
🎨 Apple Barrel Acrylic Paint (2 oz)
The quintessential, incredibly inexpensive craft paint. Woodworkers and hobby painters swear by its smooth flow and matte finish, providing massive value and remarkably thick color coverage on rough surfaces.
Okay, so you’ve decided to ditch the store-bought, mass-produced holiday cheer this year. Good for you. We love to see it. There’s something extra special about a handmade Christmas card, right? It just screams, “I thought about you enough to get glue on my fingers.”
Forget the stress of perfection. We’re going for charm, personality, and maybe a little glitter explosion. Get ready to impress your friends and family with cards that actually feel like a hug, not a receipt. Let’s dive into some seriously cool DIY inspo.

1. Watercolor Wonders
Grab those paints you bought that one time and never touched. A simple watercolor wash with a silhouette stamp of a tree or reindeer looks incredibly chic without requiring an art degree. Plus, the slightly imperfect edges? Totally intentional, darling.
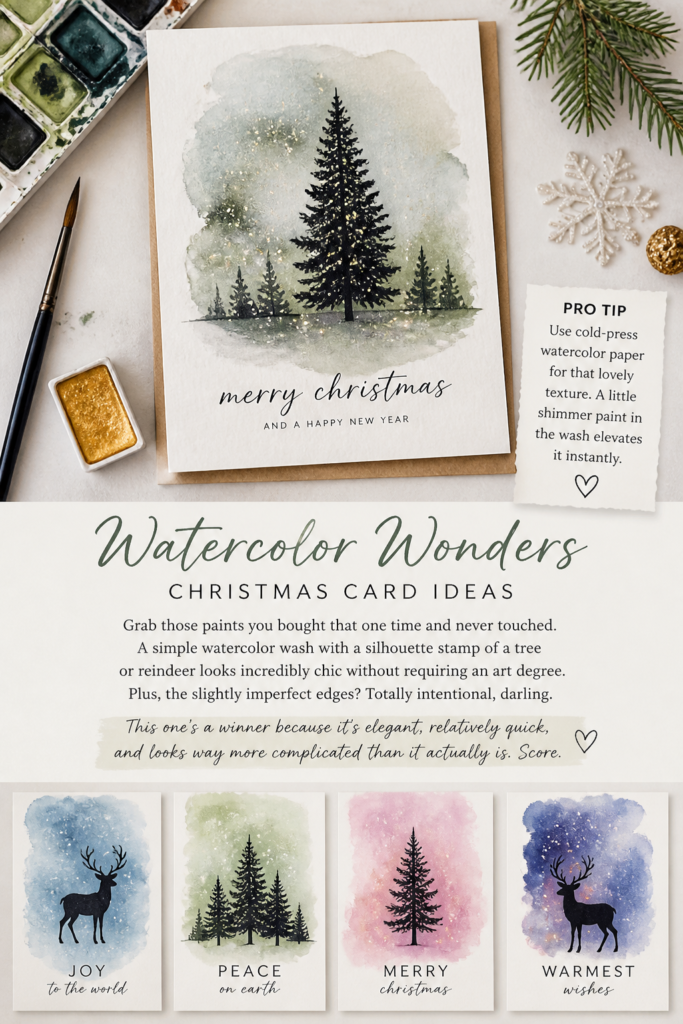
Pro tip: Use cold-press watercolor paper for that lovely texture. A little shimmer paint in the wash elevates it instantly.
This one’s a winner because it’s elegant, relatively quick, and looks way more complicated than it actually is. Score.
2. Button Bonanza
Time to raid your grandma’s button jar (with permission, obviously). Arrange colorful buttons to form a Christmas tree, a wreath, or even a snowman. It adds fantastic texture and a playful 3D effect.
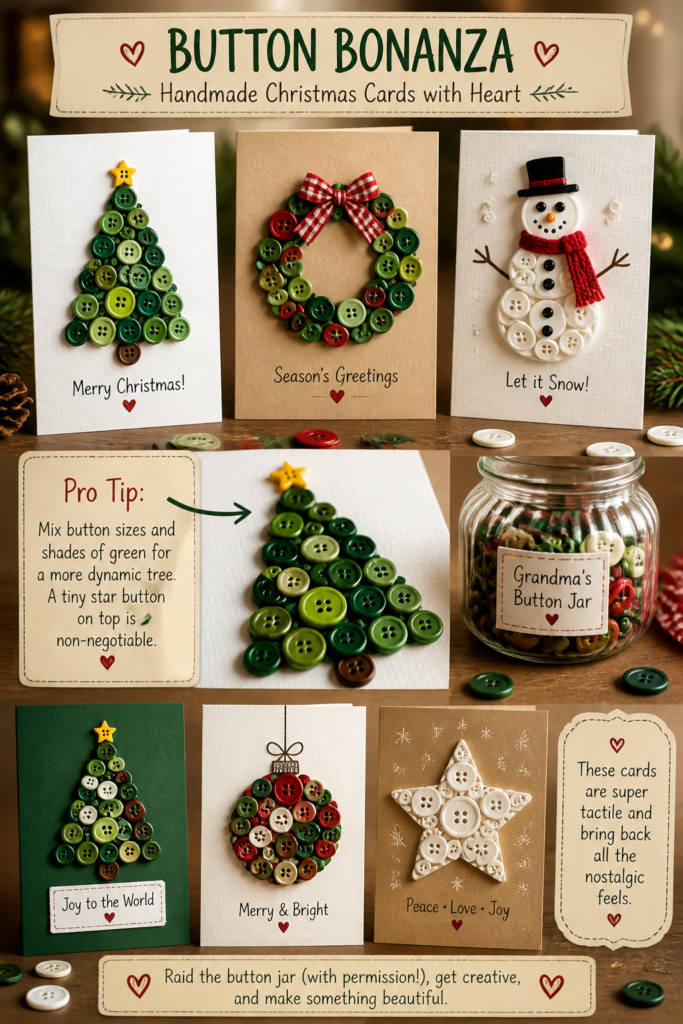
Pro tip: Mix button sizes and shades of green for a more dynamic tree. A tiny star button on top is non-negotiable.
These cards are super tactile and bring back all the nostalgic feels. Plus, it’s a great way to use up those random spare buttons.
3. Washi Tape Wizardry
Your washi tape collection finally has its moment to shine. Create geometric trees, stripes, or even tiny gift boxes on your card. It’s low-mess, high-impact, and surprisingly versatile.
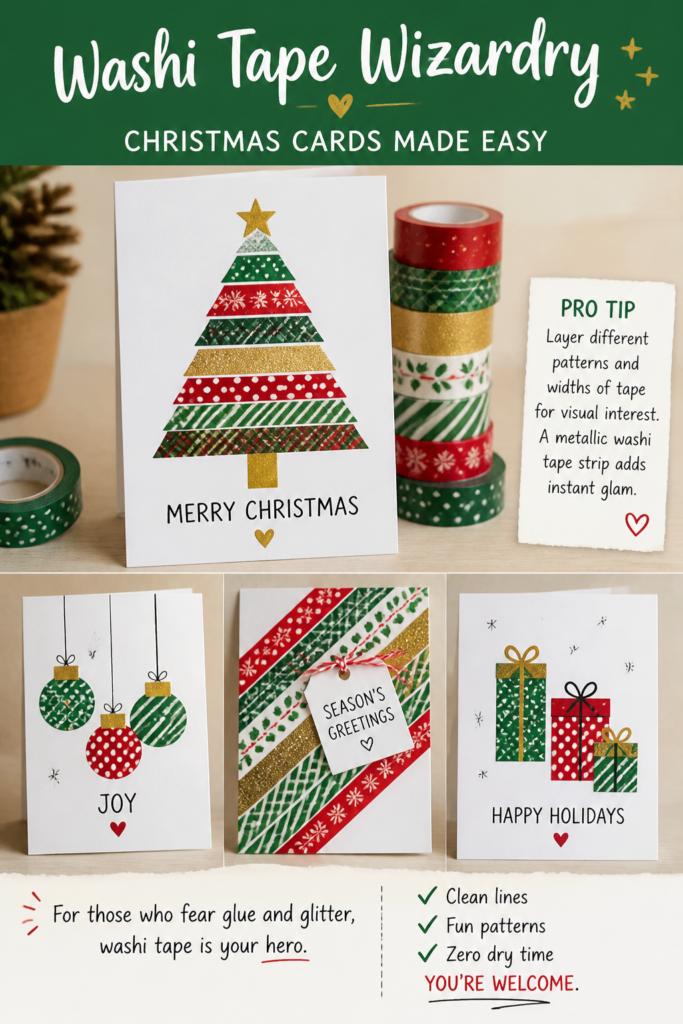
Pro tip: Layer different patterns and widths of tape for visual interest. A metallic washi tape strip adds instant glam.
For those who fear glue and glitter, washi tape is your hero. Clean lines, fun patterns, and zero dry time. You’re welcome.
4. Fingerprint Fun
Yes, really. Ink up your finger (or your kid’s, if you’re brave) and make tiny fingerprints. Turn them into reindeer with drawn-on antlers and eyes, or string them together as fairy lights. Adorable and totally unique.
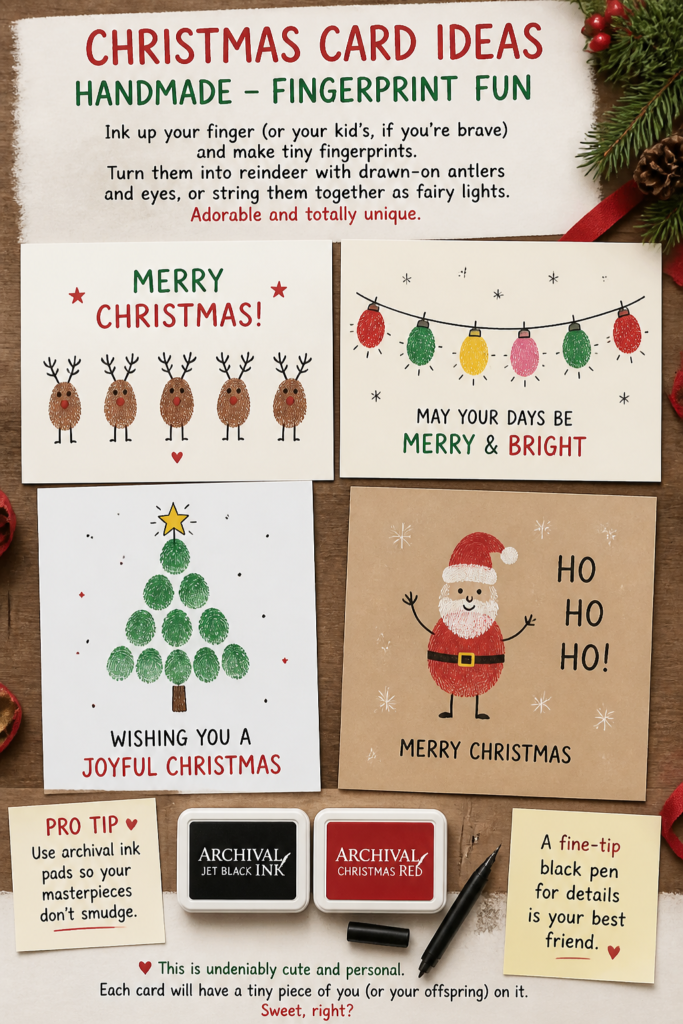
Pro tip: Use archival ink pads so your masterpieces don’t smudge. A fine-tip black pen for details is your best friend.
This is undeniably cute and personal. Each card will have a tiny piece of you (or your offspring) on it. Sweet, right?
5. Yarn-Wrapped Trees
Cut out a simple Christmas tree shape from cardstock. Wrap it tightly with festive yarn – green, red, or even variegated. Glue the wrapped tree onto your card base. It’s got that cozy, hygge vibe.
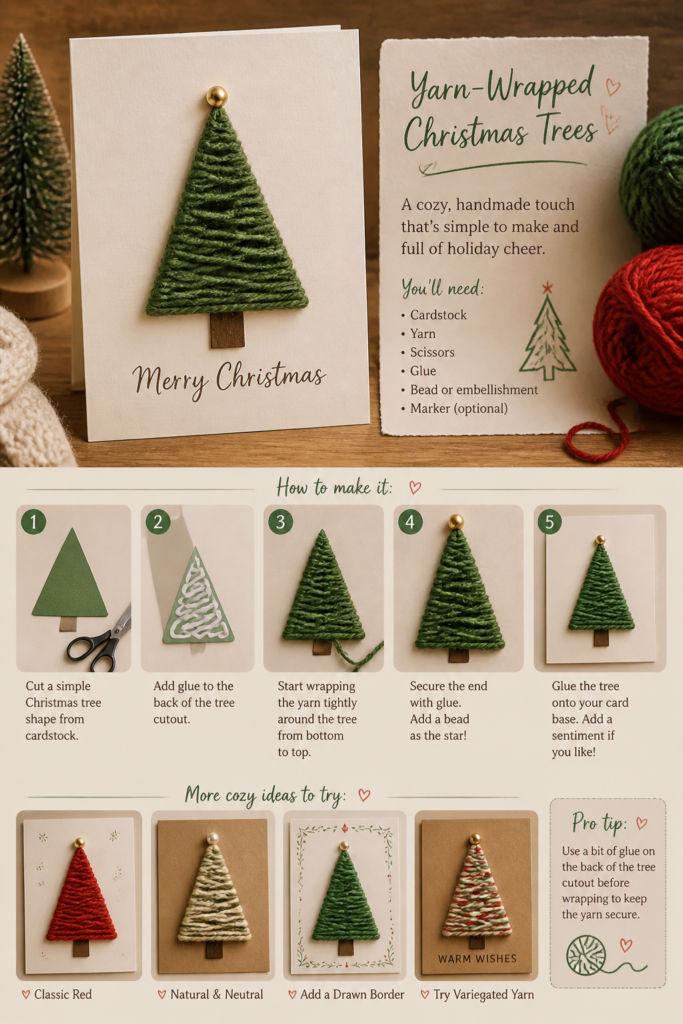
Pro tip: Use a bit of glue on the back of the tree cutout before wrapping to keep the yarn secure. Add a small bead as a star.
These cards feel warm and inviting, perfect for a winter greeting. Plus, it’s a great excuse to buy more pretty yarn.
6. Stamped Simplicity
Sometimes, less is more, especially when you’re batch-producing. Grab a classic holiday stamp – a snowflake, a simple “Joy,” or a sprig of holly. Stamp it cleanly, perhaps with a metallic ink, and call it a day.

Pro tip: Invest in a good quality ink pad and stamp block for crisp images. Embossing powder can take a simple stamp to the next level.
Elegant, understated, and surprisingly impactful. It’s the minimalist chic of Christmas cards, and we’re here for it.
7. Glitter Bomb (Controlled)
Okay, maybe not a full bomb, but strategic glitter. Use double-sided tape or glue to create a shape (like a star or a word) and then sprinkle glitter over it. Tap off the excess. Instant sparkle, minimal mess (we hope).
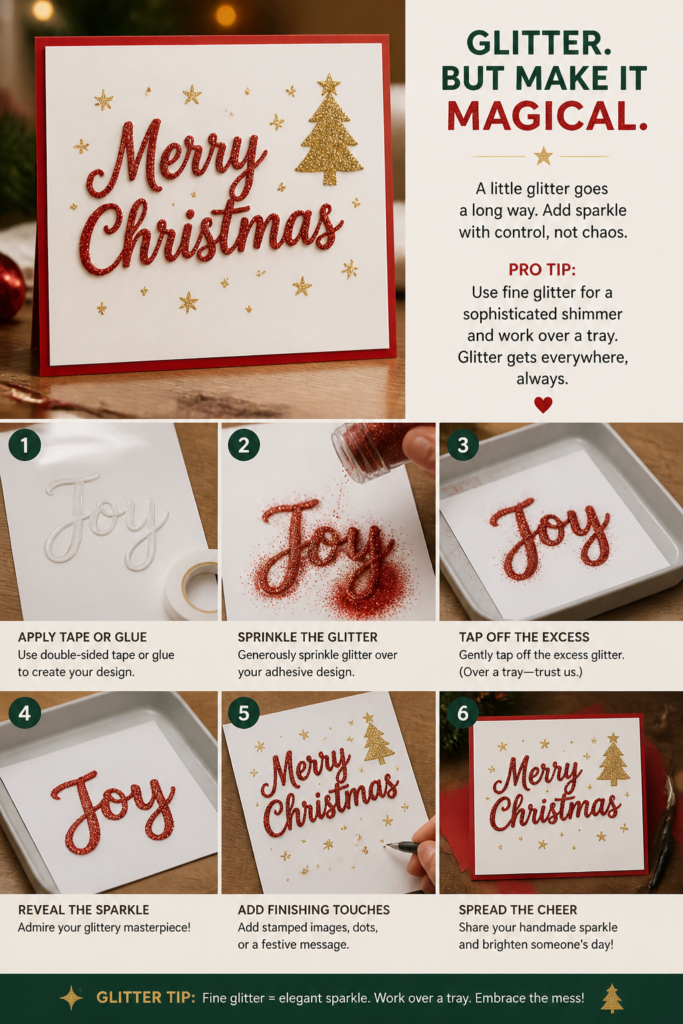
Pro tip: Use fine glitter for a more sophisticated look. Work over a tray to catch the fallout, because glitter gets everywhere, always.
It’s Christmas. You need some sparkle. This method gives you that festive pop without turning your entire house into a disco ball.
8. Pop-Up Surprises
Feeling ambitious? A simple pop-up card isn’t as hard as it looks. Cut two parallel lines in the middle of your card, fold the tab inwards, and glue a small element (a tree, a snowman) onto it. Instant wow factor.
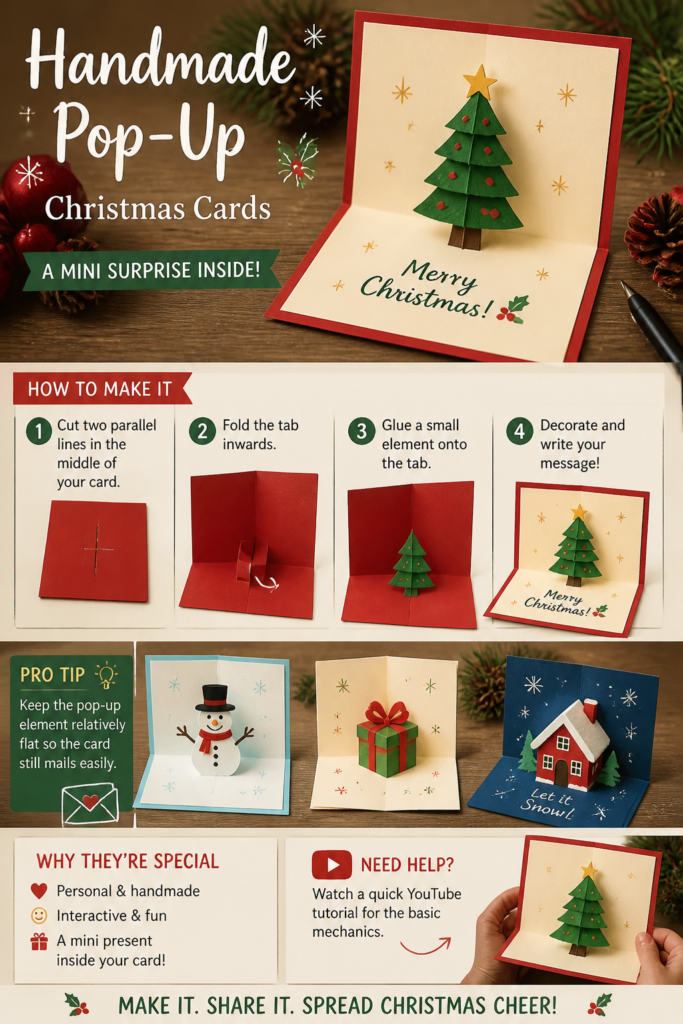
Pro tip: Keep the pop-up element relatively flat so the card still mails easily. Watch a quick YouTube tutorial for the basic mechanics.
These cards are interactive and guaranteed to make recipients smile. It’s like a mini present inside your card.
9. Leaf & Twig Tributes
Go foraging! Small dried leaves, tiny twigs, or even flattened pine needles can be glued onto cards to create rustic, natural designs. Think mini wreaths or abstract forest scenes.
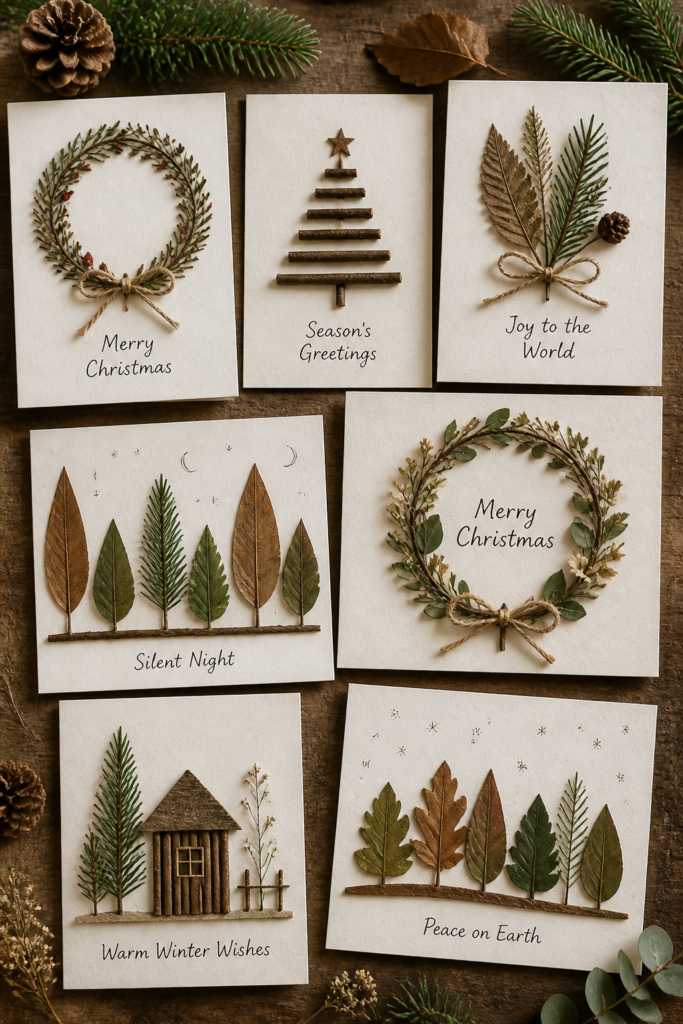
Pro tip: Press leaves flat for a few days between heavy books before gluing. Use a strong craft glue to ensure they stick.
Embrace nature’s beauty with these earthy cards. They feel organic and bring a touch of the outdoors in, even if it’s freezing outside.
10. Photo Collage Cards
Instead of just one photo, create a mini collage. Print out a few small, square photos (think Instagram vibes) and arrange them artfully on the front of your card. Add a small handwritten message.

Pro tip: Use photos with a consistent color palette for a cohesive look. Black and white photos always look chic.
These are super personal and a fantastic way to share a year’s worth of memories. Your loved ones will appreciate the effort.
11. Painted Dot Designs
Get out your craft paint and a Q-tip or the eraser end of a pencil. Dip and dot! Create patterns, festive shapes, or even abstract designs using varying sizes of dots. It’s meditative and results in really cool texture.
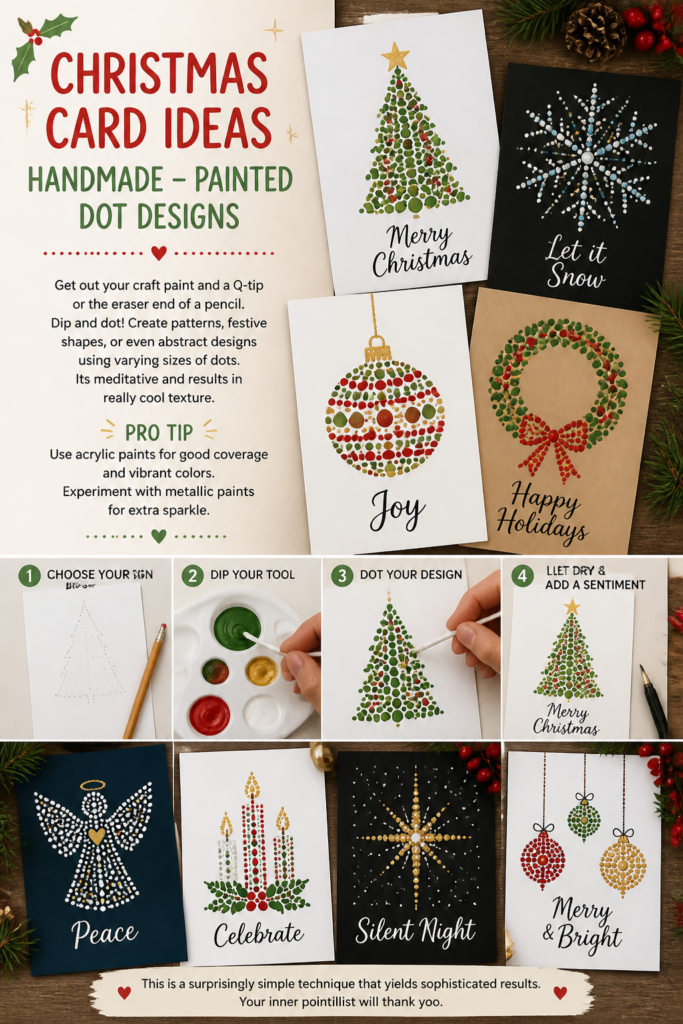
Pro tip: Use acrylic paints for good coverage and vibrant colors. Experiment with metallic paints for extra sparkle.
This is a surprisingly simple technique that yields sophisticated results. Your inner pointillist will thank you.
12. Embossed Elegance
If you have an embossing folder and a machine, you know the magic. Run cardstock through with a festive folder (snowflakes, holly, plaid). The raised texture is incredibly luxurious and requires minimal other embellishments.
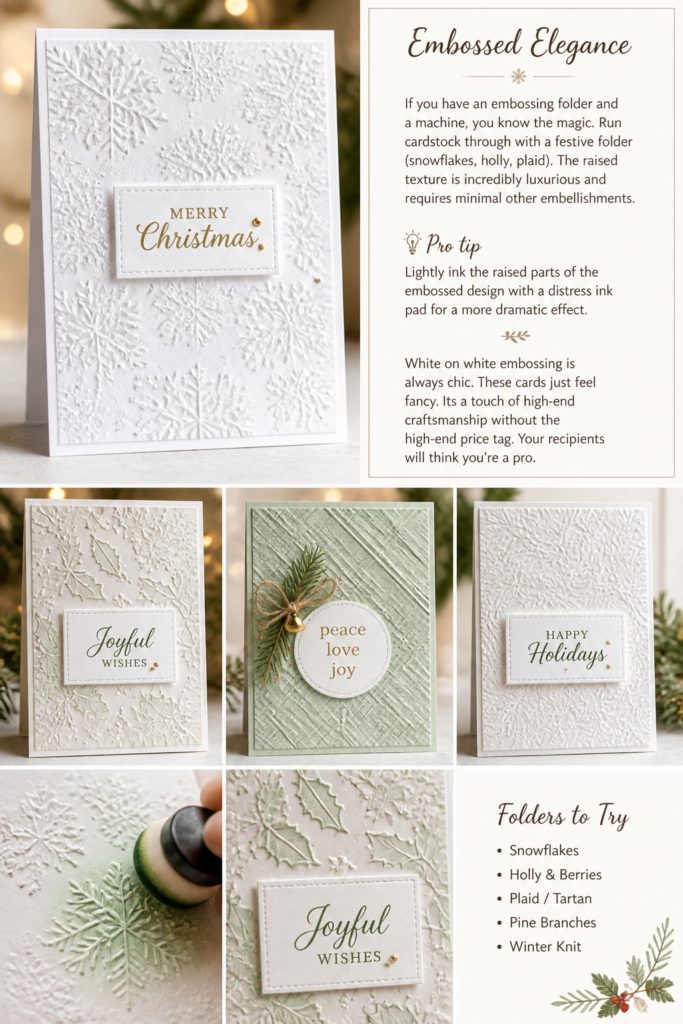
Pro tip: Lightly ink the raised parts of the embossed design with a distress ink pad for a more dramatic effect. White on white embossing is always chic.
These cards just feel fancy. It’s a touch of high-end craftsmanship without the high-end price tag. Your recipients will think you’re a pro.
13. Paper Cut Scenes
Grab an X-Acto knife and a cutting mat. Cut out simple silhouettes – a deer in a forest, a village scene, or intricate snowflakes – from a contrasting color of cardstock. Layer it onto your main card. Patience is a virtue here.

Pro tip: Start with simple designs and work your way up. Use a fresh blade for clean cuts. A light box helps if you’re tracing.
These cards are stunning and truly show off your dedication. They’re little works of art that recipients will definitely save.
14. Recycled Magazine Art
Flip through old magazines for colorful pages, interesting textures, or even specific words. Cut them into shapes (trees, ornaments) or tear them for a collage effect. It’s eco-friendly and surprisingly modern.
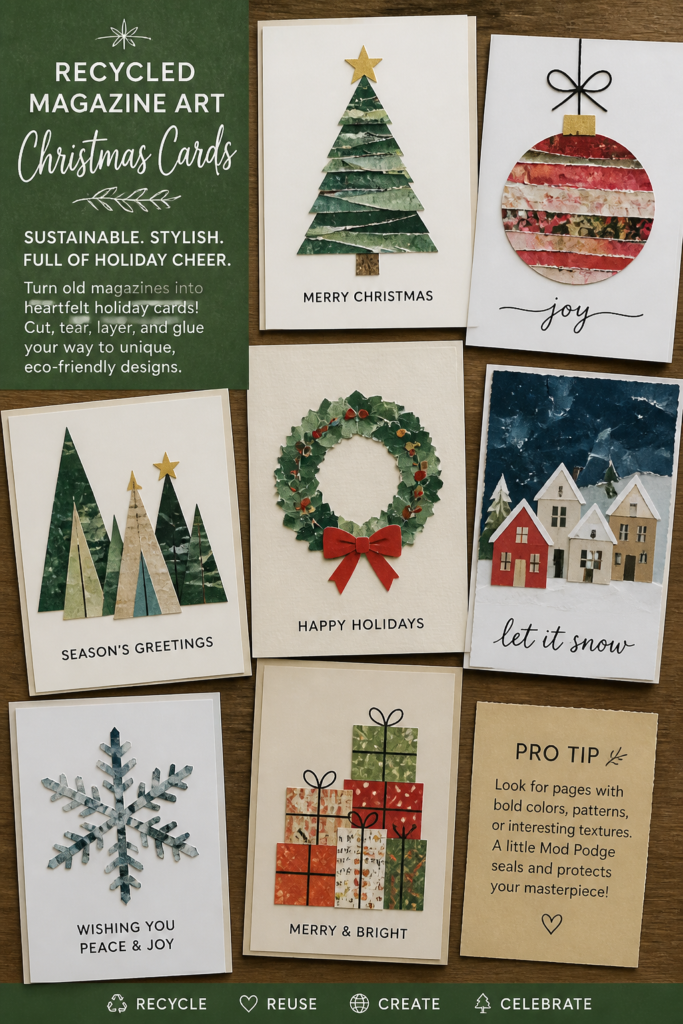
Pro tip: Look for pages with solid blocks of color or interesting patterns. A little bit of Mod Podge can seal and protect your collage.
Sustainable and stylish? Yes, please. These cards prove that one person’s trash is another’s holiday treasure.
15. Simple Stencil Magic
Find a festive stencil (or cut your own from thin plastic). Use a sponge or brush to dab paint through it onto your card. A single, well-placed stenciled image can be incredibly effective and super easy.
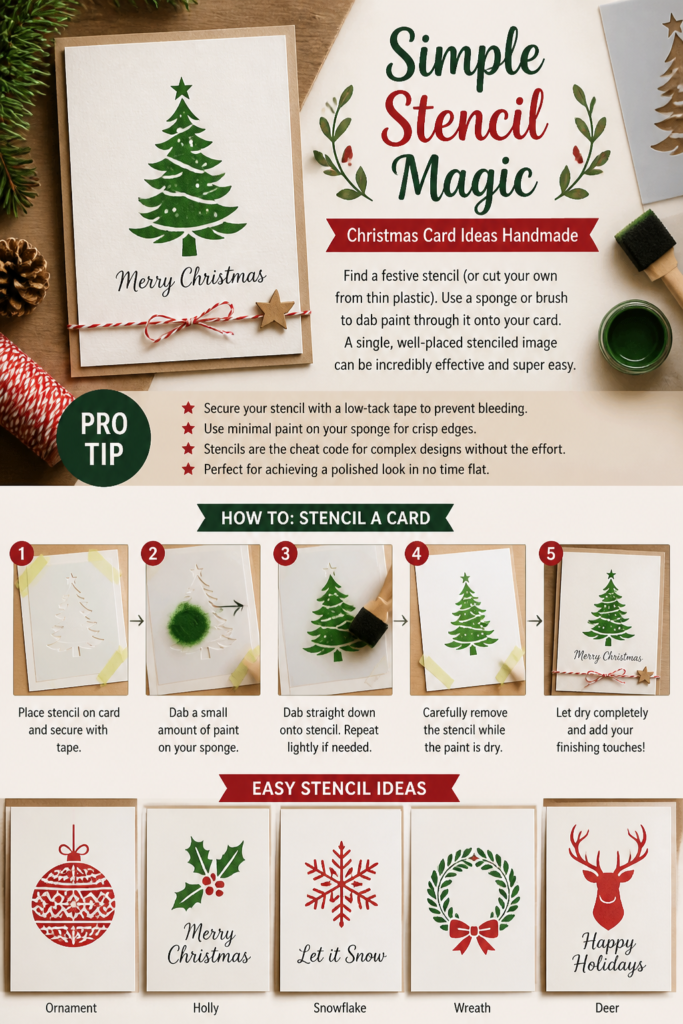
Pro tip: Secure your stencil with a low-tack tape to prevent bleeding. Use minimal paint on your sponge for crisp edges.
Stencils are the cheat code for complex designs without the effort. Perfect for achieving a polished look in no time flat.
✨ New Member Etsy Shops (100% Unsponsored!)
We are incredibly proud of the talent in this community! 💖 We've rounded up some gorgeous new Etsy shops launched by our very own members.
There are ZERO affiliate links in this post—just 100% pure support for our makers. Click below to shop small, show them some love, and find your new favorite items! 👇🛍️


Conclusion
There you have it, folks! Fifteen ways to make your Christmas cards stand out from the beige pile of bills and flyers. Remember, the goal isn’t perfection, it’s personality. Your friends and family will totally appreciate the extra effort and the fact that you didn’t just sign your name on a generic print.
So, clear off your kitchen table, put on some holiday tunes, and get crafting. Your inner artisan (and your mailbox) will thank you. Happy making!