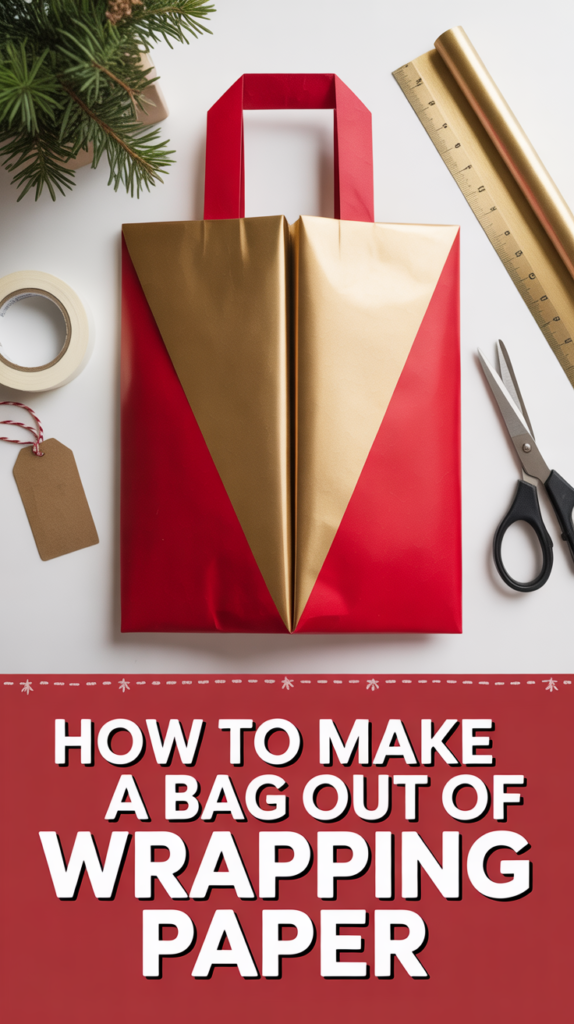
🎁 How To Make A Bag Out Of Wrapping Paper
🛠️ The Ultimate Maker's Toolkit
I've tested thousands of craft tools over the years. Whether you are quilting, crafting, or building mixed-media art, these are the top 5 absolute non-negotiable tools I personally recommend to guarantee professional results.
🪡 SINGER Heavy Duty 4452 Sewing Machine
The sewing community highly recommends this as the ultimate "bulletproof" entry-level machine. Its heavy metal frame powerfully pushes through thick denim and heavy quilt layers that would instantly jam a standard plastic machine.
✂️ Fiskars 8" Orange-Handled Scissors
Never settle for dull dollar-store blades. Wirecutter repeatedly names Fiskars the absolute best all-purpose craft scissor due to its legendary precision-ground blades and an ergonomic grip that prevents hand-cramping.
🔥 Gorilla Dual Temp Hot Glue Gun
Named Wirecutter's top choice because it literally does the work of two tools. It features dual-temperature settings offering low heat for delicate florals and blistering high heat for heavy wood adhesion repairs.
🖌️ Mod Podge Waterbase Gloss Sealer
The absolute undisputed champion of decoupage and paper crafts. Experts rely exclusively on this exact water-based formula because it glues, seals, and finishes beautifully without yellowing or flaking over time.
🎨 Apple Barrel Acrylic Paint (2 oz)
The quintessential, incredibly inexpensive craft paint. Woodworkers and hobby painters swear by its smooth flow and matte finish, providing massive value and remarkably thick color coverage on rough surfaces.
Got a gift but no bag? Zero panic. You’ve got wrapping paper, tape, and questionable confidence. Perfect. Let’s turn that roll into cute DIY bags that look intentional, not last-minute.
1. Classic Gift Bag
Simple, sturdy, and totally bag-credible. This is your go-to when you want a clean look fast.
Fold your paper around the gift like a sleeve, tape the seam, then make a flat base with two diagonal folds and tape. Fold the top edge for a neat finish and punch two holes for handles. Add ribbon or twine.
Pro tip: Reinforce the bottom with a cardboard insert from a cereal box for heavy gifts.
It works because the structure mimics a store-bought bag, just way cuter.
2. No-Measure Lunch Sack
Fast, unfussy, and oddly chic. Perfect for small gifts and snacks-but-not-really snacks.
Wrap paper around the gift, tape the back, then fold the bottom up by a few inches and press flat to form a pouch. Slide the gift in and roll the top down like a lunch bag. Clip or tape to seal.
Pro tip: Use double-sided tape so the outside looks seamless.
It works because the roll-top gives flexibility without precise measuring.
3. Flat Envelope Bag
Minimal effort, maximum aesthetic. Great for books, scarves, or gift cards with delusions of grandeur.
Cut a rectangle, fold it like an envelope with a center seam at the back, and seal. Fold a small bottom gusset so it can expand slightly. Tuck the top flap and close with a sticker.
Pro tip: Score folds with a butter knife for crisp edges.
It works because the flat silhouette looks intentional and polished.
4. Twisted Handle Tote
Cute mini tote energy. Great for candles, mugs, or anything that wants a handle moment.
Create the classic bag body, then twist two strips of paper into handles. Glue or tape them inside the top rim with extra paper strips as reinforcement tabs. Fold the rim down to hide the hardware.
Pro tip: Add a dab of hot glue if you’ve got it for stronger handles.
It works because the rim fold locks everything in and keeps it tidy.
5. Origami-Style Stand-Up Bag
Looks fancy, still easy. The base pops open and stands tall like it pays rent.
Form a tube with the paper, then fold the bottom into two triangles that meet in the center. Fold top and bottom flaps inward and tape. Press the sides to create gussets for that boutique vibe.
Pro tip: Use thicker wrapping paper or kraft wrap to hold sharp creases.
It works because the gussets balance the weight and shape.
6. Ribbon Tie Pouch
Soft, scrunchy, and romantic. Like a tiny drawstring bag’s cousin.
Make a simple sleeve around your item with the seam in back. Punch two holes near the top, thread ribbon through, and gather. Add tissue peeking out for drama.
Pro tip: Fold a 1-inch top hem before punching holes so it doesn’t tear.
It works because the drawstring distributes pressure and looks fancy.
7. Boxed Bottom Luncher
Sturdy base, quick build. Ideal for anything box-ish without actually using a box.
Wrap into a tube, then fold the bottom up and create triangle corners to form a rectangular base. Tape inside for strength. Add a top cuff fold and clip shut.
Pro tip: Line the base with a second layer of paper for extra support.
It works because the boxed bottom keeps things upright and safe.
8. Window Peekaboo Bag
Show off the cute gift without ruining the surprise. Okay, slight surprise.
Before assembling, cut a small window and tape clear plastic or cellophane behind it. Build the bag as usual. Keep the window away from folds for stability.
Pro tip: Outline the window with washi tape for a clean frame.
It works because the plastic adds structure and a boutique feel.
9. Layered Pattern Bag
When your leftovers don’t match but you want them to. Chaos, but coordinated.
Create a base bag with one paper, then add a contrast panel to the front. Fold a cuff at the top using the second pattern. Finish with a matching tag.
Pro tip: Keep patterns in the same color family for cohesion.
It works because layering hides seams and looks intentional.
10. Micro Favor Bag
Tiny bag, huge personality. Great for candy, jewelry, or a dramatic note.
Use leftover scraps to make a teeny envelope-style or mini boxed bag. Seal with a sticker or mini clothespin. Add a loop of twine as a handle.
Pro tip: Score folds with a ruler edge to avoid tearing small pieces.
It works because small scale = instant cuteness with minimal materials.
✨ New Member Etsy Shops (100% Unsponsored!)
We are incredibly proud of the talent in this community! 💖 We've rounded up some gorgeous new Etsy shops launched by our very own members.
There are ZERO affiliate links in this post—just 100% pure support for our makers. Click below to shop small, show them some love, and find your new favorite items! 👇🛍️


Conclusion
Congrats, you just hacked gift bags out of thin paper and charm. These tricks save cash, reduce waste, and make your presents look designer-level on a snack budget. Tape, fold, flex—your gifts now arrive with main-character energy.