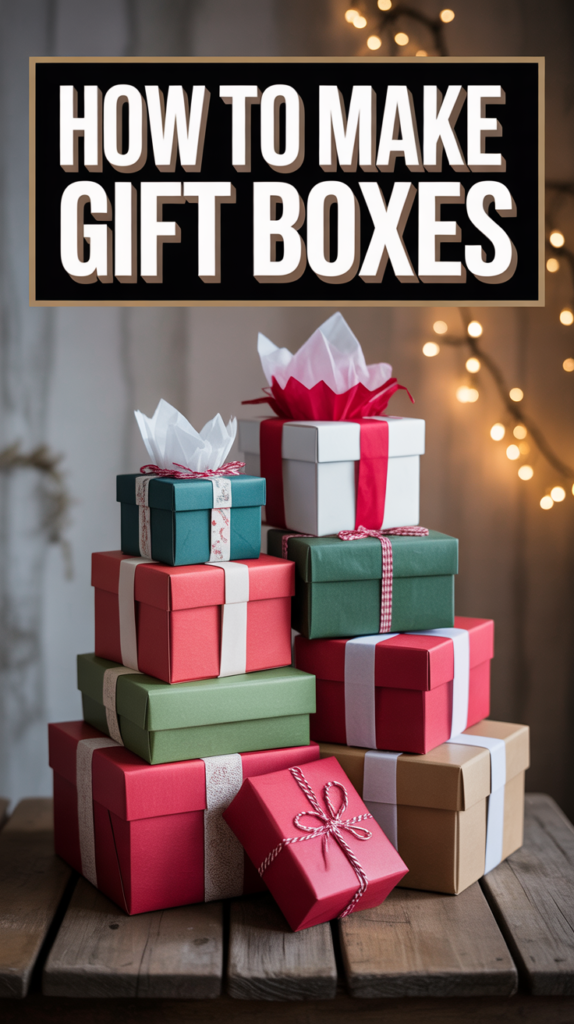
🎁 How To Make Gift Boxes
Alright, gift-giving gurus and DIY dreamers, listen up! We all know the real MVP of any present isn’t just what’s inside (though, let’s be honest, that matters too), it’s the epic presentation. Ditch those sad, store-bought boxes that scream “I tried, but not really,” and let’s craft some seriously swoon-worthy packaging that practically begs to be unwrapped. We’re talking handmade, heart-made, and totally brag-worthy.
So, grab your glue sticks, unleash your inner paper wizard, and prepare to elevate your gifting game from ‘meh’ to ‘OMG, where did you get this?!’. Trust us, your loved ones (and your Instagram feed) are going to love you for it.
1. The Classic Square
Okay, let’s be real, sometimes you just need a no-nonsense box that gets the job done without a fuss. This is your go-to for pretty much anything, from tiny trinkets to a collection of artisanal soaps.
Grab some sturdy cardstock, a ruler, and a craft knife. You’ll score, fold, and glue, creating a perfectly respectable container. Think clean lines, minimalist vibes, but with all the handmade love. Pro tip: Use a bone folder for super crisp folds; your future self (and your gift recipient) will thank you.
It’s a timeless choice because it’s versatile and surprisingly elegant when you pick the right paper. Plus, it’s a great starting point before you get all fancy.
2. The Playful Pillow Box
Who doesn’t love a good pillow? Especially one that holds a present! These curvy cuties are perfect for smaller, flatter items like jewelry, gift cards, or even a handful of homemade cookies.
You essentially cut a rectangle, score the edges, and then round the flaps, folding them in to create that iconic pillow shape. A little double-sided tape keeps everything snug. Pro tip: Print a cute pattern directly onto your paper before cutting for an instant design boost.
They’re quick, they’re charming, and they add a touch of whimsy that screams “I thought about this, even if it only took five minutes.”
3. The Mighty Pyramid Box
Feeling a bit architectural? The pyramid box is your jam. It’s surprisingly easy to construct and gives off major “ancient treasure” vibes, even if it’s just holding a fancy lip balm.
You’ll need a square piece of paper, then score and fold it into four triangles that meet at the top. A tiny hole punch and some ribbon secure it. Don’t forget to pick a paper with some heft. Pro tip: Embellish the tip with a bead or charm for extra sparkle before tying it off.
This box adds an unexpected geometric flair, making even the simplest gift feel a bit more special and mysterious.
4. The Sweet Heart-Shaped Box
For gifts straight from the heart (or, you know, just because you like hearts), this one’s a winner. Perfect for Valentine’s Day, anniversaries, or anytime you want to spread some love.
Cut two identical heart shapes for the top and bottom, then a long strip for the sides. Carefully score and glue the strip around the edges of one heart, then attach the second heart as the lid. Use craft glue for a strong hold. Pro tip: Use a contrasting color for the side strip to make the heart shape pop.
It’s undeniably cute and shows you put in that extra bit of effort to match the packaging to the sentiment.
5. The Clever Matchbox Style Drawer
This one is pure genius for small, delicate items. It’s like a tiny secret compartment for your treasures, offering a delightful pull-out reveal that’s way more exciting than just lifting a lid.
You construct an outer sleeve and a slightly smaller inner tray that slides in. Think of it as a mini dresser drawer for your gift. Thick cardstock is essential here to maintain its shape. Pro tip: Add a small ribbon pull to the drawer for easy opening and an elegant touch.
The slide-out action is incredibly satisfying, making the unwrapping experience feel like a fun little game.
6. The Hip Hexagon Box
Why be square when you can be a hexagon? This six-sided wonder is a fantastic alternative to the standard box, offering a unique silhouette that’s visually appealing.
You’ll cut out a hexagon for the base and lid, then a long strip for the sides, scoring it into six equal sections. Patience is key when gluing the sides. Patterned paper works wonders here. Pro tip: For an extra sturdy base, cut out a second hexagon and glue it to the inside bottom.
It’s distinct and modern, proving you’re not afraid to step outside the box (pun absolutely intended) with your packaging.
7. The Exciting Pop-Up Box
Surprise! This isn’t just a box; it’s an experience. When the lid comes off, elements inside pop up, adding a delightful dimension to your gift. It’s perfect for small items, photos, or even a mini message.
You’ll build a standard box, then attach springs or accordion folds to internal decorative elements. The trick is getting the tension right so they spring up. Use lightweight paper for the pop-up elements. Pro tip: Test your pop-up mechanism before gluing everything permanently; nobody wants a sad, droopy surprise.
It’s an instant wow-factor creator, transforming a simple box into an interactive piece of art.
8. The Scholarly Book-Shaped Box
For the bibliophiles and secret keepers, this box looks just like a miniature book. It’s ideal for hiding away small gifts, jewelry, or even a heartfelt letter.
You essentially create a rectangular box and then add a spine and a cover, mimicking a book’s structure. Think sturdy chipboard for the covers and decorative paper for the binding. Pro tip: Age the edges of your “book” with some ink for a vintage, well-loved look.
It’s charmingly deceptive and adds an intellectual, thoughtful touch to your present.
9. The Dramatic Explosion Box
Prepare for oohs and aahs! When you lift the lid off an explosion box, the sides dramatically fall open, revealing layers of photos, messages, and a central gift. It’s a showstopper, plain and simple.
You start with a square, score it into nine smaller squares, and then cut out the corner squares. Fold up the sides, and create a lid. Then, get creative with inner layers and embellishments. Scrapbook paper is your best friend here. Pro tip: Plan out your photo and message placement before gluing; it’s like designing a mini scrapbook.
This box isn’t just packaging; it’s a gift in itself, full of memories and delightful surprises.
10. The Upcycled Cereal Box
Who said you need fancy materials to make something awesome? Transform a humble cereal box into a sturdy, eco-friendly gift container. It’s resourceful and surprisingly chic with the right paper.
Cut the top and bottom flaps off, then cover the entire box with decorative paper, inside and out. You can even add a new lid. Mod Podge works wonders for a smooth finish. Pro tip: Reinforce the corners with an extra layer of glue or tape before wrapping for maximum durability.
It’s a fantastic way to repurpose, save some cash, and show off your crafty ingenuity.
11. The Adorable Milk Carton Box
These little guys are just too cute for words. Perfect for small treats, party favors, or a tiny token of appreciation. They bring a nostalgic, homey vibe to your gift.
You’ll need a rectangular piece of paper, scored and folded to create the carton shape, then pinch the top together. A hole punch and ribbon seal the deal. Use medium-weight cardstock. Pro tip: Use a crimper tool on the top flap before punching holes for that authentic milk carton look.
They are incredibly charming and a unique alternative to a standard favor box, guaranteed to make people smile.
12. The Grand Shirt Box
Got a bigger item? Like, say, an actual shirt, or a collection of smaller gifts? Don’t stress, you can totally make a larger, sturdy box without breaking a sweat (or the bank).
This is essentially an oversized version of the classic square box, but you’ll want to use heavy-duty poster board or even thin cardboard. Measure twice, cut once, and be generous with your glue. Pro tip: Use masking tape on the inside seams while the glue dries for extra reinforcement and a cleaner look.
It’s practical, impressive in scale, and shows you can tackle even the bigger packaging challenges with style.
13. The Elegant Origami Box
No glue? No problem! An origami box is a marvel of paper folding, creating a beautiful and functional container with just a single sheet of paper. It’s almost magical.
You’ll learn a series of precise folds to create a seamless box and lid. Patience and accuracy are your best friends here. Use origami paper or any thin, square paper. Pro tip: Start with a larger sheet of paper than you think you need; it’s easier to fold and gives you a more substantial final box.
It’s a testament to the power of paper and a truly elegant way to present a small, thoughtful gift.
14. The Peek-A-Boo Window Box
Sometimes, you want to give a little sneak peek of the awesomeness inside. A window box lets your gift do some of the talking before it’s even fully unwrapped.
You create a regular box, but cut an opening in the lid (or side) and then glue a piece of clear acetate or cellophane behind it. Use a craft knife for clean cuts. Pro tip: Add a decorative frame around your window opening using a contrasting paper for an extra polished touch.
It builds anticipation and highlights a particularly pretty or intriguing gift, making the presentation even more engaging.
Conclusion
See? Who needs those overpriced, boring boxes when you’ve got a little creativity and a whole lot of paper? Whether you’re going for minimalist chic, playful whimsy, or full-on dramatic reveal, crafting your own gift boxes adds a layer of thoughtfulness that no store-bought option can ever match.
So, go forth, brave crafter! Snip, score, and fold your way to gifting glory. Your presents (and your lucky recipients) will thank you for making them feel extra special. Now, go make some magic!