🫶 12 Easy And Simple Mehendi Designs
Got a last-minute event and zero patience for complicated swirls? Same. These quick mehendi ideas look chic, don’t eat your whole day, and won’t make your fingers cramp. Grab a cone, deep breath, steady hand, and let’s play connect-the-dots but make it pretty.

1. Minimal Finger Bands
Subtle, sleek, and done before your chai cools. Draw thin parallel bands across each finger with tiny dot separators.
- Keep spacing even for that clean, graphic vibe.
- Mix one zigzag band among straight lines for contrast.
Pro tip: Use the cone tip barely touching the skin for razor-thin lines. Practice on your palm first.
It works because it frames your rings and nails without trying too hard.
2. Half-Moon Wrist Cuff
A half mandala hugging your wrist like a dainty tattoo. Start with a semi-circle, then layer petals and dots outward.
- Alternate thick and thin petals to add depth.
- Finish with a dotted chain to close the cuff.
Pro tip: Mark the center point lightly before you start so it stays symmetrical.
It works because cuffs read polished even when they’re super simple.
3. Single Trail Vine
The no-brainer classic. A slim leafy vine running from index to wrist.
- Add tiny teardrop leaves alternating sides.
- Dot trios fill gaps without clutter.
Pro tip: Keep the vine slightly curved; straight lines look stiff.
It works because negative space makes it look airy and elegant.
4. Bold Dot Grid
Geometric but zero stress. Create a diagonal grid of dots, then fill some intersections with mini diamonds.
- Use larger center dots and smaller ones at the edges.
- Leave a finger or two blank for balance.
Pro tip: Test dot size on a tissue to keep consistency.
It works because symmetry + simplicity = instant chic.
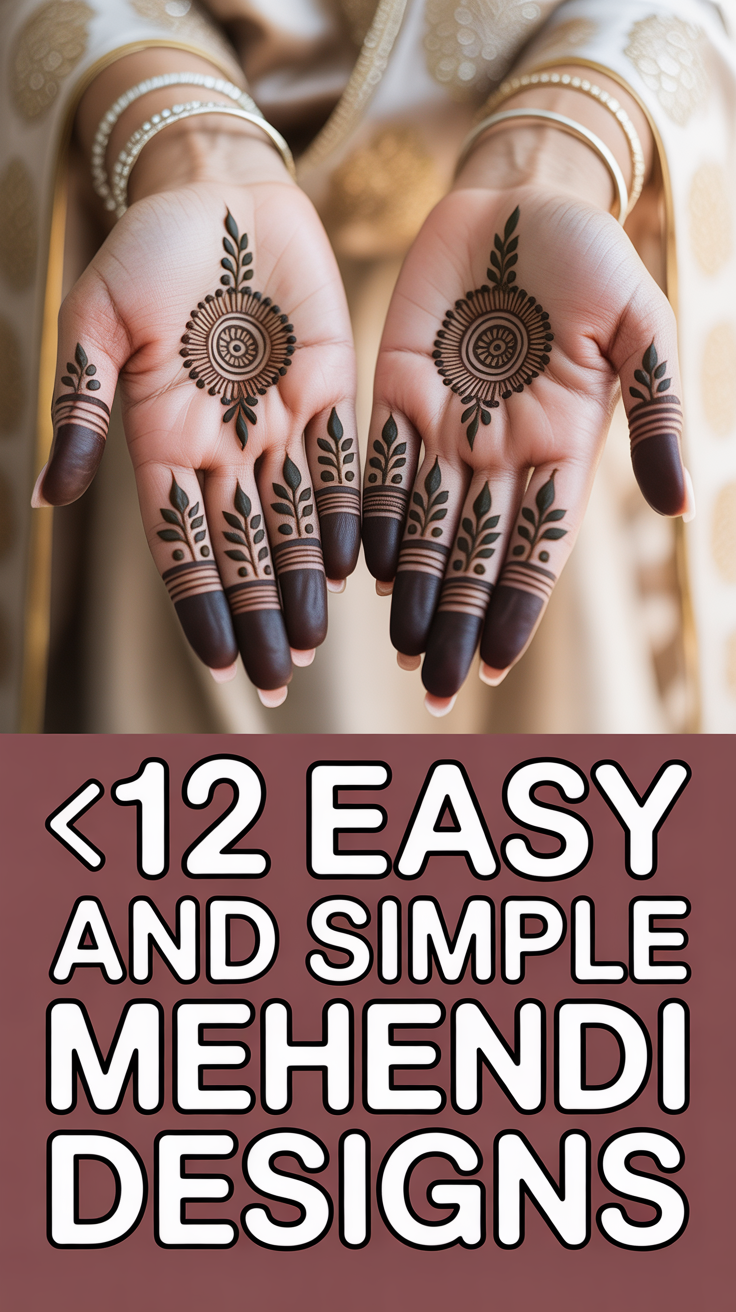
5. Tiny Mandala Centerpiece
One cute mandala right in the palm. Start with a dot center, add rings and petals.
- Repeat a motif: dot, petal, line, dot.
- Leave the rest of the palm clean.
Pro tip: Rotate your hand, not the cone, for smoother circles.
It works because focal pieces feel intentional and artsy.
6. Chevron Fingertips
Triangle tips but make them mehendi. Draw V-shaped chevrons at fingertips with a tiny dot below.
- Stack two or three Vs per finger.
- Match on both hands for symmetry.
Pro tip: Angle the V to follow your nail shape—it elongates fingers.
It works because it’s nail art’s cooler cousin.
7. Bracelet With Charm Drop
Delicate wrist line with a hanging teardrop charm toward the hand.
- Add micro-beads along the bracelet line.
- One centered charm keeps it minimal.
Pro tip: Draw the charm first, then connect the bracelet so it aligns perfectly.
It works because jewelry-inspired designs always look refined.
8. Negative Space Petal Ring
A floral ring around one finger using open petals and dots.
- Leave the petal centers blank for negative space.
- Add a thin line above to double-stack the ring.
Pro tip: Keep petals small and identical for that “I meant to do that” energy.
It works because tiny details read luxe without effort.
9. Side Hand Arabic Swirl
Flowy linework along the thumb side from wrist to index base. Think bold curves with paisleys.
- Use thicker strokes for the main swirls, thin for fillers.
- Dot chains trail off the ends.
Pro tip: Outline paisleys first, then shade one side for dimension.
It works because movement draws the eye and flatters hand shape.
10. Daisy Chain Knuckle Bands
Teeny five-dot daisies hugging each knuckle. Cute overload.
- Connect daisies with micro lines.
- Leave base of fingers bare to avoid crowding.
Pro tip: Keep cone pressure light for crisp micro dots.
It works because tiny motifs feel playful and modern.
11. Half Palm Net With Border
Quick lattice on half the palm with a crisp leaf border.
- Draw diagonal lines, then intersect for a net.
- Add dots inside alternate diamonds.
Pro tip: Start lattice from one corner so spacing stays even.
It works because texture + border = neat and complete.
12. Centered Lotus With Stem
A neat lotus bloom near the wrist with a slim stem drifting toward the palm.
- Layer petals from small to wide.
- Dot halo around the flower for highlight.
Pro tip: Shade inner petals with fine lines to fake depth fast.
It works because the lotus is classic, calm, and looks polished in minutes.
Conclusion
See? No art degree required—just steady-ish hands and a mildly patient vibe. These easy designs save time, look intentional, and photograph like a dream. Pick one, breathe, draw, and let the stain do the flexing later.