🌸 11 DIY Room Decor For Girls Teenagers
Ready to upgrade your room without begging for a full makeover budget? Same. These DIYs are cute, easy, and totally customizable—so your space screams you, not generic catalog. Grab some glue, blast your playlist, and let’s make your room double as your aesthetic era.
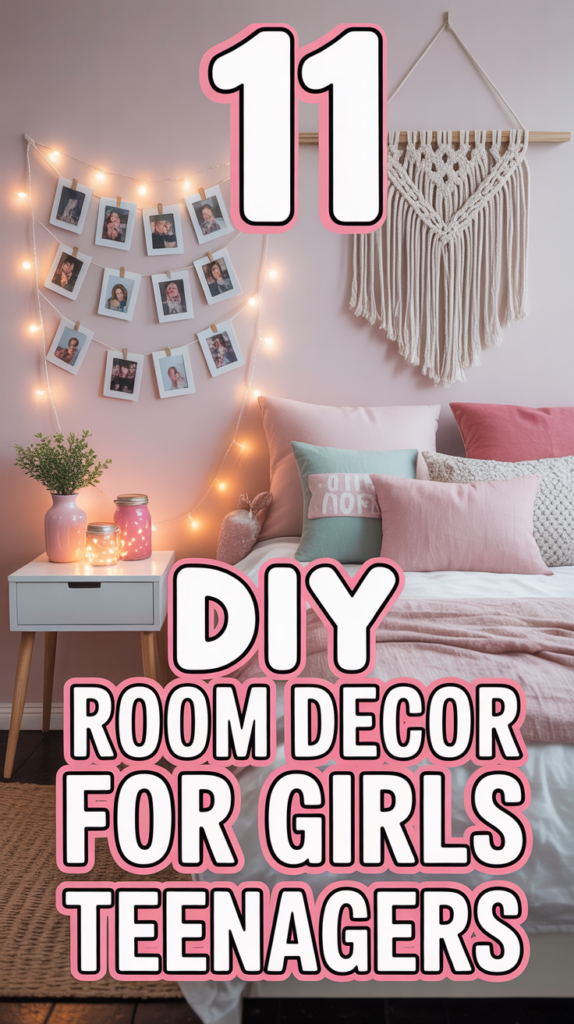
1. Fairy Light Photo Wall
Turn your memories into glowing art. String warm fairy lights across your wall and clip on polaroids or mini prints. Mix in ticket stubs and doodles for extra personality.
Pro tip: Use clear command hooks and micro-clips so the lights float. Layer lights in a zigzag for fuller sparkle.
This works because it adds cozy lighting and personal vibes without taking up floor space.
2. Washi Tape Window Frames
No drill, all thrill. Outline posters and mirrors with washi tape frames to fake a gallery look. Try color blocking or tiny patterns for texture.
Pro tip: Use contrasting colors—like pastel tape around bold prints—to make art pop. Press edges firmly for clean lines.
It works because you get instant style with zero commitment and zero wall damage.
3. DIY Cloud Lamp
Make your ceiling look like a daydream. Wrap cotton batting around paper lanterns and tuck in LED puck lights or string lights.
Pro tip: Vary sizes and hang at different heights for a dreamy cluster. Use battery-powered LEDs to keep it safe and tidy.
It transforms boring overhead space into soft, magical lighting.
4. Painted Arch Accent Wall
Fake an interior designer with one paint roller. Paint a soft arched shape behind your bed or desk using a pencil + string trick for the curve.
Pro tip: Choose a muted tone like dusty rose or sage for calm vibes. Tape edges with painter’s tape for crisp borders.
This works because it zones your space and creates a focal point without repainting the whole room.
5. Jewelry Peg Rail
Goodbye tangled necklaces, hello aesthetic. Mount a slim peg rail or a painted wood strip with adhesive hooks.
Pro tip: Arrange by color and length for a boutique feel. Add a mini dish under it for rings and studs.
It doubles as decor and storage, which your future self will thank you for.
6. Collage Aesthetic Board
Curate your vibe on one wall. Layer magazine clippings, printable quotes, and color swatches in a tight grid or organic cluster.
Pro tip: Stick to a palette—think blush, cream, and mocha—so it looks cohesive, not chaotic.
This works because it’s a cheap, high-impact way to personalize a large area fast.
7. Fabric-Wrapped Headboard
Upgrade your bed with texture. Wrap a foam board in bouclé, velvet, or linen and secure with a staple gun or strong tape.
Pro tip: Add peel-and-stick trim for a luxe finish. Mount with command strips if you can’t drill.
It creates a cozy focal point and makes your bed feel hotel-level comfy.
8. Mini Vanity Tray Setup
Corral chaos with cute trays. Use a thrifted frame with a patterned paper insert or a marble contact paper base.
Pro tip: Group items in threes—perfume, lip gloss holder, tiny plant—for instant aesthetic balance.
It works because organized surfaces look chic and make getting ready faster.
9. Tie-Dye Pillow Covers
Easy craft, big statement. Grab plain pillow covers and tie-dye or use fabric paint for abstract swirls and hearts.
Pro tip: Keep everything in the same color family—like lilac, violet, and periwinkle—for that cohesive, not chaotic, look.
It adds color, softness, and a custom vibe for cheap.
10. Floating Shelf Vignette
Turn your wall into a mini gallery. Install floating shelves and style with plants, books, and figurines.
Pro tip: Use the triangle rule—tall, medium, small objects—for balance. Add a tiny lamp for glow.
It works because vertical storage = more floor space and more personality stacked up.
11. Chalkboard or Whiteboard Door
Make your door do more. Cover it with chalkboard paint or a peel-and-stick whiteboard for doodles, to-dos, and inspo quotes.
Pro tip: Frame the edges with washi tape for a cleaner look. Keep neon markers handy for fun highlights.
This works because it’s functional, expressive, and changes with your mood daily.
- Budget-friendly: Most materials are thriftable or dollar-store accessible.
- Landlord-safe: Adhesives and peel-and-stick save your walls.
- Customizable: Swap colors and textures to match your aesthetic.
Conclusion
Your room isn’t just where you sleep—it’s your studio, selfie set, and chill zone. Pick a few projects, stick to a color palette, and let your personality do the decorating. Small DIYs add up fast, and suddenly your space looks curated, not crowded. Now cue the before-and-after photos, obviously.