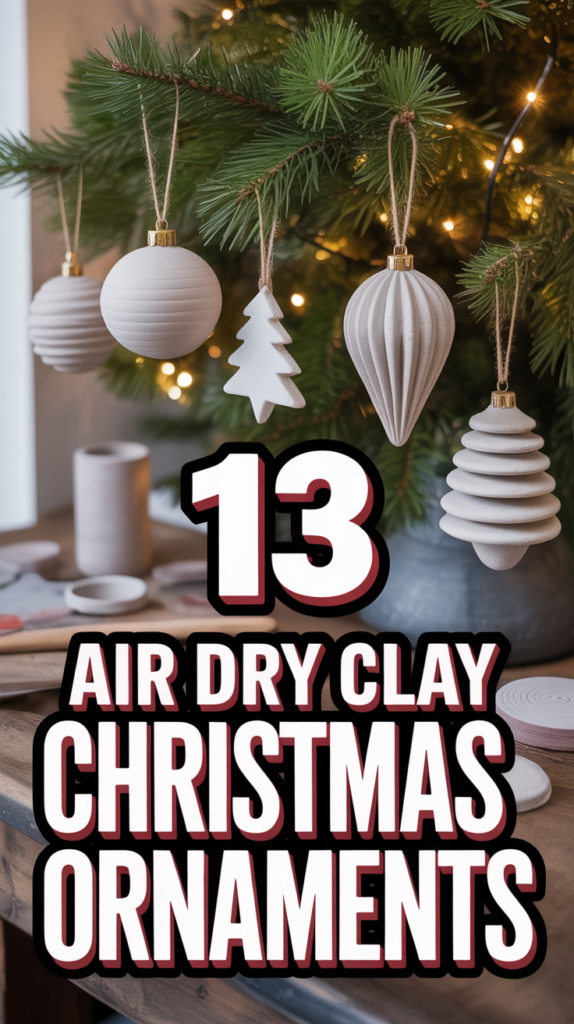
🎄 13 Air Dry Clay Christmas Ornaments
Okay, real talk. The holidays are basically a competitive sport for who can be the most “festive” without actually losing their mind. But what if I told you there’s a way to nail that cozy, handmade vibe without wrestling with a sewing machine or, like, learning to knit? Enter: air dry clay. It’s the low-commitment, high-reward craft project your holiday season desperately needs. Seriously, it’s so easy, even your perpetually-stressed aunt could do it. Let’s get our hands dirty (but not really, because it’s clay, not mud).
1. Classic Starbursts
You know the ones. Simple, elegant, and they scream “I tried, but not too hard.” Just roll out your clay, grab a star cookie cutter, and then use a toothpick to create little radiating lines from the center. Easy peasy.
These look super chic with a coat of metallic gold paint or just left in their natural matte glory. Pro tip: make sure your lines are deep enough to really show up after drying. These are a win because they’re timeless and literally impossible to mess up.
2. Monogram Medallions
Want to personalize your tree without engraving everything? These are your jam. Roll out circles or squares, then use alphabet stamps to press initials or even short holiday words into the clay. Think “JOY” or “NOEL.”
A little twine through a punched hole, and boom, instant family heirloom (or at least a really cute gift tag). Seriously, a little black acrylic paint rubbed into the letters and then wiped off makes them pop like crazy. Everyone loves seeing their initial, it’s just a fact of life.
3. Rustic Tree Slices
Channeling major cabin-in-the-woods vibes without, you know, actually going to a cabin. Roll out thicker pieces of clay and cut irregular circles or ovals. Then, use a real tree branch (or a textured stamp) to press a wood grain pattern onto the surface.
These look amazing with a touch of dark brown paint in the grooves to enhance the “bark” look. Don’t forget to sand the edges a bit once dry for that truly authentic, splinter-free feel. They’re earthy and just cool.
4. Gingerbread People (No Baking!)
All the cute, none of the burnt edges. Use a gingerbread person cookie cutter, then go wild with puff paint or fine-tipped markers for the classic icing details. Bonus points for tiny buttons and bow ties.
These are ridiculously fun to decorate, and you won’t be tempted to eat them (probably). Pro tip: a little sprinkle of cinnamon powder mixed into the clay before you roll it out gives them a subtle, festive scent. Pure holiday magic, without the kitchen chaos.
5. Miniature Houses
Because who doesn’t want a tiny village hanging from their tree? Cut out simple house shapes – a rectangle with a triangle roof. Etch in windows, doors, and maybe a little chimney. You can even make them 3D by glueing two flat pieces together.
Paint them with festive colors, add some “snow” with white puff paint, and you’ve got a whole little neighborhood. Seriously, a tiny dot of glitter glue on the “windows” makes them look like they’re lit up. Adorably architectural.
6. Paw Print Keepsakes
For the pet parents out there, this one’s a no-brainer. Roll out a chunk of clay, gently press your furry friend’s paw into it (good luck with that, cats!), and cut a circle around it. Add their name and the year with a stamp or by hand.
These are truly special and make the perfect gift for fellow animal lovers. Pro tip: make sure the clay is thick enough so the print doesn’t go all the way through. It’s sentimental, without being cheesy.
7. Geometric Shapes
For the minimalist, modern tree. Cut out triangles, hexagons, or even abstract shapes. These look particularly striking when left unpainted or just given a coat of matte white or black.
String a few together with fishing line or thin metallic thread for a cool mobile effect. Trust me, these are way cooler than they sound. Pro tip: use a ruler and a craft knife for super crisp edges. They’re effortlessly stylish.
8. Faux Macarons
Sweet, colorful, and zero calories. Roll two small, flat circles for the macaron shells and a tiny coil for the “filling.” Gently press them together. You can even use a toothpick to create the frilly edge.
Paint them in pastel shades and maybe add some glitter for that extra sparkle. Honestly, these look good enough to eat. Pro tip: use a tiny bit of textured paint or fine sand mixed into your clay for the shells to get that signature macaron texture. Delightfully whimsical.
9. Feather Dangles
For a delicate, bohemian touch. Roll out thin pieces of clay, cut into feather shapes, and use a craft knife or toothpick to etch in the feather details. Don’t forget the hole for hanging!
These look amazing left natural or painted in soft, muted tones like dusty rose or sage green. They sway beautifully on the tree. Pro tip: make them as thin as possible without tearing for a truly ethereal look. Super unique and airy.
10. Textured Snowflakes
No two are alike, just like real snowflakes (except you made these). Use a snowflake cookie cutter, then press various textures into the clay – lace, doilies, even a tiny comb can create cool patterns.
Paint them white, silver, or ice blue, and then add some glitter for that frosty sparkle. These catch the light beautifully. Pro tip: use a damp sponge to smooth the edges before texturing. They’re intricate without being difficult.
11. Tiny Gift Boxes
Miniature presents for your tree! Cut out small squares or rectangles, then etch on ribbon details and a tiny bow. You can even cut out a tiny tag to hang from the “ribbon.”
Paint them in classic holiday colors – red, green, gold – or go for a whimsical pastel palette. These are ridiculously cute and add a playful touch. Pro tip: use a fine-tipped black marker to outline the “ribbons” for a cartoonish, graphic look. So festive, so small.
12. Painted Baubles
Sometimes, simplicity is key. Roll out perfect spheres (or as close as you can get!) and let them dry. Then, unleash your inner artist with intricate hand-painted designs – mandalas, abstract swirls, or tiny festive scenes.
These are a canvas for your creativity and look incredibly professional when done. Pro tip: use acrylic paint pens for super detailed work. They allow for precision that a brush sometimes can’t. Your tree just got an art gallery.
13. Leaf Imprints
Bringing the outdoors in, without the actual dirt. Collect some interesting leaves (think oak, maple, or fern). Roll out your clay, press the leaf firmly into it to capture the veins and texture, then carefully peel the leaf away. Cut around the imprint.
These look stunning with a wash of earth-toned paint or simply sealed with a matte varnish. Pro tip: choose leaves that are fresh but not too delicate for the best imprints. They’re naturally beautiful and totally unique.
Conclusion
So there you have it, folks. Thirteen ways to make your holiday decor look like you actually put in effort, when really, you just played with some clay. It’s the ultimate hack for getting that Pinterest-perfect tree without the actual stress-induced meltdown. Go forth, create, and maybe even impress a few people. You got this, and your tree is about to be the envy of all other trees.