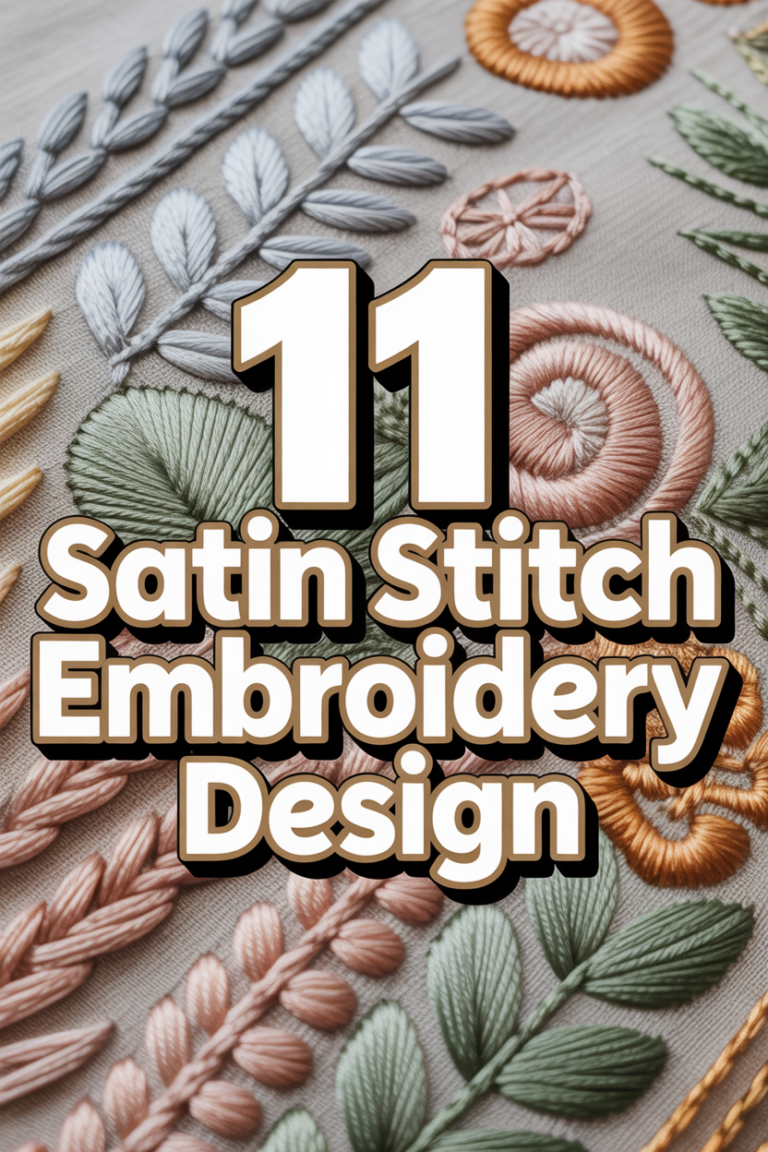
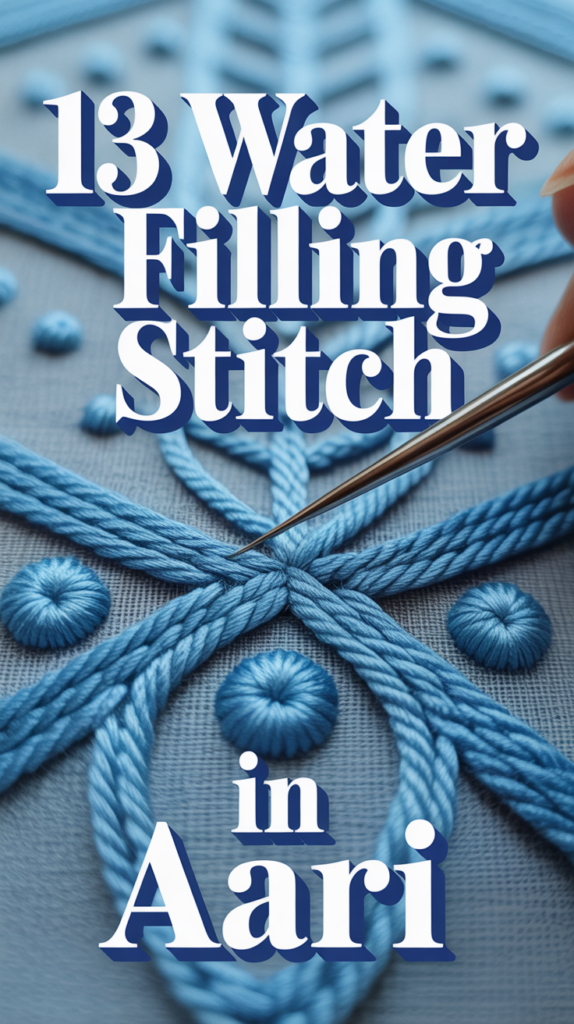
💧 13 Water Filling Stitch In Aari
🛠️ The Ultimate Maker's Toolkit
I've tested thousands of craft tools over the years. Whether you are quilting, crafting, or building mixed-media art, these are the top 5 absolute non-negotiable tools I personally recommend to guarantee professional results.
🪡 SINGER Heavy Duty 4452 Sewing Machine
The sewing community highly recommends this as the ultimate "bulletproof" entry-level machine. Its heavy metal frame powerfully pushes through thick denim and heavy quilt layers that would instantly jam a standard plastic machine.
✂️ Fiskars 8" Orange-Handled Scissors
Never settle for dull dollar-store blades. Wirecutter repeatedly names Fiskars the absolute best all-purpose craft scissor due to its legendary precision-ground blades and an ergonomic grip that prevents hand-cramping.
🔥 Gorilla Dual Temp Hot Glue Gun
Named Wirecutter's top choice because it literally does the work of two tools. It features dual-temperature settings offering low heat for delicate florals and blistering high heat for heavy wood adhesion repairs.
🖌️ Mod Podge Waterbase Gloss Sealer
The absolute undisputed champion of decoupage and paper crafts. Experts rely exclusively on this exact water-based formula because it glues, seals, and finishes beautifully without yellowing or flaking over time.
🎨 Apple Barrel Acrylic Paint (2 oz)
The quintessential, incredibly inexpensive craft paint. Woodworkers and hobby painters swear by its smooth flow and matte finish, providing massive value and remarkably thick color coverage on rough surfaces.
Alright, Aari fam, listen up! Ever stared at a design and thought, “How do I make this pop like a fresh splash of water?” You’re in luck, because we’re diving headfirst into the glorious, often underestimated, world of the Water Filling Stitch in Aari embroidery. It’s not just about filling space; it’s about bringing that liquid magic to your fabric. Forget flat and boring; we’re going for dimension, shimmer, and all the “oohs” and “aahs.” Get ready to make your designs flow like a dream.
1. The Classic Ripple Effect
Want to add a subtle movement to your designs? The classic ripple effect is your go-to. You achieve this by varying the length and tension of your stitches ever so slightly in concentric or parallel lines. It creates a gentle undulation, like water disturbed by a soft breeze.
Pro tip: Use a slightly thicker thread for the “peak” of your ripples to enhance the visual texture. This technique makes backgrounds feel alive, not just filled.
2. Gradient Flow Fill
Who says water is just one shade of blue? Gradient flow is all about blending colors seamlessly, just like a sunset reflecting on a calm lake. Start with a dark shade and gradually transition to lighter tones within your filled area.
Pro tip: Work in small sections, changing your thread color every few rows to get that buttery smooth blend. It gives your “water” incredible depth and realism.
3. Textured Swirl Stitch
If you’re bored of flat surfaces, the textured swirl is your new best friend. Instead of uniform stitches, you’ll playfully vary their direction and length within a defined area. This creates a dynamic, almost chaotic, water-like texture.
Pro tip: Experiment with silk threads for an extra luxurious sheen that catches the light differently with each swirl. It’s perfect for making water look agitated or flowing rapidly.
4. Shimmering Puddle Technique
Ever seen sunlight dance on a puddle? That’s the vibe we’re chasing here. Incorporate metallic or sequin threads into your regular filling stitch. A few strategically placed shimmers can transform a flat surface into a dazzling water feature.
Pro tip: Use a very fine metallic thread alongside your regular cotton or silk for a subtle sparkle that isn’t overwhelming. This trick makes your water look truly magical.
5. Dewdrop Delight Stitch
Sometimes, less is more. The dewdrop delight focuses on creating small, isolated, convex shapes that mimic tiny water droplets. You’ll use a dense, circular filling stitch for these little gems, often raised slightly.
Pro tip: Outline your dewdrop with a single chain stitch before filling to give it a crisp edge and a more defined shape. These are fantastic for adding delicate accents to floral motifs.
6. Ocean Current Pattern
Ready to bring the ocean’s power to your fabric? The ocean current pattern uses directional stitching to simulate strong, flowing movement. Imagine long, sweeping lines that curve and converge, mimicking underwater currents.
Pro tip: Use varying shades of blue and green threads, layering them to build up a sense of depth and motion. This stitch works wonders for large background areas that need a dramatic feel.
7. Raindrop Cascade Fill
When you want to convey a sense of gentle rain or a waterfall, the raindrop cascade is ideal. This involves layering multiple filling stitches, often slightly offset, to create an overlapping, dripping effect. Think translucent layers.
Pro tip: Work with slightly translucent threads like organza silk or very fine rayon to enhance the layered, ethereal look. It’s perfect for adding a soft, dreamy quality to your designs.
8. Frosted Surface Stitch
Imagine a frozen pond or a misty morning. The frosted surface stitch uses light, almost translucent threads, densely packed, to create a soft, ethereal fill. It’s less about movement and more about a still, reflective quality.
Pro tip: Use white or very pale blue silk floss for an unparalleled soft sheen that truly looks like a thin layer of frost or mist. This is excellent for winter-themed designs or subtle backgrounds.
9. Underwater Bloom Effect
This technique makes your motifs look like they’re submerged! You’ll fill the background around your main design elements with a water stitch, creating the illusion that they are floating beneath the surface. The edges of your motifs will appear softened.
Pro tip: Before filling, lightly outline your motifs with a single, fine chain stitch in a slightly darker shade of your water color. This subtle outline helps define the “submerged” object.
10. Mosaic Mist Fill
Who said water has to be one continuous sheet? The mosaic mist involves breaking your water-filled area into smaller, distinct sections, each with a slightly different stitch direction or subtle shade variation. It creates a fragmented, almost pixelated, water effect.
Pro tip: Use a fine silver or iridescent thread for the outlines between your mosaic sections to give it an extra glimmer. This offers a modern, abstract take on water.
11. Reflective Sheen Stitch
For that glossy, mirror-like finish, the reflective sheen stitch is your secret weapon. This technique relies on using high-sheen threads like pure silk or rayon, and executing very even, tight stitches in a single direction to maximize light reflection.
Pro tip: Iron your finished piece from the back on a low setting to help flatten the stitches and enhance their reflective quality. This is how you get that “wet” look without actual water.
12. Bubbling Brook Texture
Inject some playful energy into your water designs! The bubbling brook technique involves incorporating tiny beads, French knots, or even small, raised chain stitches within your regular water filling. These elements mimic effervescent bubbles.
Pro tip: Use clear or iridescent seed beads for the most realistic bubble effect. Sprinkle them sparsely for a subtle fizz or more densely for a lively brook.
13. Tranquil Pond Fill
When you need calm, serene, and utterly still water, the tranquil pond fill delivers. This is a dense, exceptionally even filling stitch, often worked in a circular or spiral pattern, to create a smooth, unbroken surface. No ripples, no drama, just pure tranquility.
Pro tip: Use a single, consistent thread color throughout the entire area to emphasize the stillness and depth. This stitch is ideal for creating a sense of peace and reflection.
✨ New Member Etsy Shops (100% Unsponsored!)
We are incredibly proud of the talent in this community! 💖 We've rounded up some gorgeous new Etsy shops launched by our very own members.
There are ZERO affiliate links in this post—just 100% pure support for our makers. Click below to shop small, show them some love, and find your new favorite items! 👇🛍️


Conclusion
See? Water filling in Aari isn’t just a basic technique; it’s a whole world of possibilities! From shimmering puddles to tranquil ponds, you’ve got 13 new ways to make your designs flow with life and personality. So grab your needle, pick your favorite “water” and dive right in. Your next masterpiece is just a stitch away, and trust me, it’s going to be absolutely dripping with style.